


When working with maps in Tableau, you may find yourself wanting to calculate the distances between locations. Tableau makes it straightforward to do this, provided that you have the latitude and longitude of all the points.
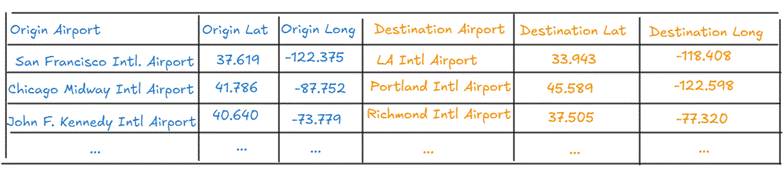
In this example, we’ll look at flight routes across the U.S. and calculate the distance from an origin airport to its various destinations. Each row in the dataset represents a single route, with coordinates for both the origin and destination (note that if your data doesn’t have both origin and destination as separate columns, you’ll want to transform it until it does):
How would you go about calculating the distance between, say, San Francisco International Airport and LA International Airport?
Step 1: Turn Your Coordinates into Points with MAKEPOINT()
Before you can measure distances, Tableau needs to know that your latitude and longitude are actual spatial points, not just numbers. You can do this with MAKEPOINT():
Origin Point
MAKEPOINT([Origin Latitude], [Origin Longitude])
Destination Point
MAKEPOINT([Destination Latitude], [Destination Longitude])
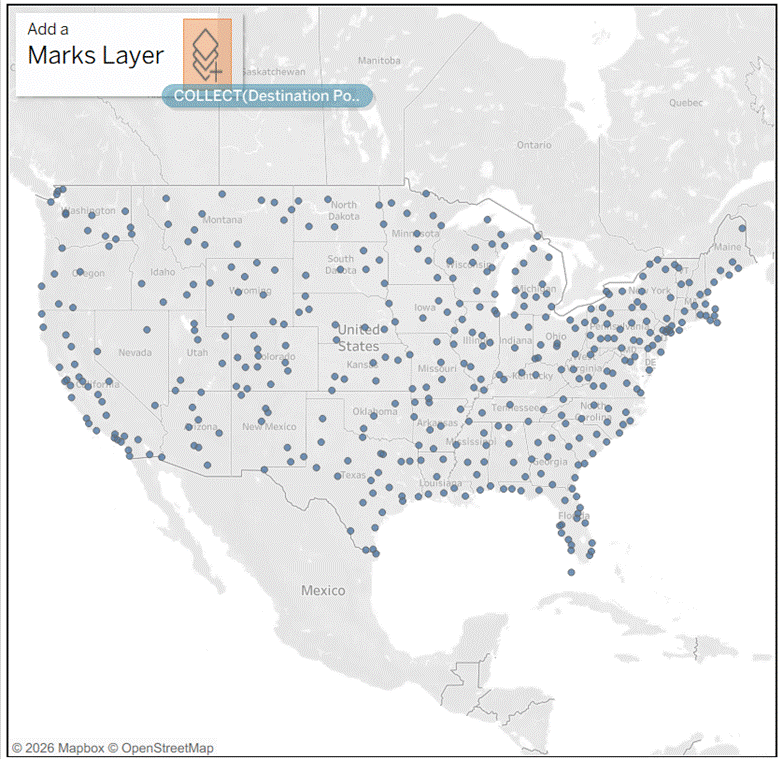
Once you’ve created these, double click Origin Point in the lefthand side bar to add it to your map. Then drag Destination Point to the map and drop it onto the “Add a Marks Layer” label that pops up.
Why do this, instead of just dragging latitude and longitude to the map directly? Dragging latitude and longitude to the map directly will allow you to plot points – but it’s not as easy for plotting multiple layers or for analysis. When your locations are points, you can easily layer points, calculate distances, or draw lines, or create buffers around them.
Step 2: Calculate Distance with DISTANCE()
Create a new calculated field:
Flight Distance (mi)
DISTANCE([Origin Point], [Destination Point], 'mi')
This function calculates the straight-line distance between the two spatial points, using the unit you specify (in this case, miles).
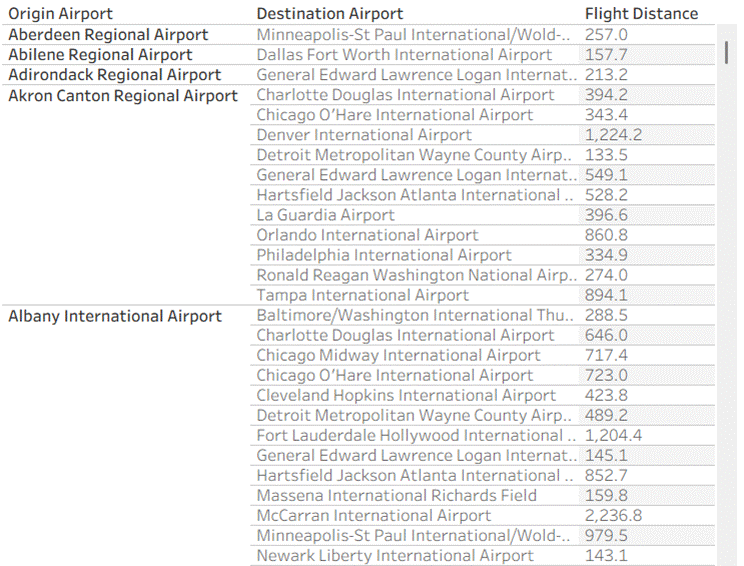
If we place the origin airport (associated with the origin point) and destination airport (associated with the destination point) into a table, it looks like this:
Step 3 (Optional): Connect the Points With Lines, Using MAKELINE()
At this point, you can visualize the distances by creating lines that connect the origin and destination airports.
Create a new calculated field:
Flight Path
MAKELINE([Origin Point], [Destination Point])
Drag it onto the map, by dragging it over then dropping it onto the “Add a Marks Layer” label that pops up.
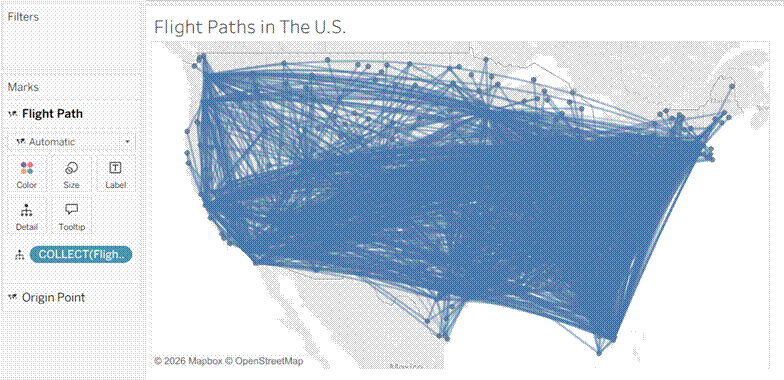
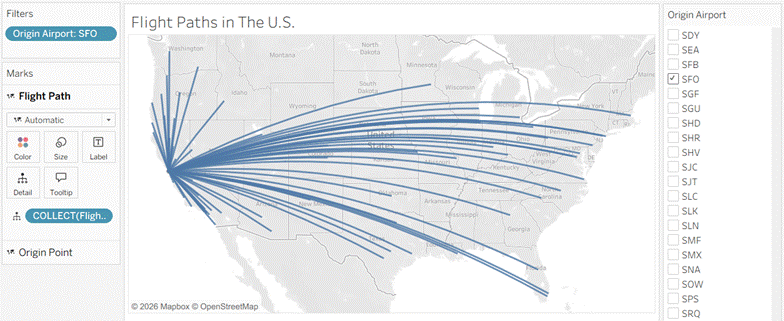
Woah! That visualization looks crowded. That’s because we are currently visualizing every single flight path across the U.S.
Let’s filter by a particular origin airport, say, San Francisco, to see ONLY flights coming out of San Francisco.
If you hover over a line, you will notice that every single flight path is highlighted at once. That is because all the fields have been “collected” together into one spatial object:
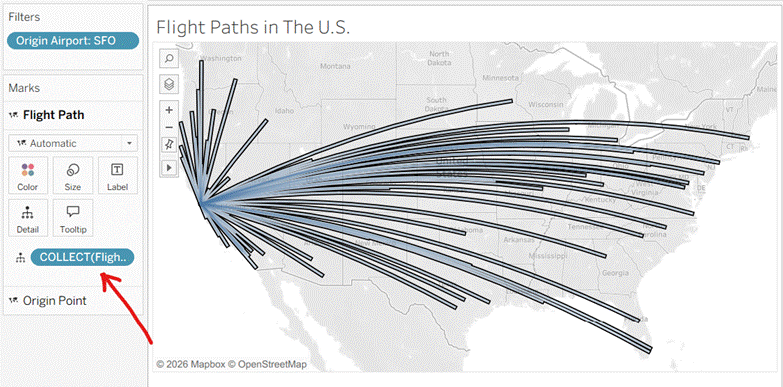
To break this up so that each flight path highlights separately, we can drag “Destination Airport” onto the Flight Path marks card:

Finally, drag flight distance, destination city, origin airport, and origin city onto onto the tooltip. Now, when hovering over a particular flight path, you will see:
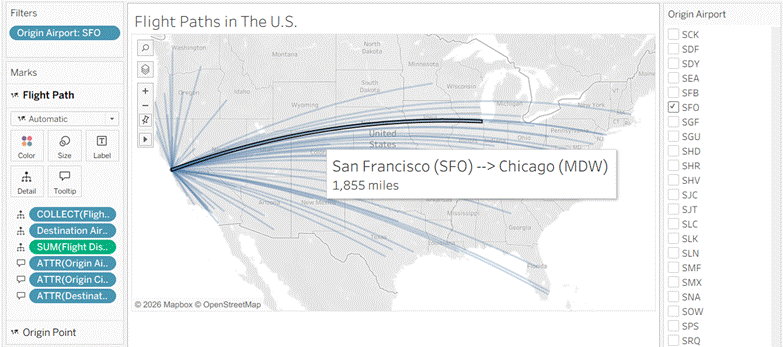
There you go!