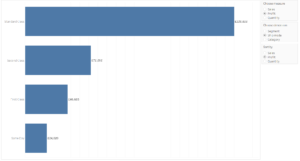
This post will show you how to create parameters to dynamically alter what is contained within your view, and even to sort by measures that don’t even have to be displayed.
I’ve even included a table calculation that will enable you to display units for the measure being sorted by, these can be dynamic too – different units or none for one measure (in my case quantity sold, which didn’t need a preceding pound sign.
Step 1: create your first parameter
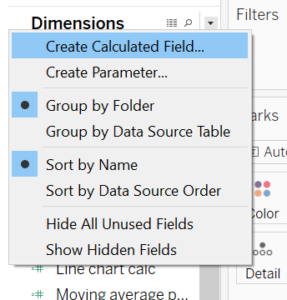
The first thing to do is to create the parameter you’ll use to select the measure you want to display (along the x axis). To create a parameter click on the drop-down menu at the top right of the dimensions field and click on create parameter.
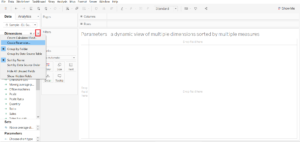
Give your parameter a name; it’s important that this name makes sense as it will be displayed on your parameter, you’ll also use it for later calculations. Change the data type to string.
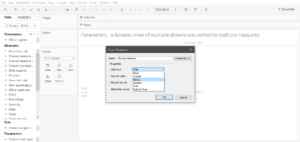
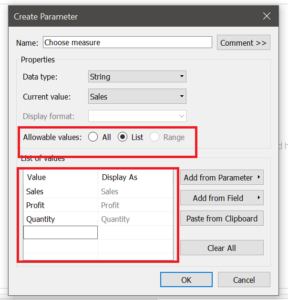
Change the allowable values to list and type in the names of the options you want to sort by.
Step 2: create a table calculation to link your parameter to measures
To create a calculated field click again on the drop-down menu and select create table calculation.
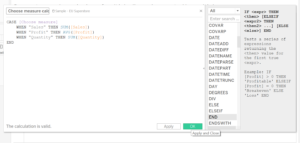
Give your table calculation a title and fill it out with the following:
CASE [Choose measure]
WHEN “Sales” THEN SUM([Sales])
WHEN “Profit” THEN SUM([Profit])
WHEN “Quantity” THEN SUM([Quantity])
END
[Choose measure] is your calculated field;
“Sales”, “Profit” and “Quantity” are the names you put in the list of your calculated field;
[Sales], [Profit] and [Quantity] are the measures you want to link your parameters to.
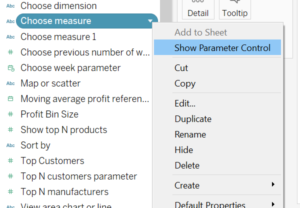
To add the parameter menu to the view right click on your Choose measure parameter and select show parameter control.
Drag your Choose measure calculated field onto the rows field; you can format it from a drop down menu to a single value list.
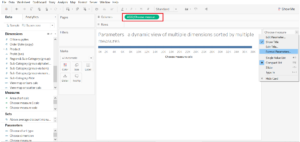
This is the first of your dynamic filters.
Step 3: repeat for dimension
Create a choose dimension parameter.
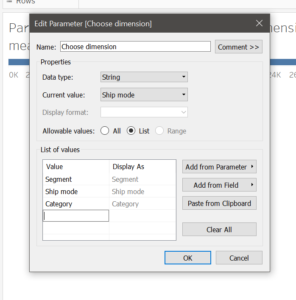
Create a calculated field to link it to your dimensions.
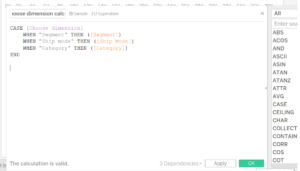
CASE [Choose dimension]
WHEN “Segment” THEN ([Segment])
WHEN “Ship mode” THEN ([Ship Mode])
WHEN “Category” THEN ([Category])
END
As before: [Choose dimensions] is the name of your parameter;
“Segment” is the name of the option in the parameter control;
[Segment] is the dimension you want to connect to.
Select show parameter control (format if you wish) and drag the Dimension table calculation onto the columns field.
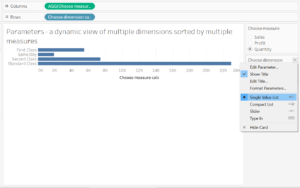
This is your second dynamic filter.
Step 4: create a parameter to sort with
Create a new parameter.
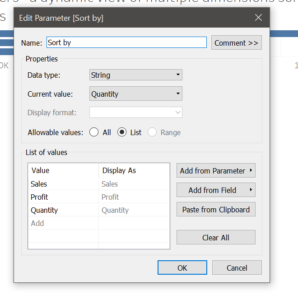
Create a table calculation to link the parameter to the measures you want to sort by.
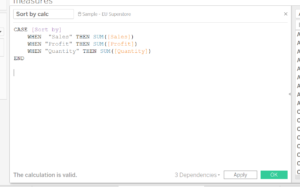
CASE [Sort by]
WHEN “Sales” THEN SUM([Sales])
WHEN “Profit” THEN SUM([Profit])
WHEN “Quantity” THEN SUM([Quantity])
END
Add the parameter control to the view. To sort by your newly created calculation and parameter you need to right click on the Choose dimensions pill in the rows shelf and select sort.
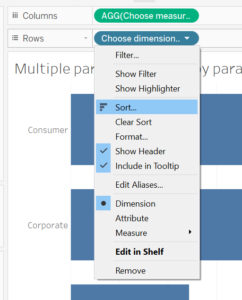
Choose your sort order and sort by field and select your Sort by calculation from the list.
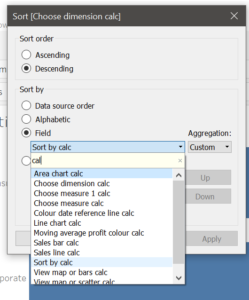
Now you have your three functioning dynamic filters!
Step 5: create some dynamic custom labelling for your sort by field, as it may not be included on the axis
Units
Create a calculated field with dynamic units
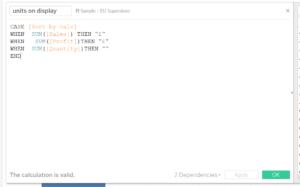
Drag this calculated field onto the label card.
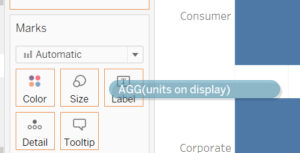
Do the same with your sort by parameter and your sort by calculated field. Click on the label card and the three small dots on the right to edit the layout of the text displayed.
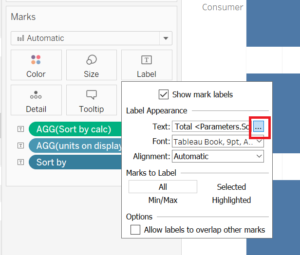
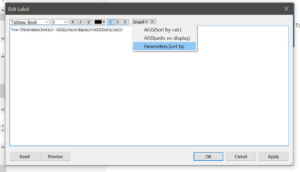
Click on the insert drop down and add the parameter and the two calculated fields; order them as below:
Now your labelling can look like this:
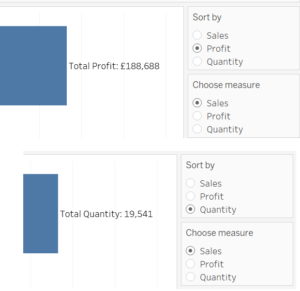
Happy dynamic sorting and labelling!
