What are sparklines?
Sparklines are a great way to show trends of multiple values over time. It’s basically a tiny little line chart, which enables you to quickly and easily compare trends over different values.
What do sparklines look like?
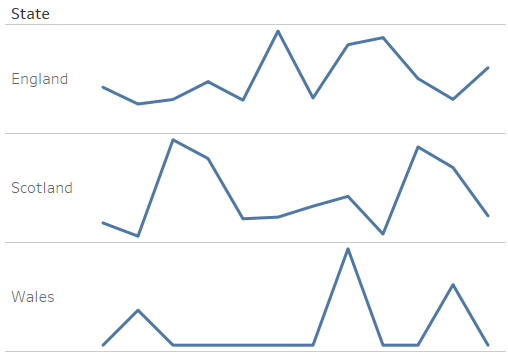
The most simple type of sparkline will only show a chosen measure over time for each value of your chosen dimension. For example, if we wanted have a look at how the total sales changed over time across the United Kingdom for a certain superstore, the most simple sparklines we could create would look like this:
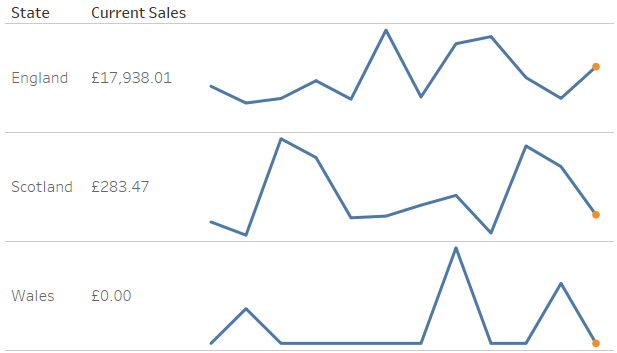
But you might want more information on your chart than just the trends. We could include the most recent sales numbers in our view to add a bit of context to the trend lines – like this:

Now we have highlighted the most recent sales figure on the line chart, and included the value it represents on the right.

One downside to sparklines is that you have no axes to show the date and sales figures for each point… This is where tooltips come in to use! You can keep the simplicity in the view, and include the detailed bits which are missing from the view in a tooltip, like the one on the left.
How do I create sparklines in Tableau?
To create the simple spark lines (like in the first picture), it’s just a case of creating the basic line charts as usual, making the axes of each row independent, and finally a little formatting to make the view a bit cleaner. I won’t go in to the details of this, but if you want to see how I made the first view, watch this video:
[youtube https://www.youtube.com/watch?v=kmfU9RawDNE&w=560&h=315]
To create the more detailed spark lines, we need to create two calculated fields – one which will highlight the most recent sales figures as a point on the line chart (the ‘Last Sales’ field), and another which will show the figure on the left of the line chart (the ‘Current Sales’ field). In both of these fields, we will use the LAST() function, which returns the number of steps it takes to get to the last point.
The calculation for the ‘Last Sales’ field is –
IF LAST()=0 THEN [Sum Sales] END
The calculation for the ‘Current Sales’ field is –
LOOKUP([Sum Sales],LAST())
The first calculation returns NULL for all points except the most recent one, which is what we need to be able to highlight the most recent point on the line chart. As this returns an array of values for each State (all NULL except one), we can’t use this same field to show the figure for the current sales on the view, as it will create a row for the NULL values as well as a row for the desired figure. This is why we create the second field using the LOOKUP() function, which returns just one value (the most recent sales figures) for each State.
Watch the additional steps I took after making the basic sparklines to achieve the extra details here:
[youtube https://www.youtube.com/watch?v=91YJRSJRfQ0&w=560&h=315]
For my next Tableau Tip…
I will be looking at how to use parameters to change the view in a dashboard – coming soon…
