In this blog, we will learn how to input data into Tableau from the Snowflake SQL server.
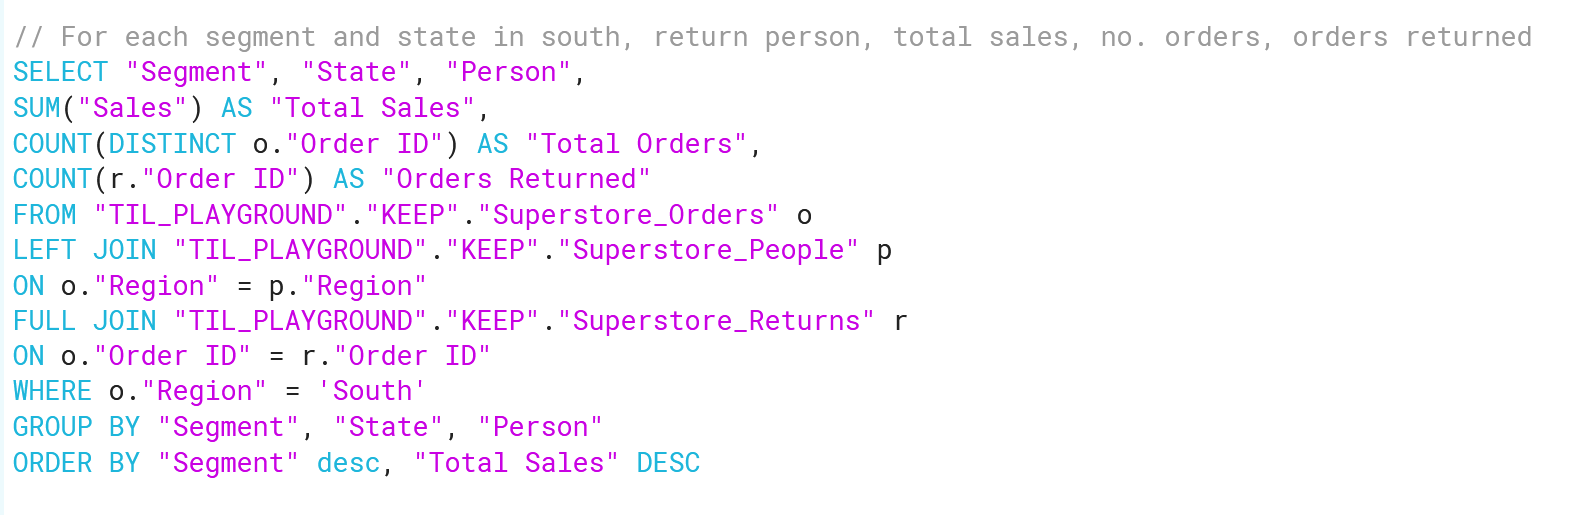
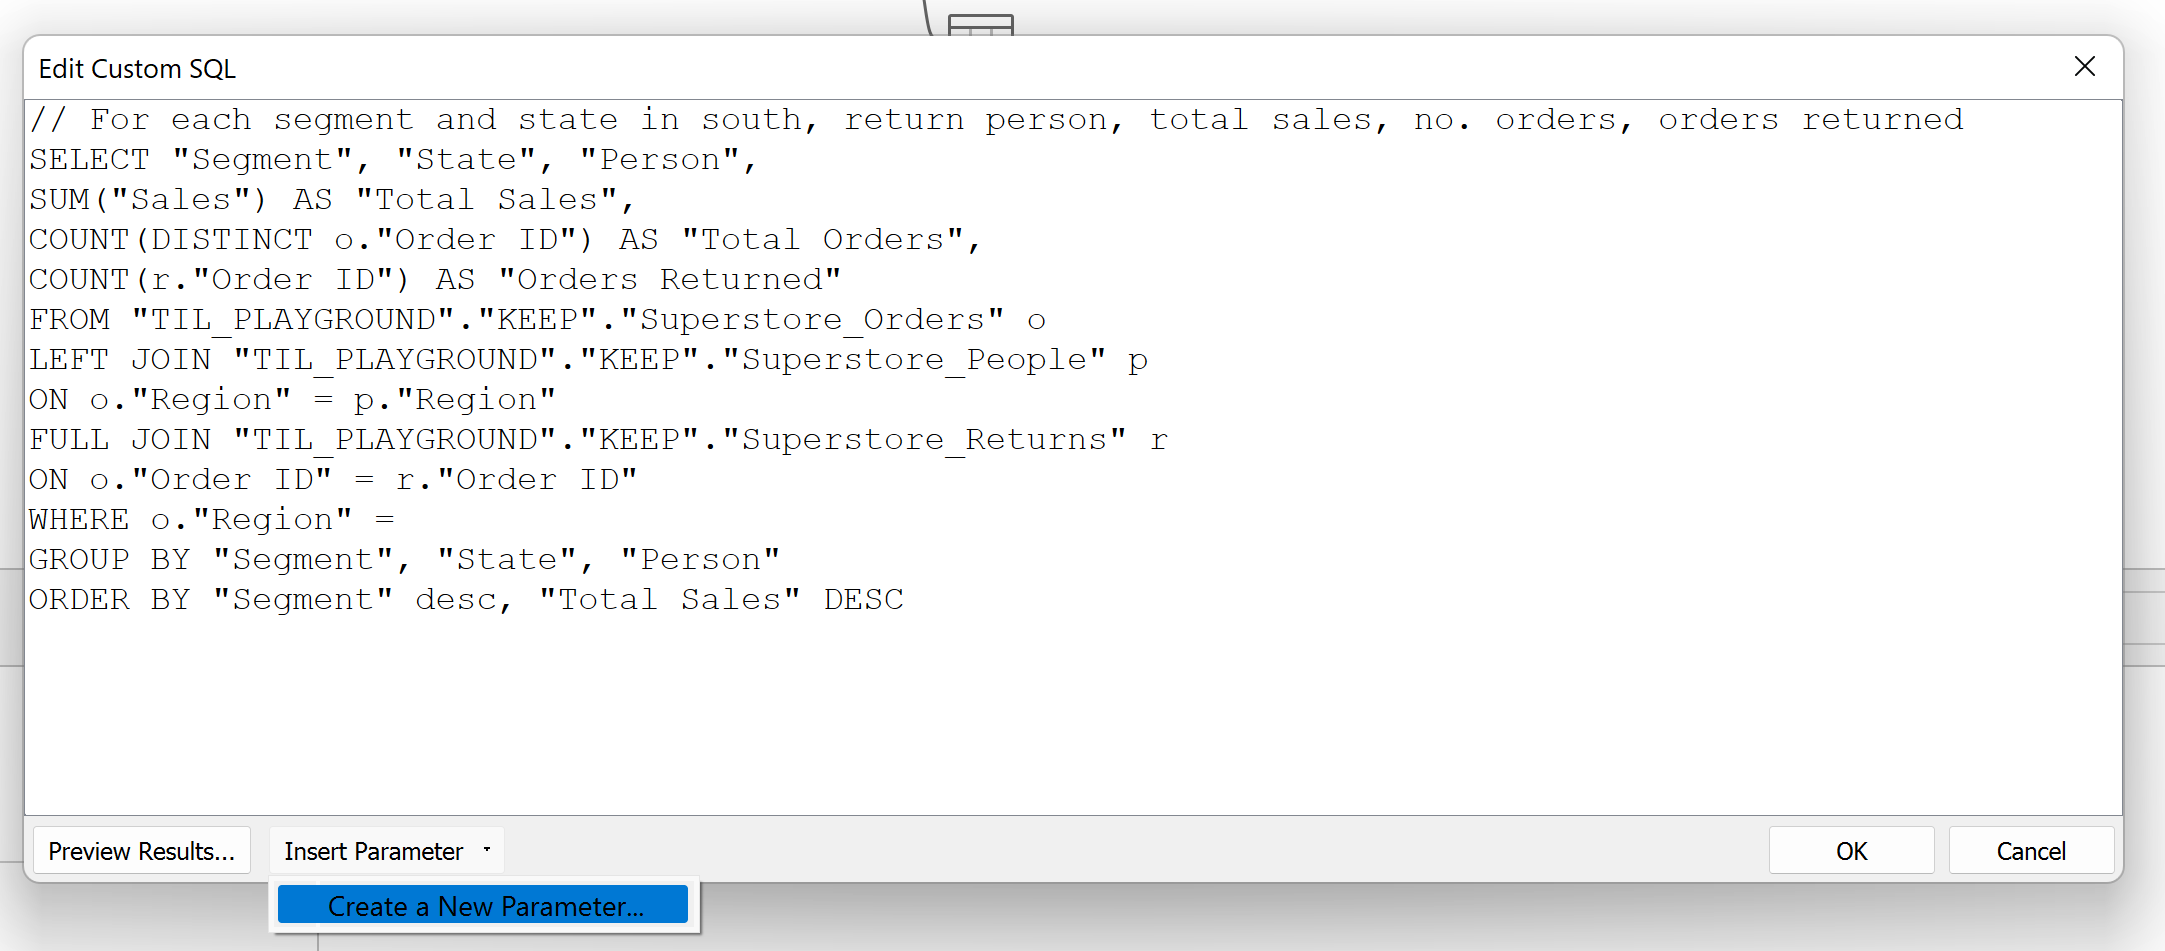
First, we write a SQL query in Snowflake to extract a certain view from the Superstore data. This query returns different metrics grouped by segment and state, filtered to only show states in the South.
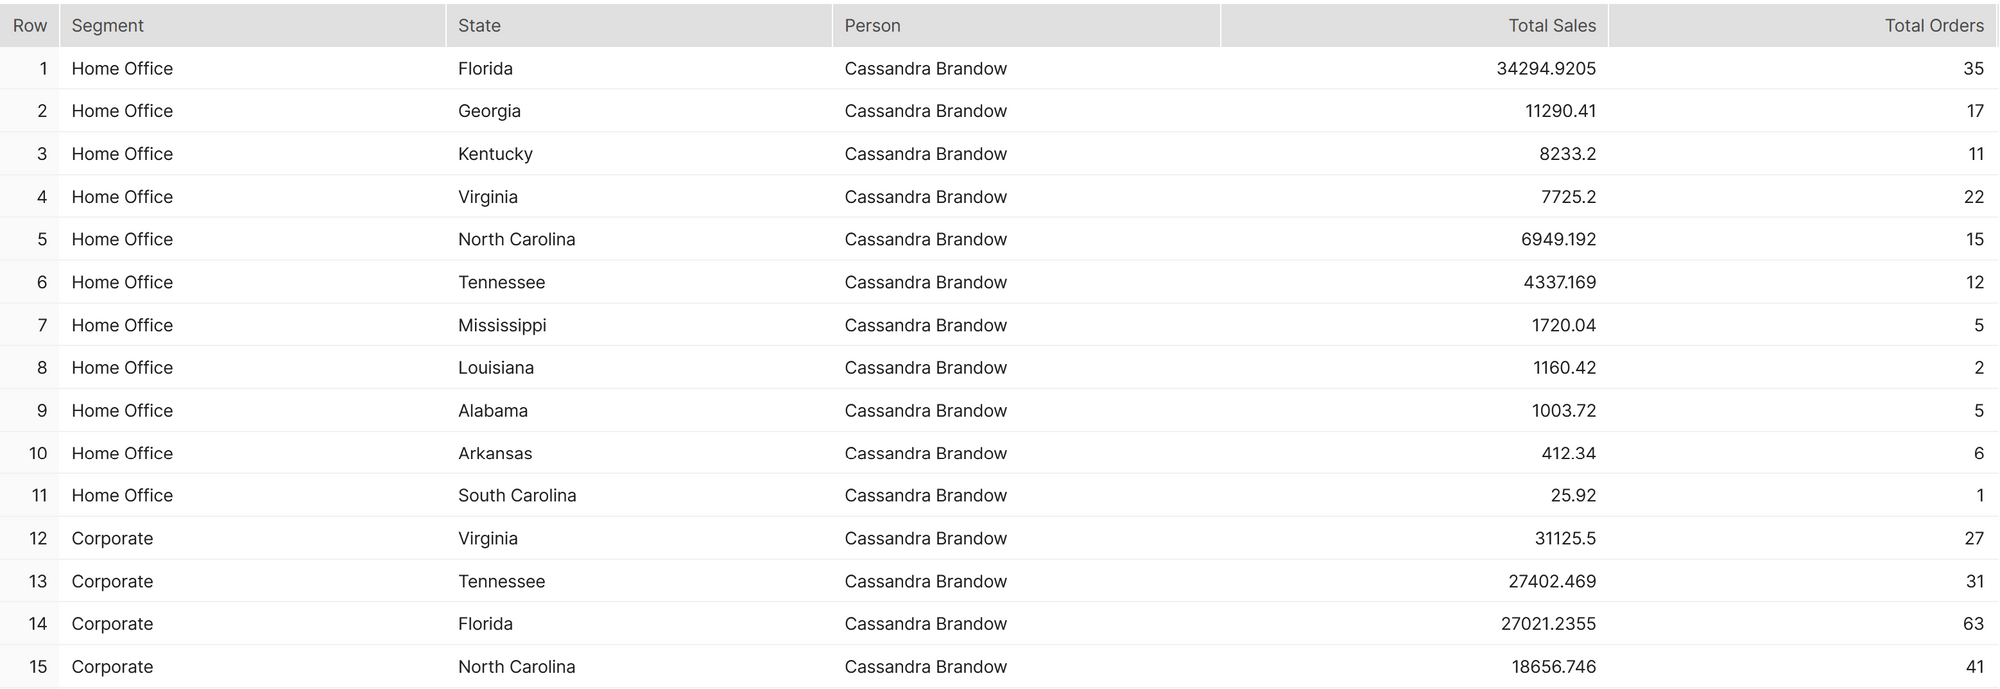
A preview of the results in Snowflake returns this:
To input this data into Tableau, first we connect to the Snowflake server, log in and select our database. Then we drag a New Custom SQL query from the bottom of the Connections pane to the Data Source pane.
When the SQL query window appears, copy and paste into it the query we wrote in Snowflake.
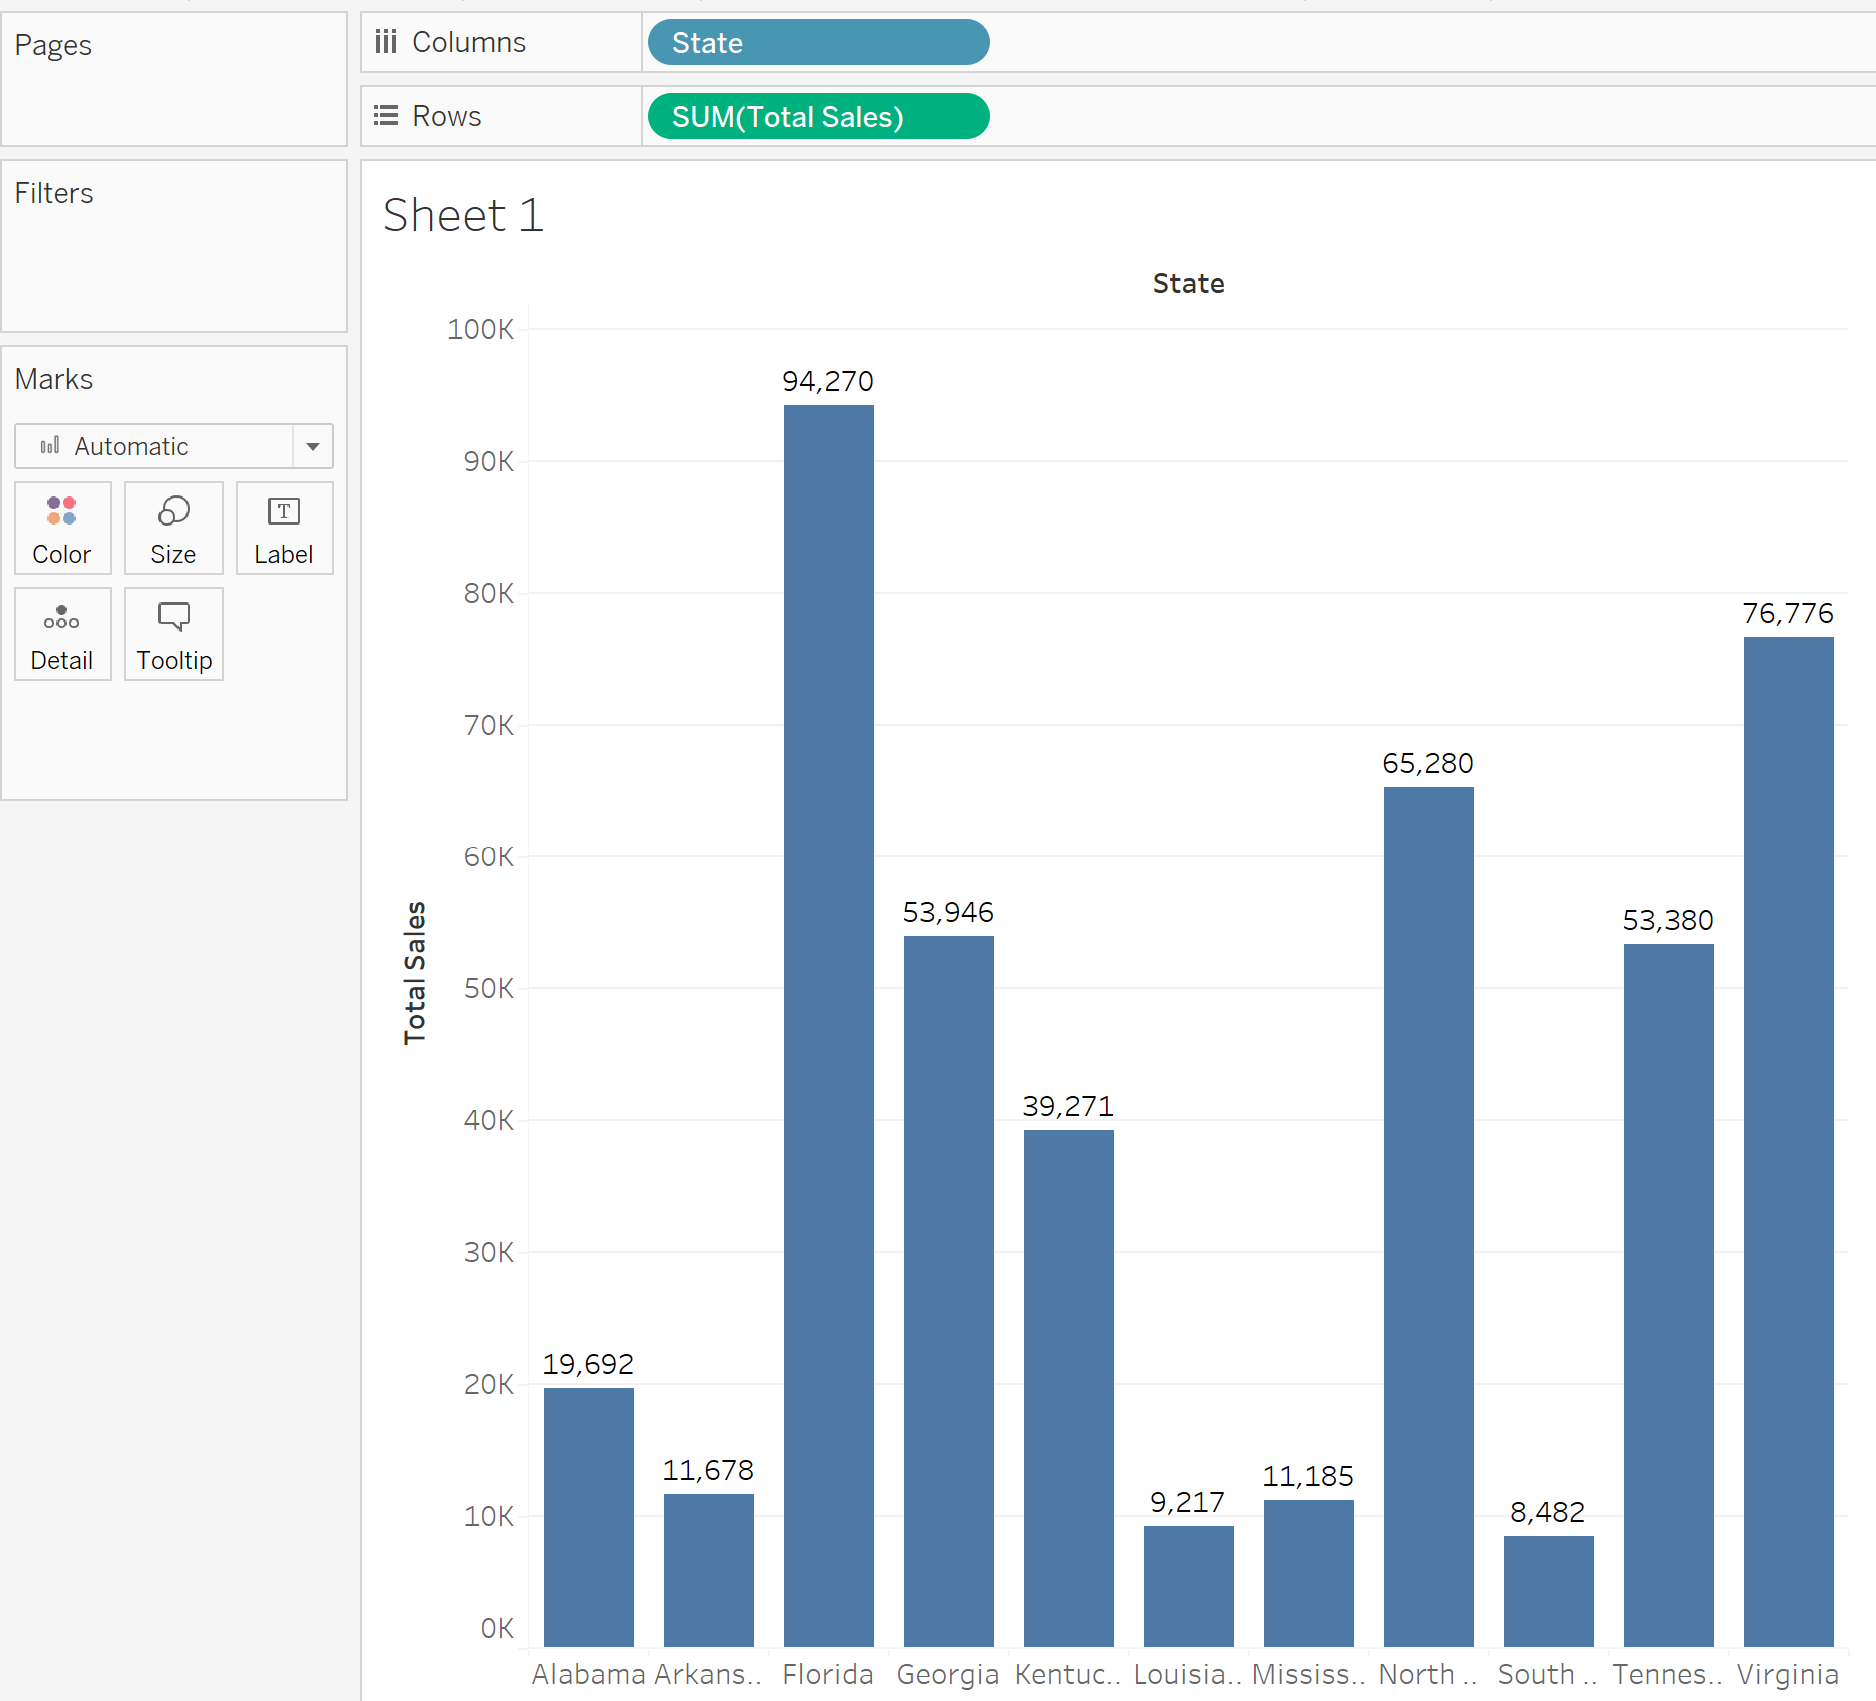
Now, the data coming into Tableau is only for the South region. If we build a chart of sales by state, only the southern states are shown. Entering data this way can help optimize the workbook, as there is no need to add filters that can slow the processes down.
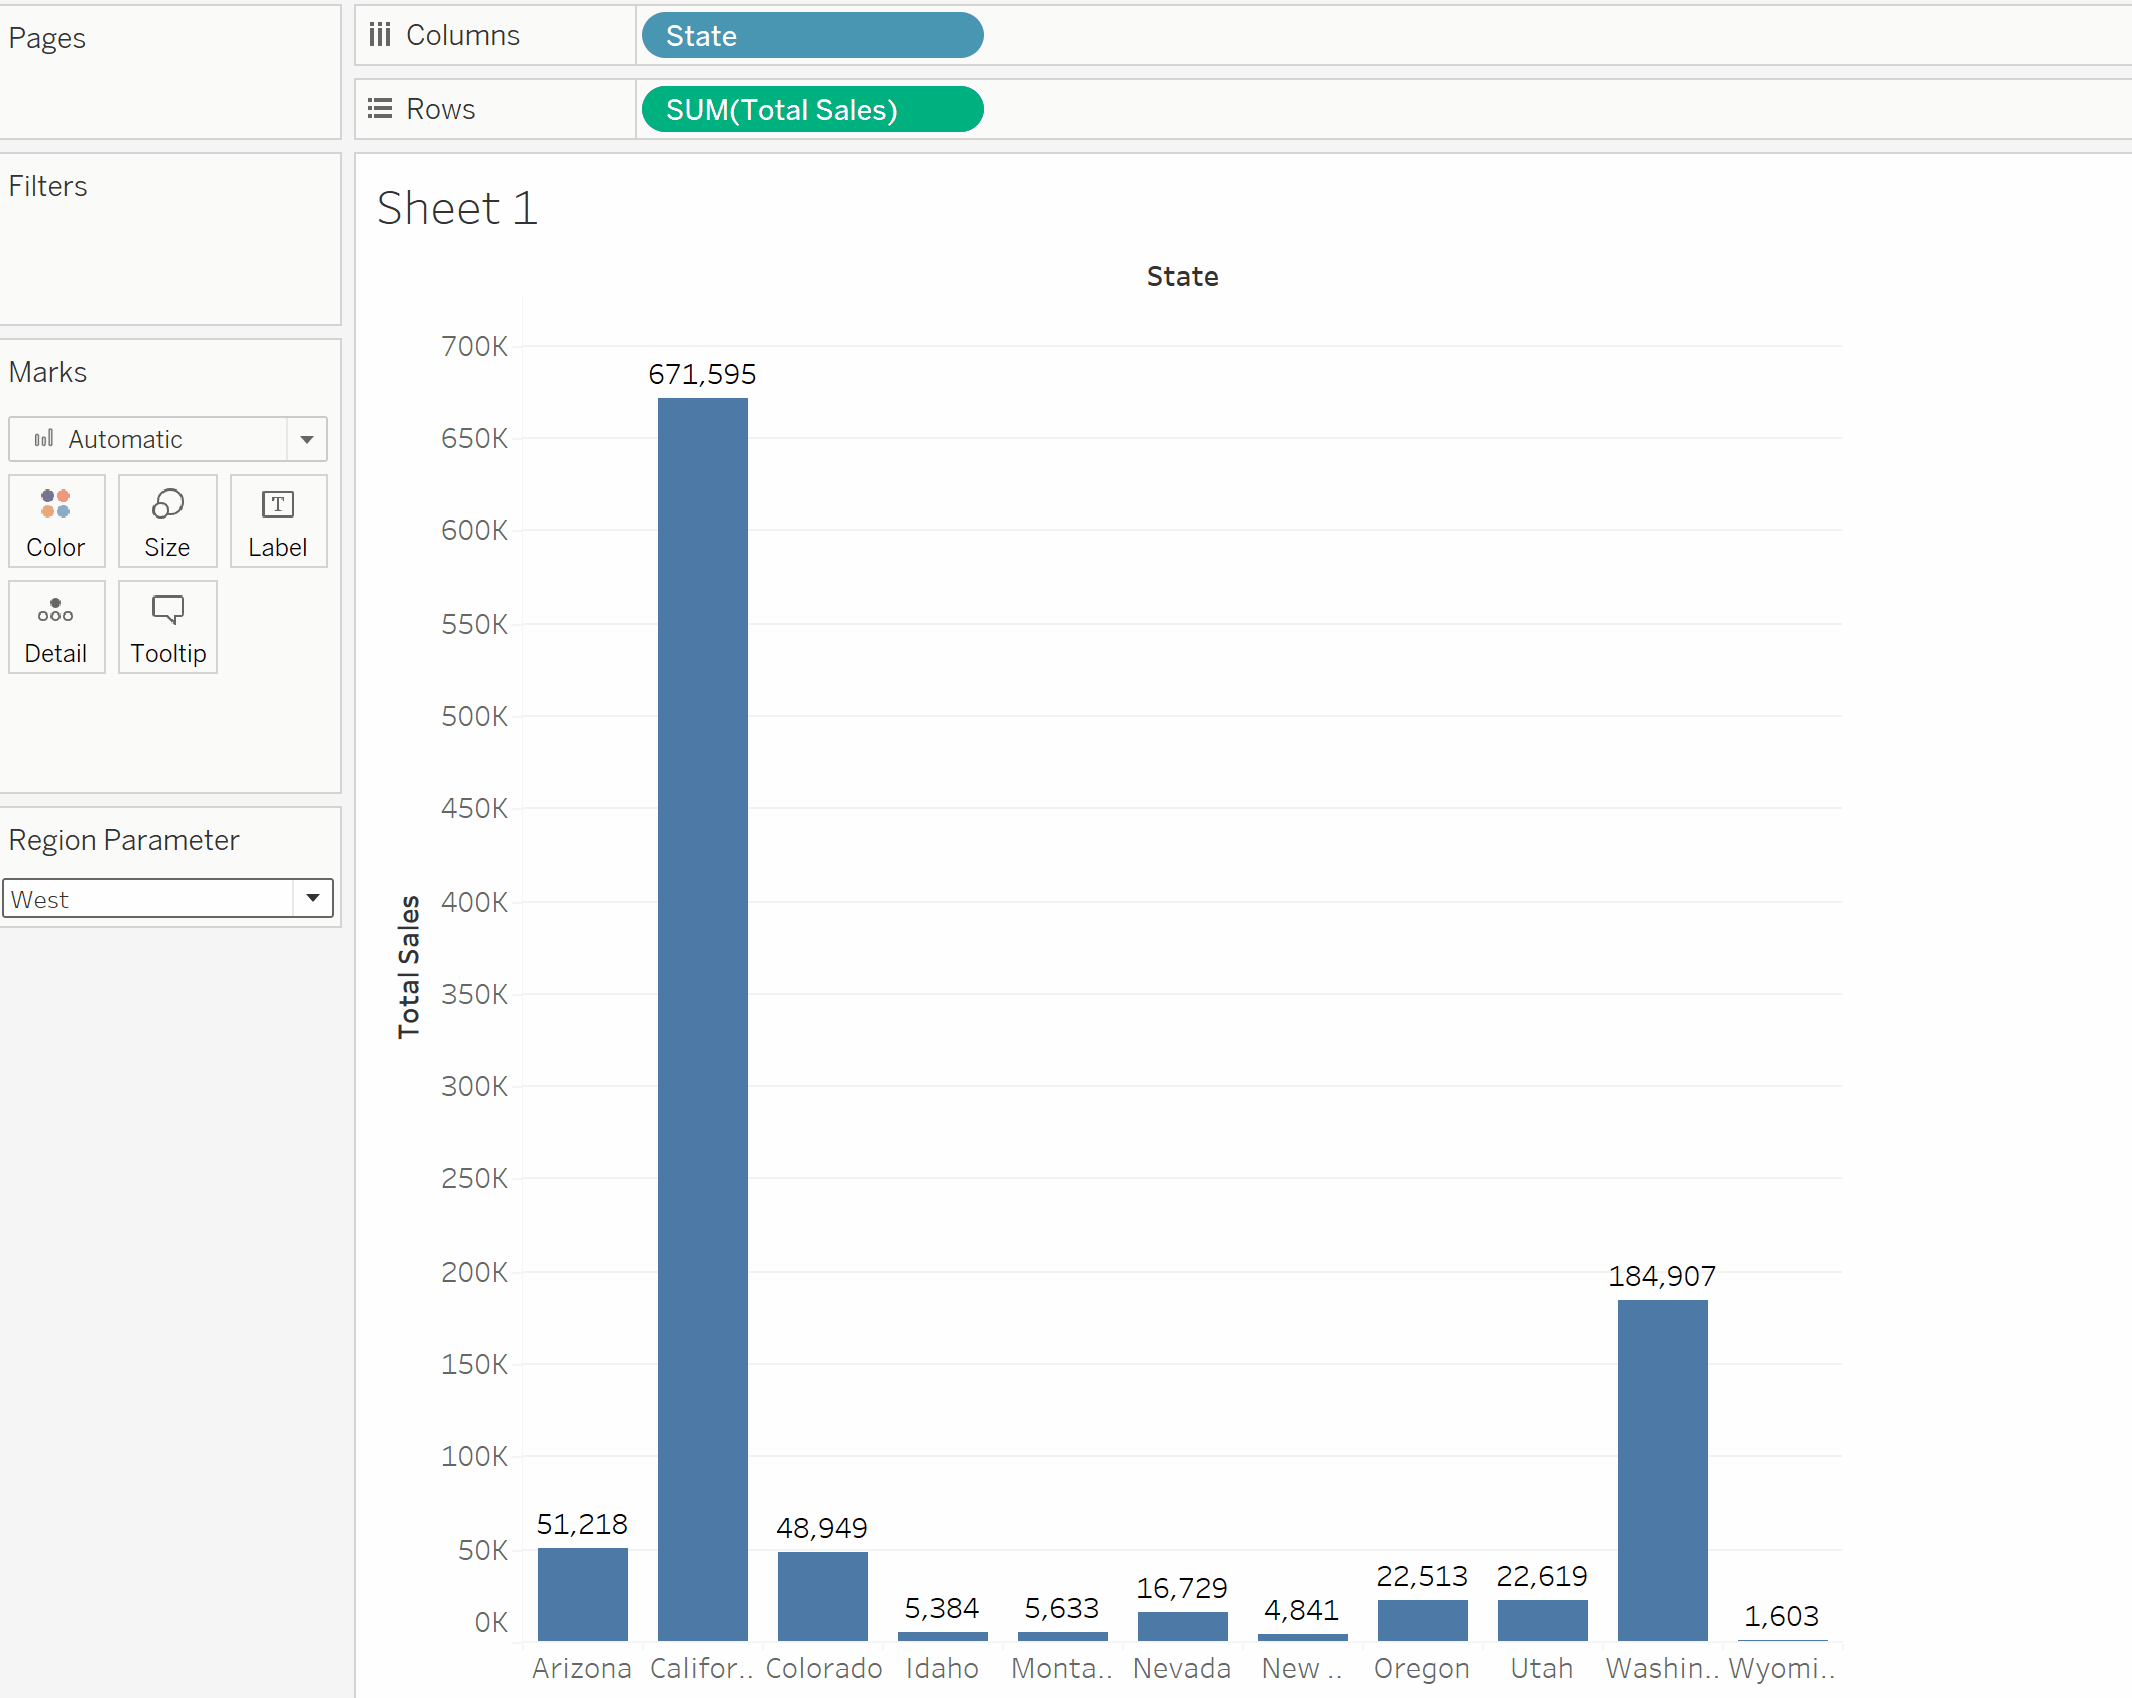
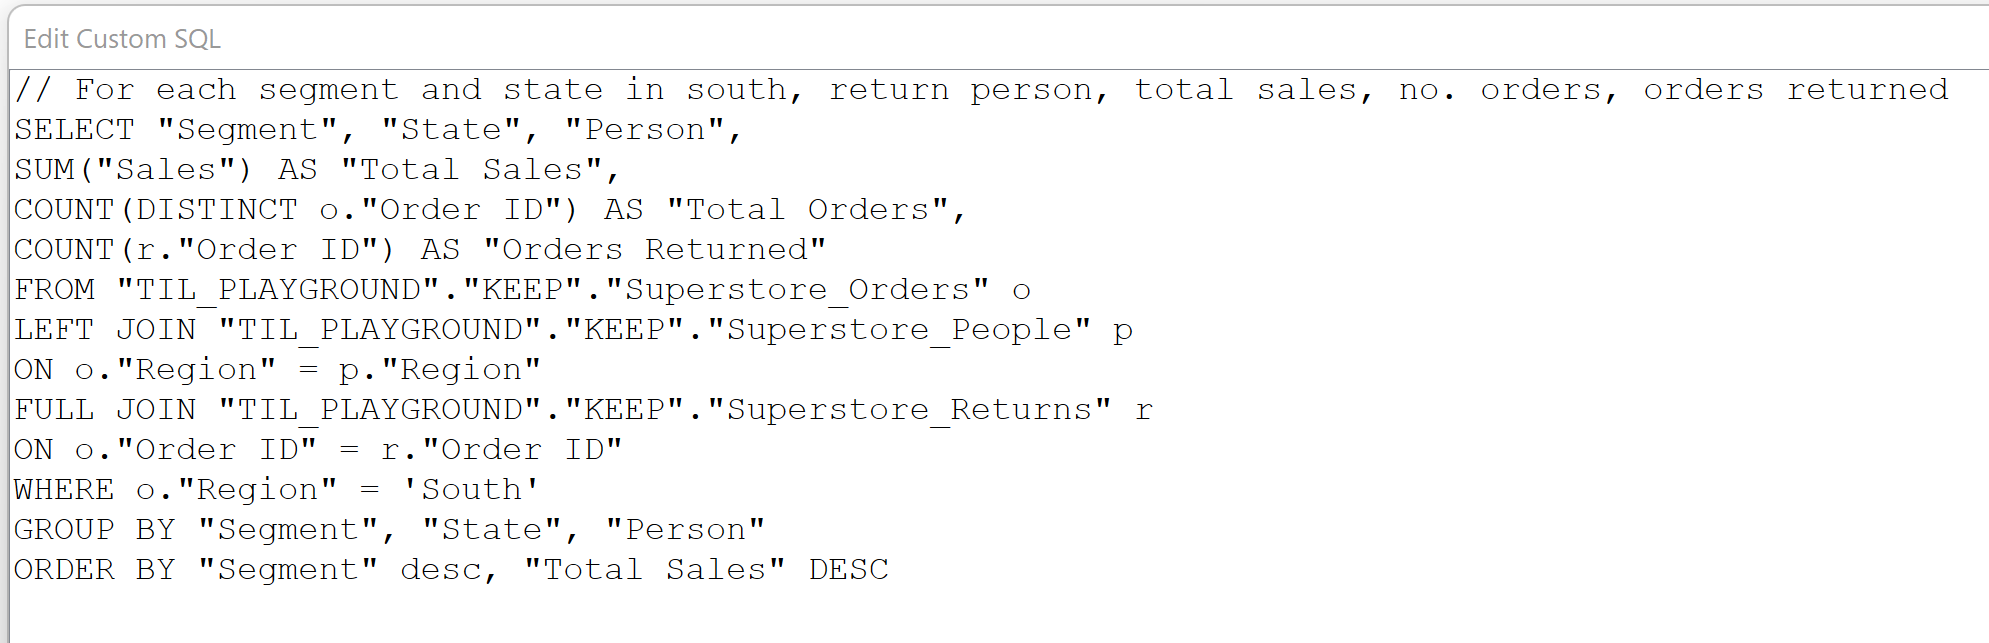
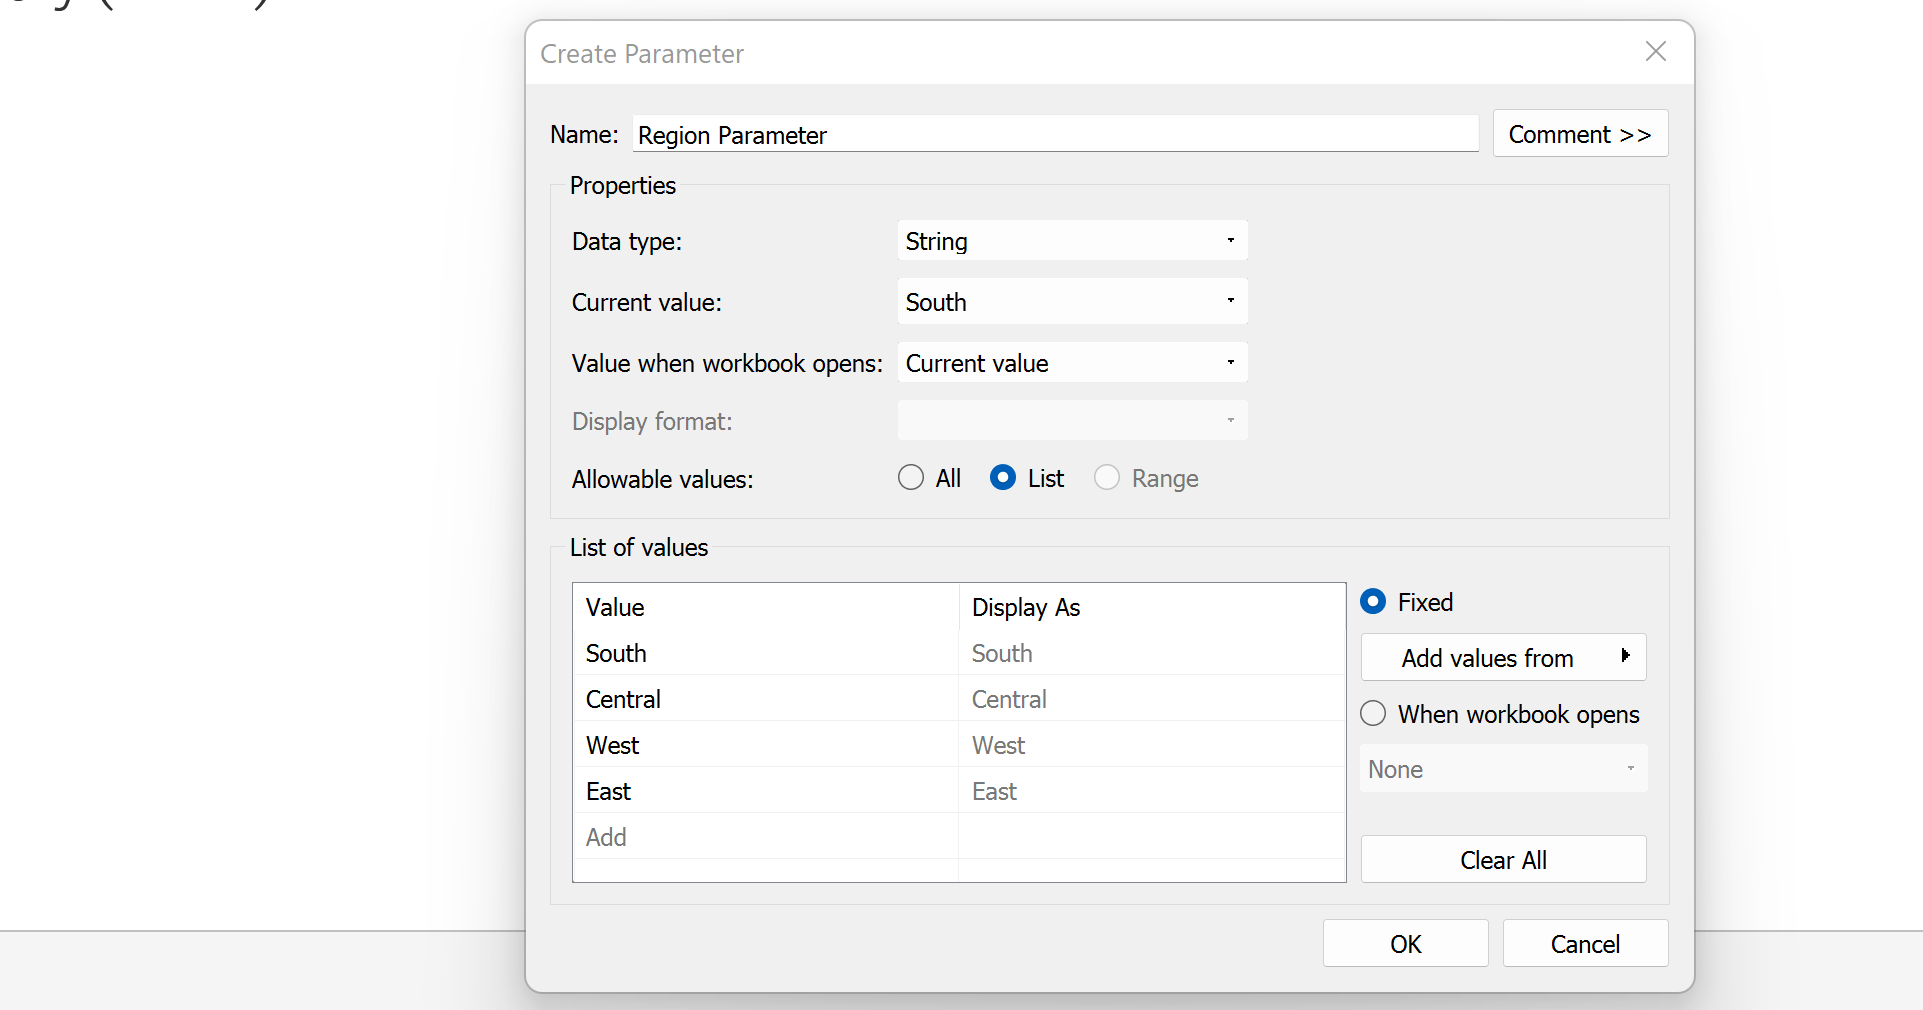
It is possible to parameterize this data entry so you can choose which region to bring in. First, we edit the SQL query and create a parameter for region.
Then we insert this parameter to replace the South region in the SQL query.
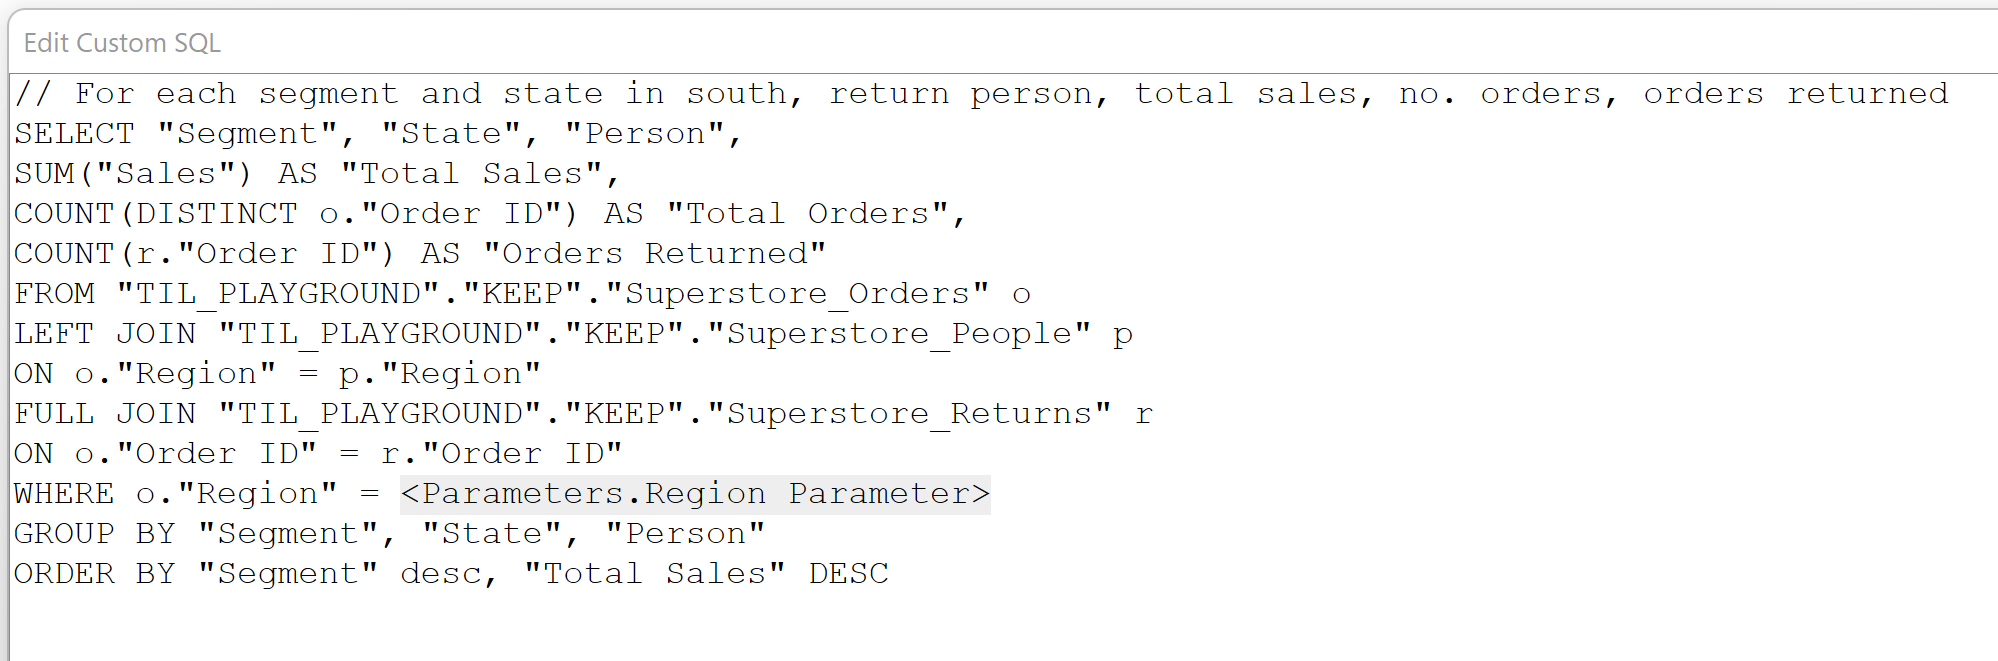
Now, when we select a different region in the parameter, Tableau brings in data for that region.