


I am a fan of data prep challenges. A big fan to be perfectly honest. I love the puzzling aspect and the logic behind it all just makes my brain happy. Just like how with crosswords (or any skill really but sticking with the puzzling tangent), you should practise to improve your skills, I have been doing lots of data prep challenges lately to work on my data preparation game. One of the things that had slipped my mind which I came across in one challenge was how to fill down in Tableau Prep, so I thought I'd walk through it simply here for others to learn from too. Then whilst writing this post, I noted that to truly take my data preparation to the next level, I should be competent across all tools that we're taught. So I opened up the floor and decided I'd go through how to do this in Alteryx and Power Query too for anyone interested in the similarities/differences across the platforms.
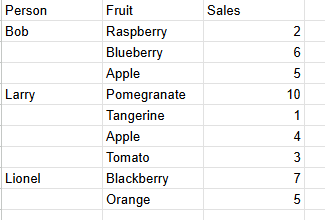
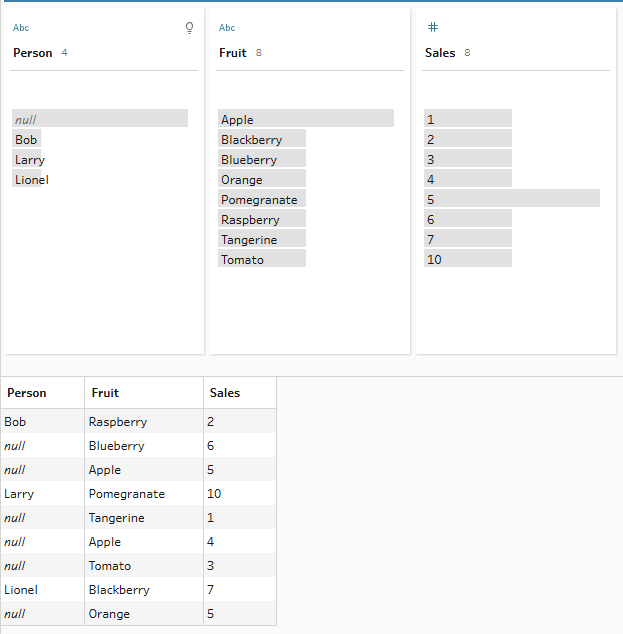
Below is the simple dataset that we'll be working with today. It explores fruit sales by person but whilst the human eye can easily decipher Bob also bought blueberries and apples, Larry bought tangerines etc, a computer can't make those inferences. In this case, writing Bob, Larry and Lionel into the sheet and hardcoding it wouldn't be too hard but with larger datasets, that would be incredibly time consuming and also make it liable to human error. That's where fill down comes in so the empty cells next to the fruit can be quickly completed with the appropriate person.
So now our scene is set, there's little else to do but get down to it, beginning with the simplest method in Power Query!
Power Query
I had originally planned to start my fill down techniques in Tableau Prep but after going through how to do it in Power Query, it felt like the simplest place to start. Whilst some might find the use of M code and logic behind Power Query justifiably confusing, Microsoft has very kindly skipped the use of that altogether with the fill down calculation and created its very own tool within the platform.
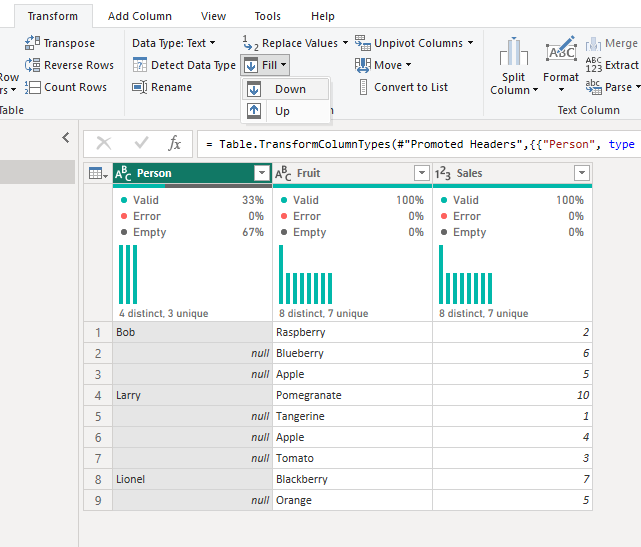
After loading your data into Power Query, simply go to transform (in the toolbar) > Fill > Down.
And there you have it. Quite simply, your completed table!
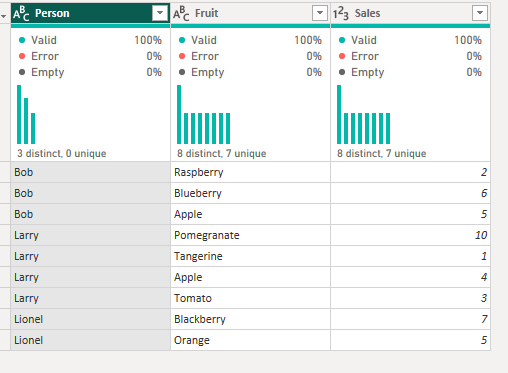
Tableau Prep
Once you understand how to fill down in Tableau Prep, it's a very simple technique to replicate. The only drawback that I can think of is that you can't do multiple columns at a time which would be incredibly handy but we can't all get what we want. At least we have the knowledge of how to do it step by step if you follow this guide!
Step 1: Load the data.
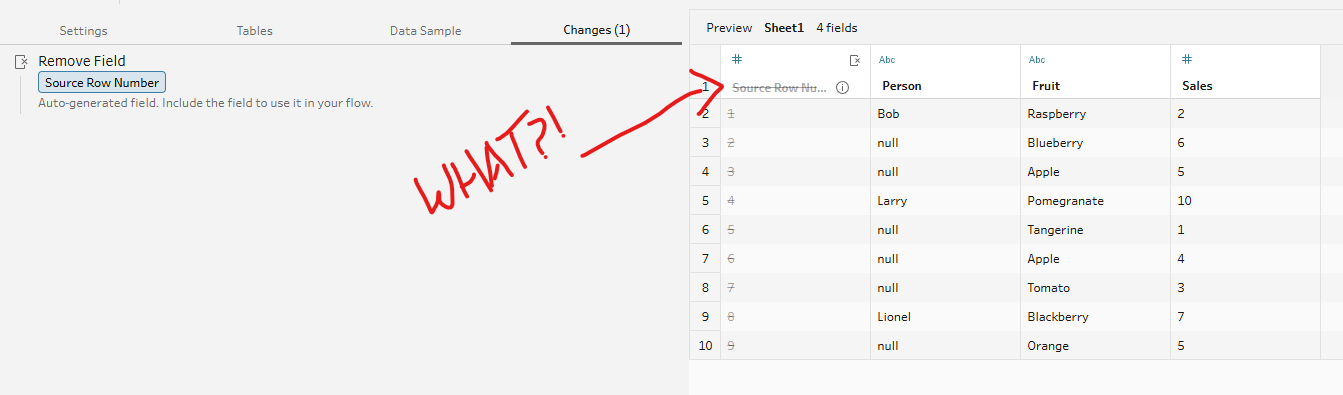
I think the sneakiest part about Tableau Prep is that when you load data into the canvas, it creates its own step and promptly deletes it like it never happened. I don't think I knew about this (or at least recognised that this had occurred) for too long a time but this is crucial for our fill down calculation. From somewhere in the back of my mind, I think fill down is the exact reason that this source row number is formed/deleted and it was added when the fill down calculation became a thing (I'm not sure of the official terminology of when they add something to new editions if that wasn't obvious) in Tableau Prep. You should probably fact check me on that though if you want to be entirely accurate. Too late, I fact checked myself and I made it up. Apparently the source row number is added in order to preserve the original sort order of the file. Either way, it will be of use to us later so it was worth the detour!
Step 2: Add a clean step.
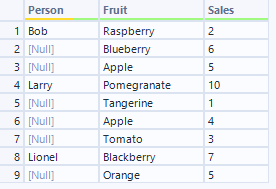
Just like you probably do with any data preparation, I added a clean step in order to clearly view what's going on with my data. As you can see below, we have lots of nulls where the names are supposed to be.
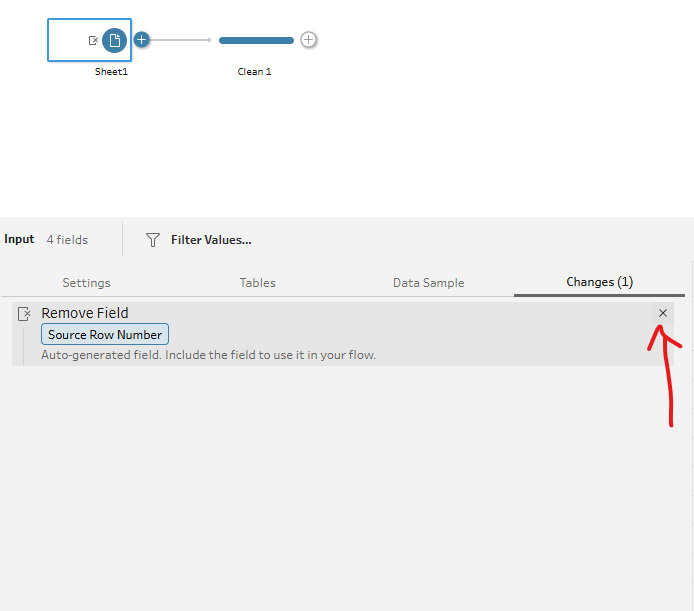
Step 3: Prepare for filling down.
So that the fill down calculation knows what order to follow, you have to cancel the cancellation of the added source row numbers in the loading stage. I learnt that Tableau Prep normally cancels this because most sets of data apparently have their own form of row ID so if your dataset has its own inset row ID, you don't need to do this part.
Step 4: The fill down calculation.
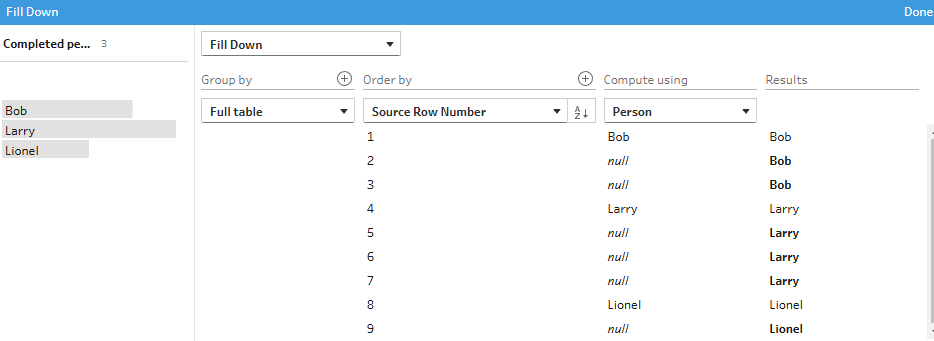
To fill down, you need to go to the field that you'd like to fill down and click the three dots in the right hand corner. Then go to create calculated field > Fill Down.

A pop-up window will appear with all the necessary information you need to complete your fill down. My fill down menu was automatically completed but yours might not be. As you can see, you just need to ensure that the order by field is correct so that Tableau Prep knows which direction to fill in (using the information from the previous row, indicated by row number, if the current row is null) and which field it is filling down.
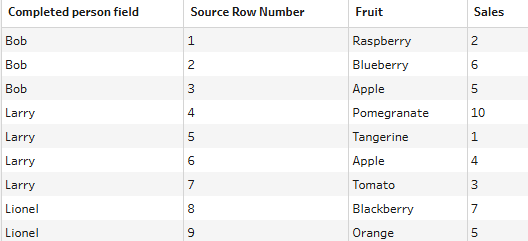
Once you click done, your results should be completely filled down and you can remove the original field before doing what you'd like with your prepped dataset.
Alteryx
You may have figured it out by now but in case you hadn't, I've been exploring the platforms in level of increasing difficulty which I'm afraid means that this won't be all that fun. However, once you know how to complete the steps, whilst it won't be quite as quick as clicking a button in Power Query, you will at least understand how to complete the task and I would say particularly within Alteryx, you'll understand more about the methodology behind how the task is completed by the platform itself.
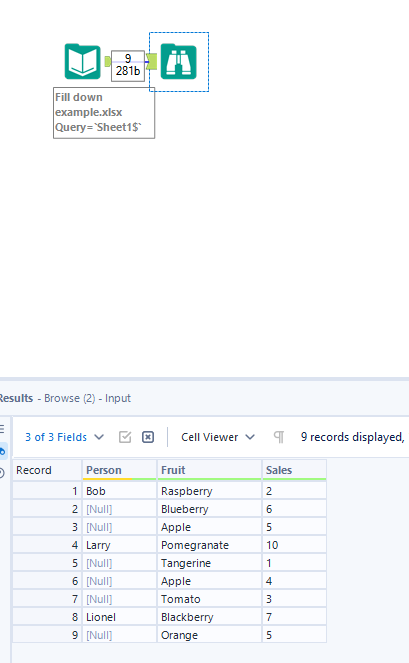
Step 1: Load in the data.
This one's pretty self-explanatory and with a browse tool, you can see exactly where your problem with incomplete fields lies.
Step 2: Add a multi-row formula tool.
If you ever want to perform a formula where you're comparing between the value above/below rather than a value within the same row in a different column, you need a multi-row formula tool. In our case, if the value is null (blank) in our person field, we want to compare with the value in the row above in order to fill down. But what happens in the rows where the row above is also null, I hear you ask? Well Alteryx rather handily works its way down sequentially so the null person for blueberry will be filled before the null person for apple which means that when it comes to filling the null person for apple, the row above will no longer be null anyway.
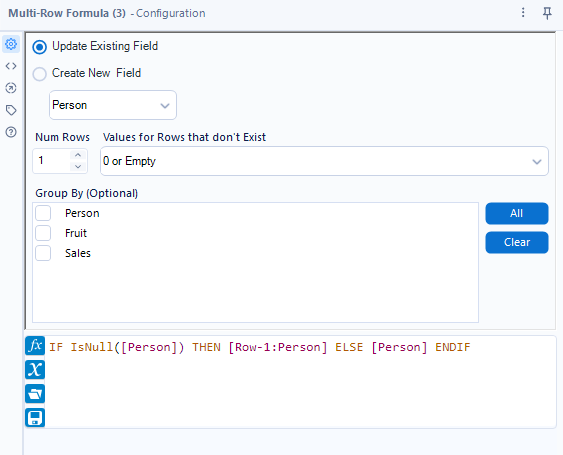
To set up the multi-row formula tool, you need to fill out the pop-up box that appears in your left hand configuration pane. As we're filling down, we want to update an existing field and set that to person. The num rows specifies how far from your actual row, you can compare across. Again, you just want to keep that at 1 in this case as you're only looking one row above your person value, and as our person field starts with Bob, we're not too worried about values for rows that don't exist either.
The important part here is the formula section at the bottom. Copy out the formula that I've used and insert your fields in the place of my person field, and I'll explain what's going on.
In the formula, you're asking if the value in my person field is null then look at the value in the row above and take that. Otherwise, keep the person value.
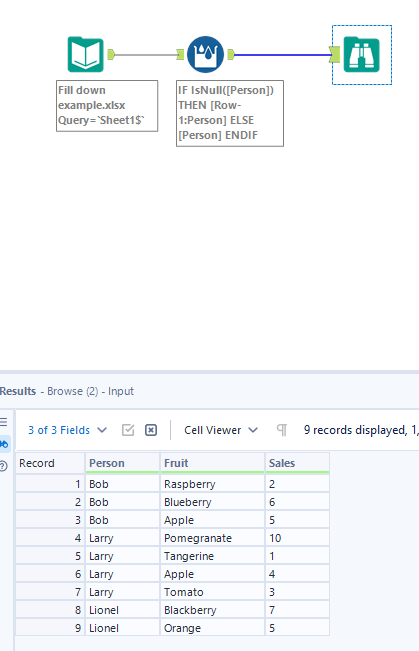
To explain what happens with actual values, Alteryx looks at record 1 and finds Bob in the person field. It asks, is Bob null? No, Bob isn't null so it updates the person field with the person value (which is still Bob). Then it goes to record 2, looks at the person field and finds null. It asks, is null null? Yes, null is null so it looks at the value in the row above (record 1) and updates the field with Bob. And this process continues until the end of the column.
And now you have your filled down column. I think the multi-row formula tool makes things seem a little trickier than they are but once you understand how that works, you'll be cooking!
So there you have a comparison of filling down across a number of data preparation platforms. I hope you feel like you've learnt something and understand not only the differences between how to complete the task in each software, but also how the platform itself works. Until next time, happy prepping!