


Replacing a data source is something that seems simple but can quickly become more complicated than intended due to some small differences between data sources. Tableau Desktop also likes to make the whole experience incredibly dramatic by turning things red with big exclamation marks if things don't match up which I think makes things more stressful than necessary but I suppose more helpful in the long run (when I'm not freaking out over the number of red icons on my screen). Never fear though - this blog will take you through how to replace data extracts in Tableau Desktop seamlessly, providing you with a stress-free zone to complete your task. Welcome to your data source extract happy place!
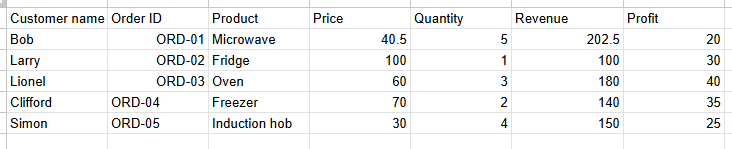
Before I take you through the step-by-step, let me run through my fictional data sources. I've got an 'original' data source which covers the very basics of some order transactions.

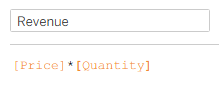
In Tableau Desktop, I've added a calculated field which calculates revenue.
Now, in my 'updated' data source I supposedly decided that I didn't need the location column and it would be best to push the calculated field upstream into my data preparation tool. I have added some new rows and a new profit column. I also felt that the customer column could be renamed to customer name. I've edited the order ID as well so now it's a string format rather than an integer and the price so that it's a decimal.
As you'll probably have guessed, each of these changes will demonstrate a different thing for you to learn about replacing data sources in Tableau Desktop so let's look at what happens.
The Initial Set Up
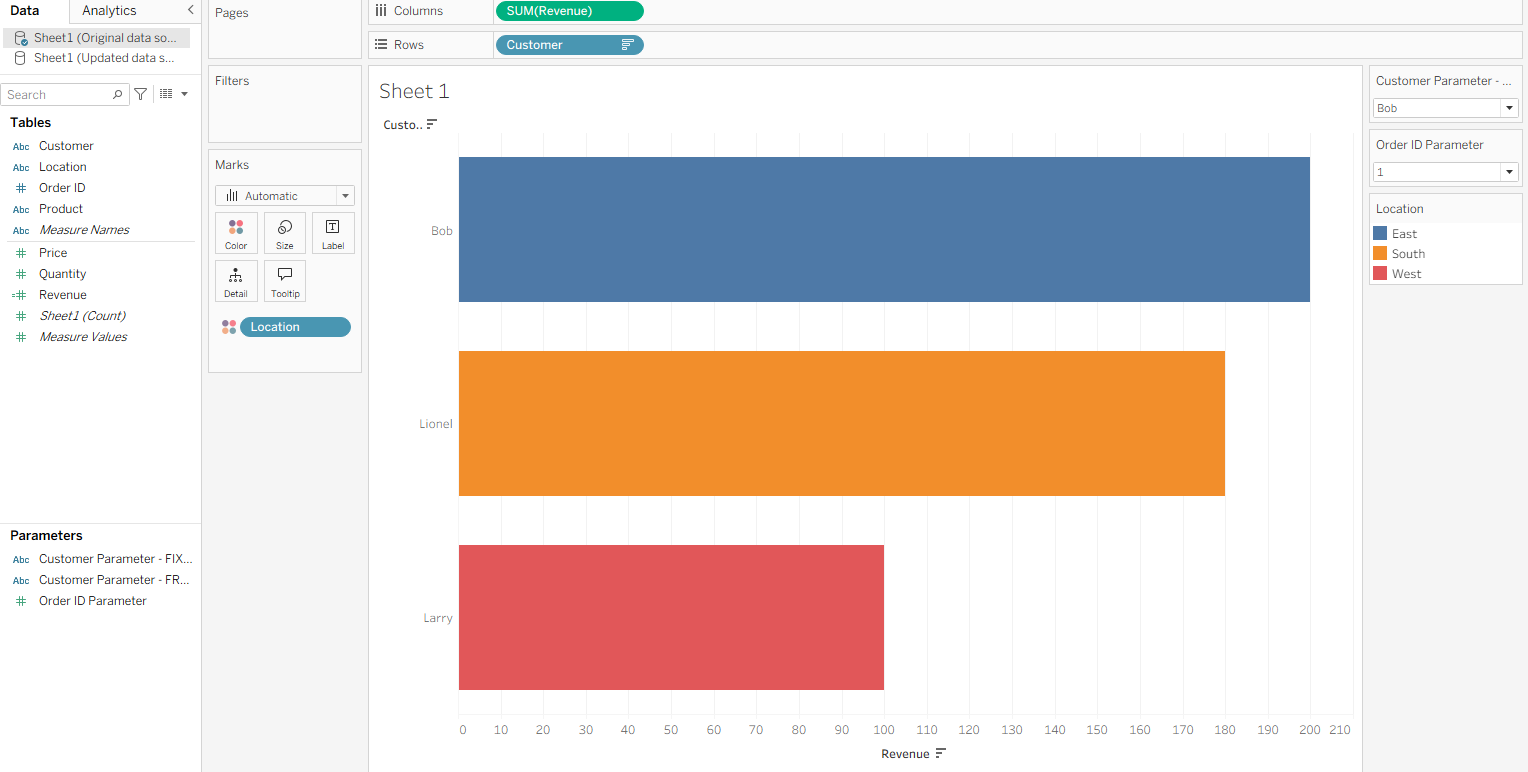
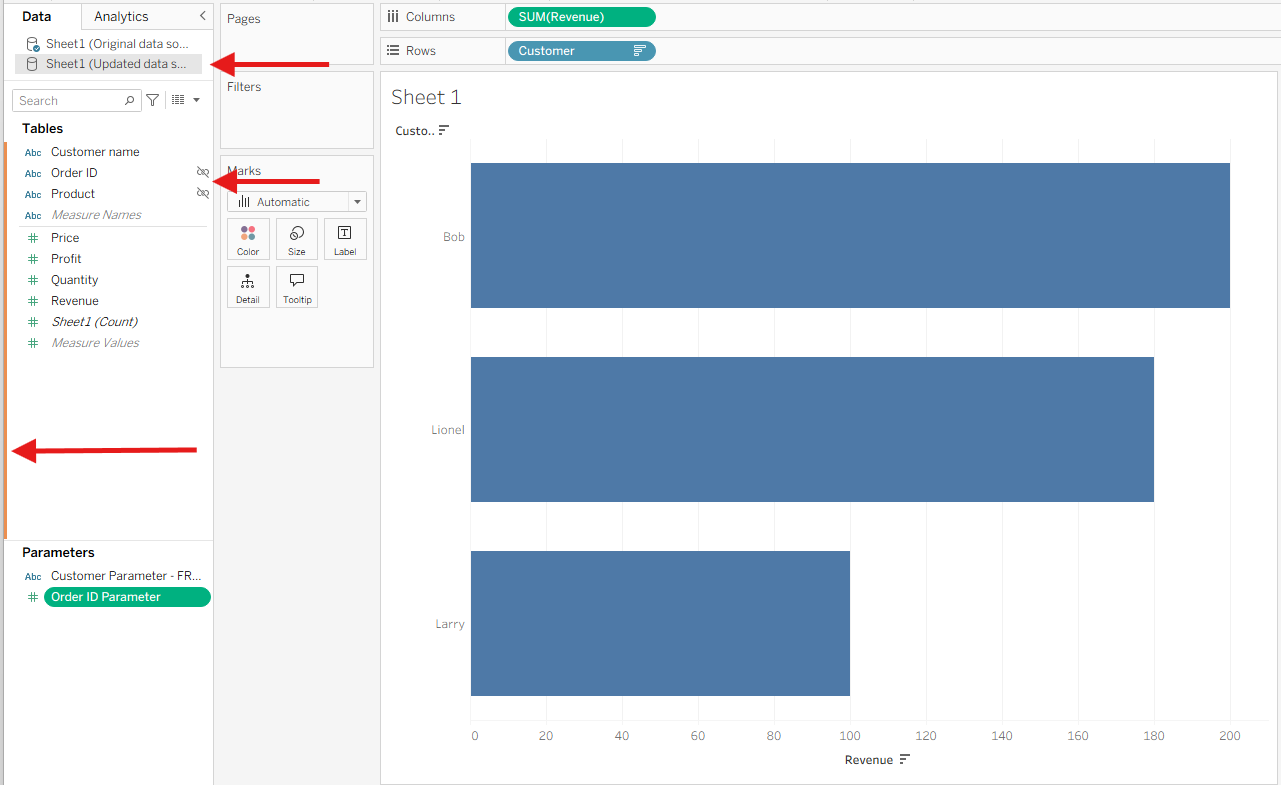
I've loaded my original data source into my workbook and created a simple chart and some parameters to explore what happens to each if you change the data source.
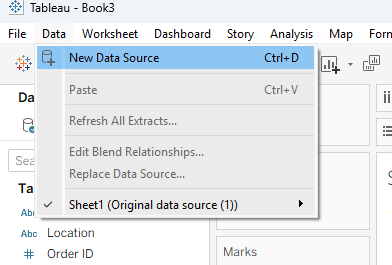
So, how do you replace a data source? We start by adding it to the workbook initially.
Adding your data source will take you to a new data source page. Don't worry about that unless you need to create new joins/relationships. Today, we're just doing a simple data source replacement so we can head straight back to our worksheet.
In your worksheet, the fields in your updated data source will be open. You can tell because the open data source is highlighted in grey (topmost arrow). The orange band also indicates that this is your 'secondary' data source in this sheet with the little blue tick indicating a data source with fields currently present in your worksheet. The little interlinked chain icons indicate that the fields could be used in a data blend but we're not doing anything that complex today.
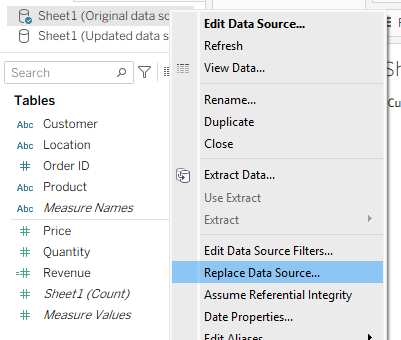
Let's see what happens when we replace the data source now by right clicking our original data source.
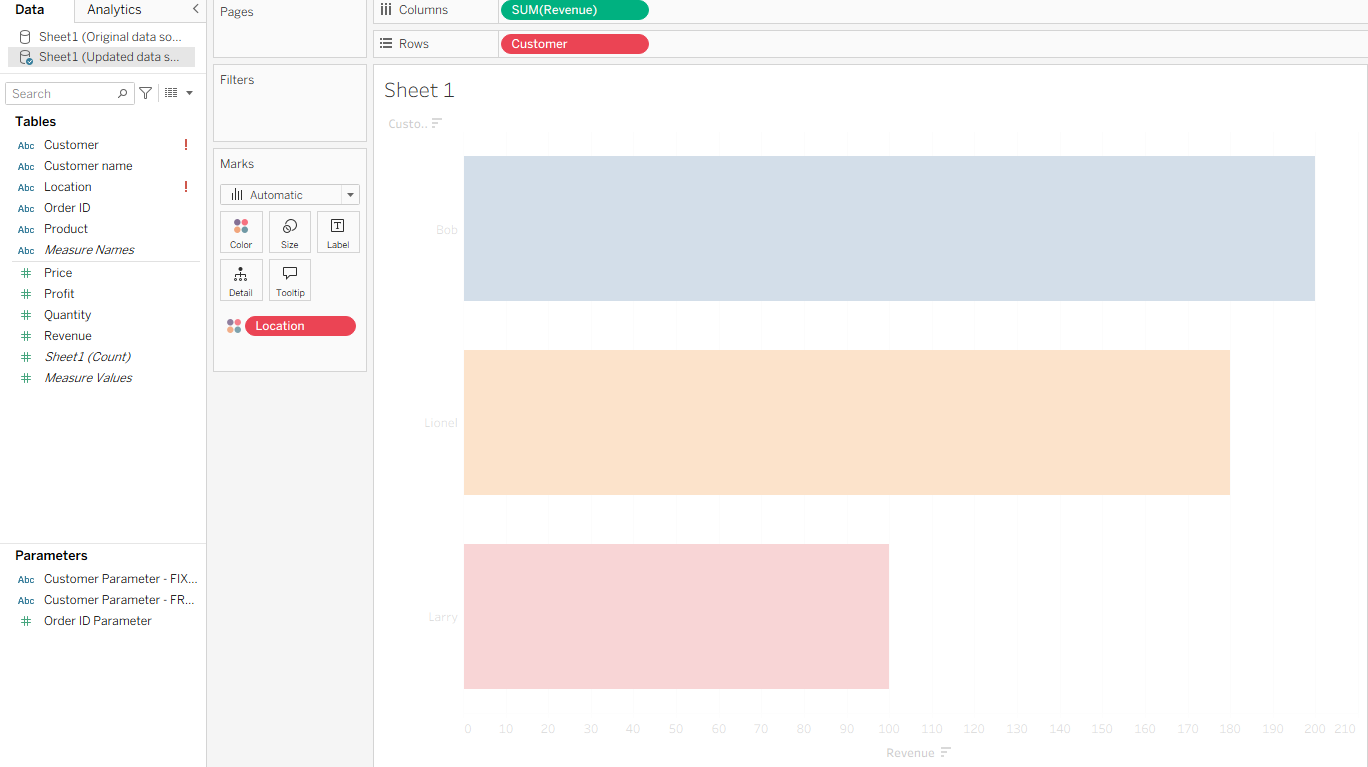
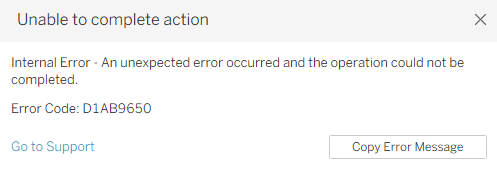
We get the errors below.
This is our first learning moment.
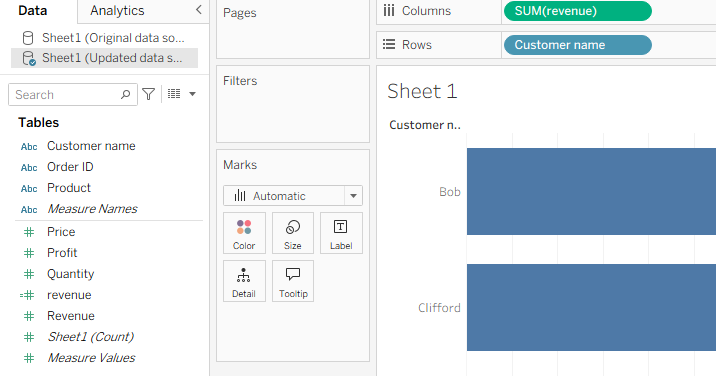
Inconsistent field naming across data sources
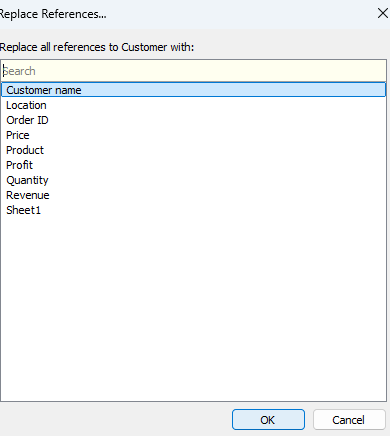
Ideally, your fields will be named the same but one of the issues that can occur is if the naming is different. Thus, we need to replace our old field with our updated version. You could do this by dragging and dropping but if you have many sheets and/or calculated fields which use your old 'customer' field, then that would take a bit of time and be at risk for something getting missed.
To fix this problem, you can replace all references instead by right clicking your old field > Replace references.
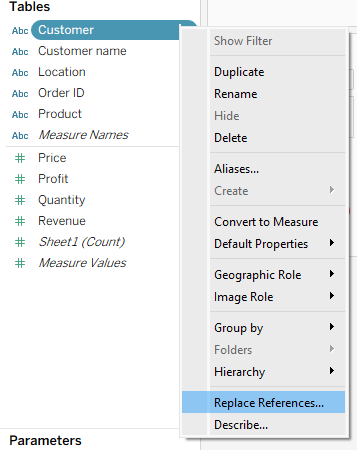
Then select the appropriate field you want to replace it with.
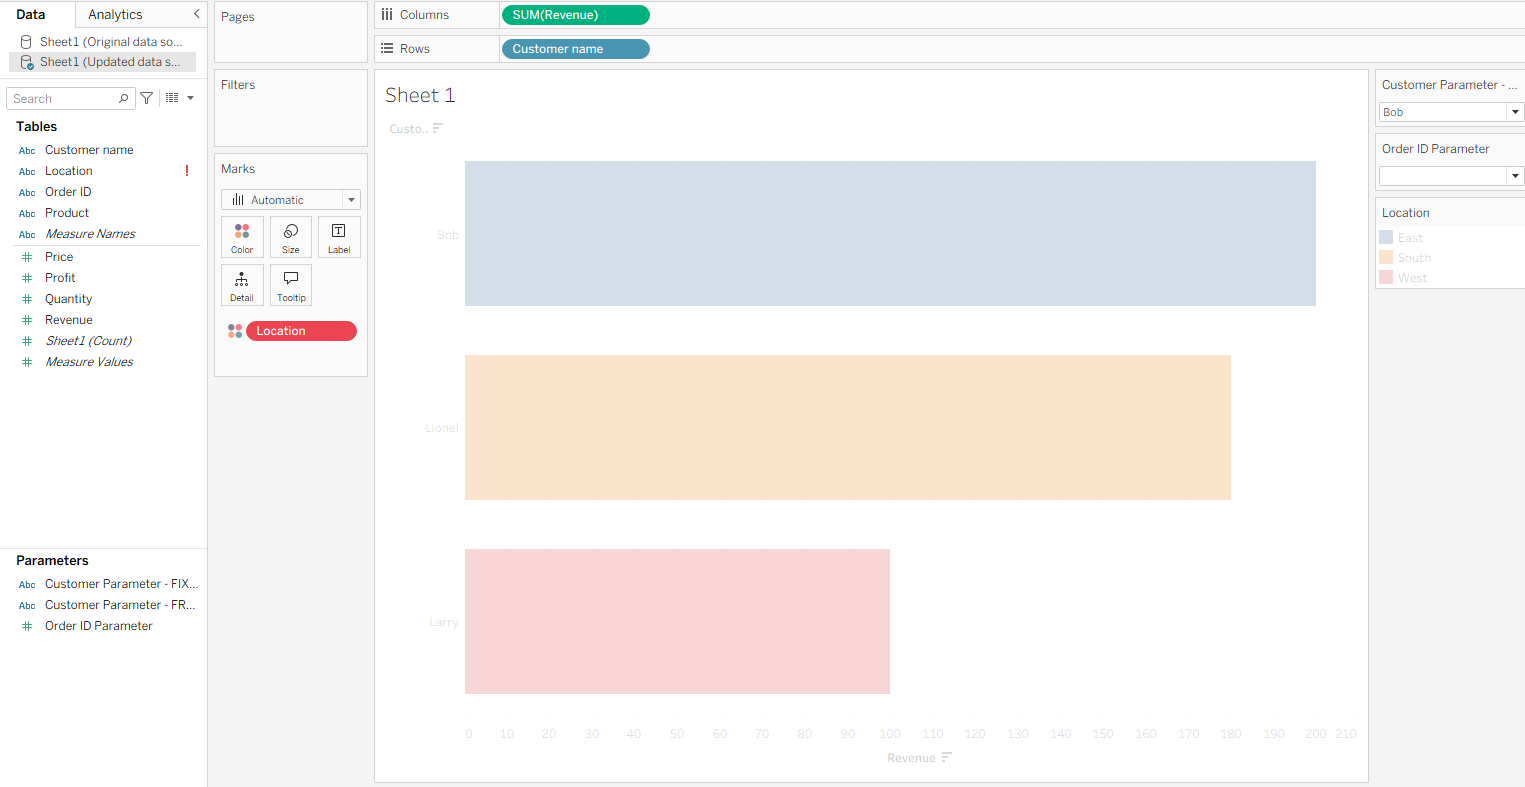
Now the customer field issue is fixed but we still have a red field in our view so what's happened here?
Lost fields
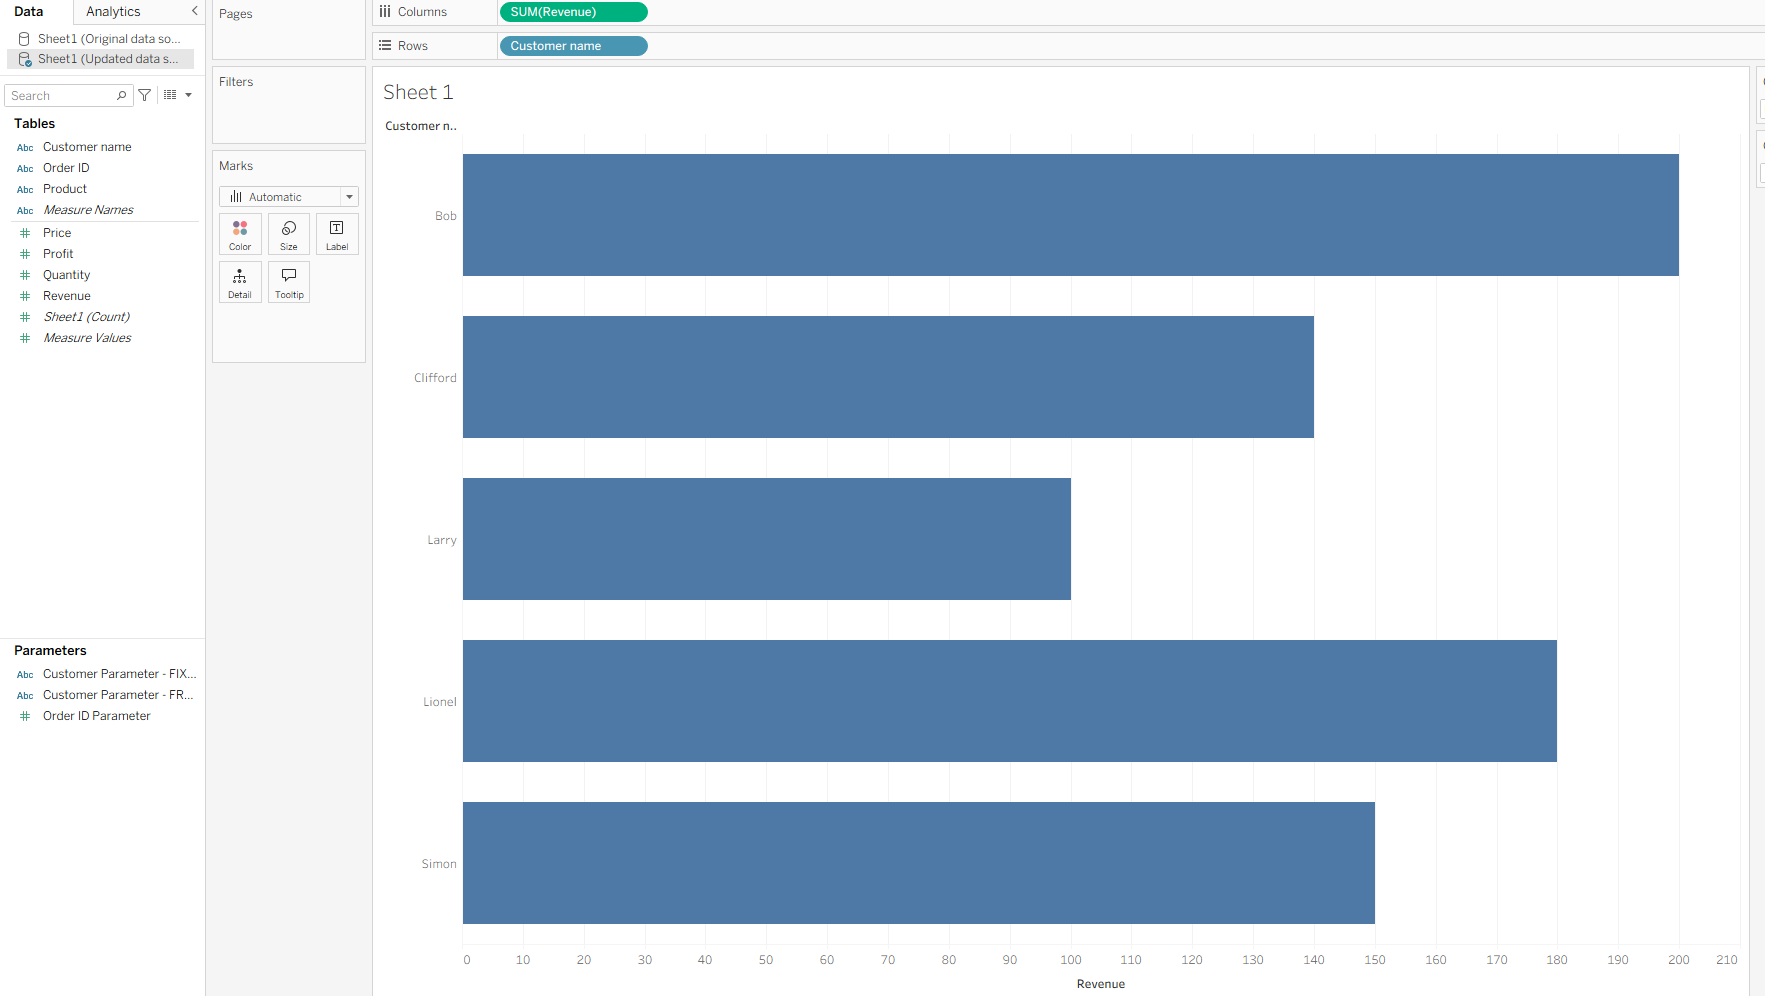
The reason we can't properly see the sheet is because we still have the red location field. Now, if you remember, I decided that we didn't need that location field anymore so you can just right click on the field and delete.
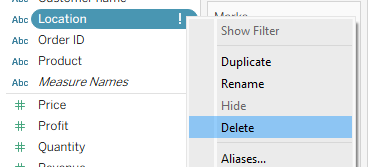

Note: If the 'lost' field had not been in the view when we replaced our data source, it would just disappear without a trace so be cautious of completely removing any fields from your data source.
Calculated fields to pre-calculated fields
As mentioned, in the original data source I created a calculated field for revenue. Because my calculated field and my new field were named exactly the same, this meant that the calculated field got replaced automatically and deleted.
However, if I had named them different things (even off by a capitalisation), then both would have remained and I would have needed to do the replace references trick.
Importantly, unlike with our set fields, calculated fields are not automatically deleted when you replace references here. You need to delete them separately, should you wish to do so.
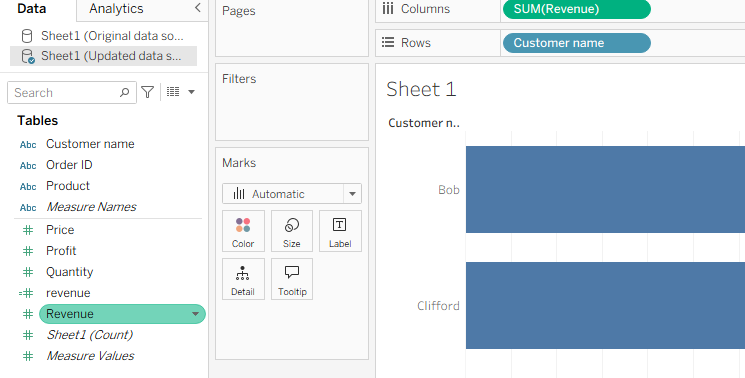
Otherwise, all calculated fields carry across without error as long as fields in the calculation are in the updated data source version.
Changes in data type
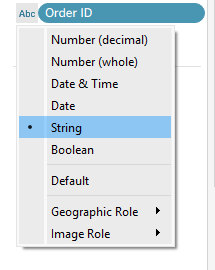
Now we get to changes that I feel are less frequently observed when replacing data sources. In my example, Order ID changed from a numeric to a string field.
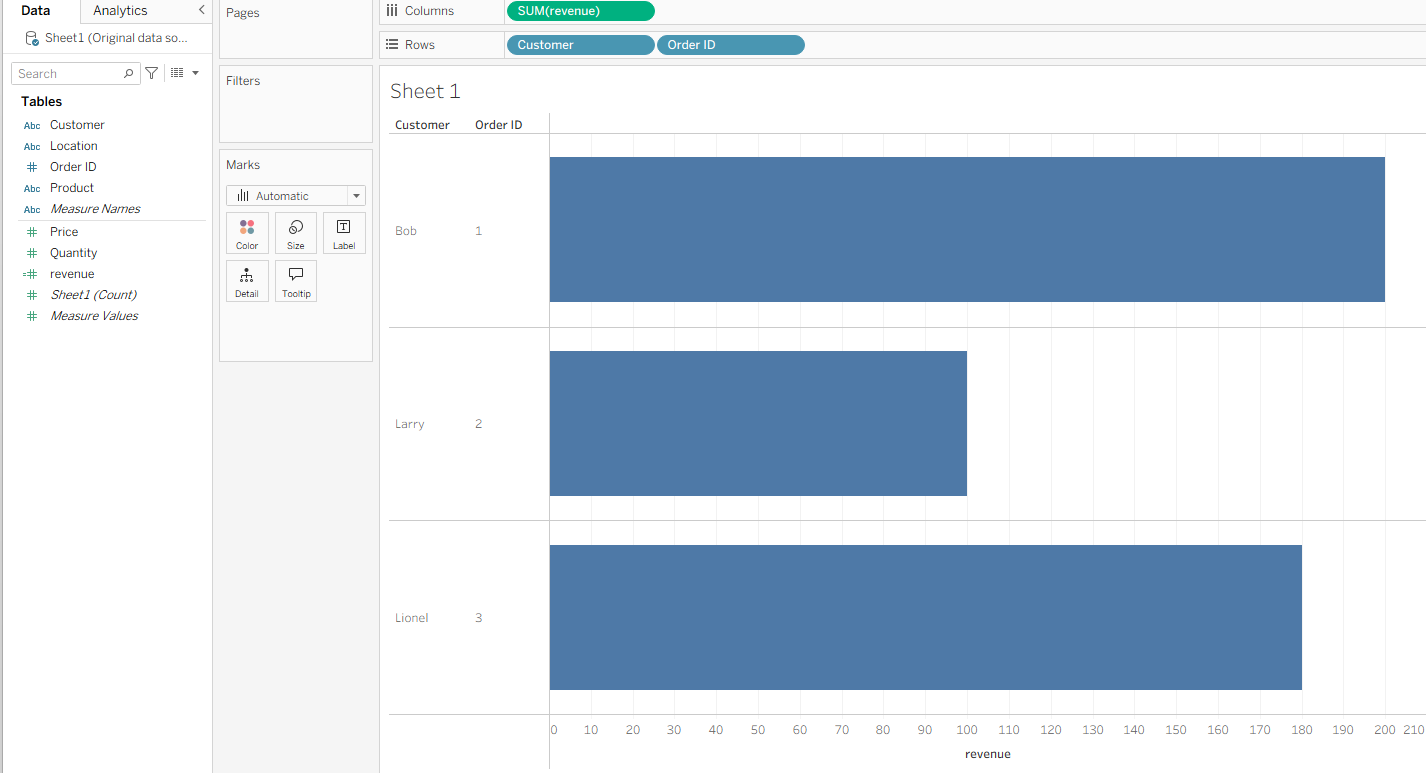
This difference resulted in this error occurring and order ID being automatically removed from the worksheet.
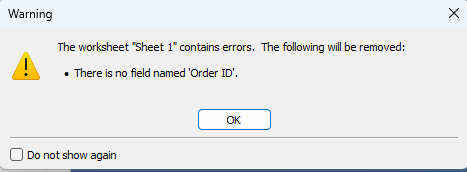
To fix this, you need to manually add the order ID back in which is manageable when only one sheet is in use but far more time-consuming with a multitude of sheets. A process I would recommend to avoid this would be changing your original field format prior to replacing the data source.
By making this change, the replacement becomes seamless.
Note: the differences are insignificant if changing between integer and decimal data types.
Parameters
There are several instances where replacing a data source might affect a parameter. The first of which is dependent on how your parameter has been set up. If you use the fixed option when creating your parameter from a field, then as the word implies, the options are fixed.
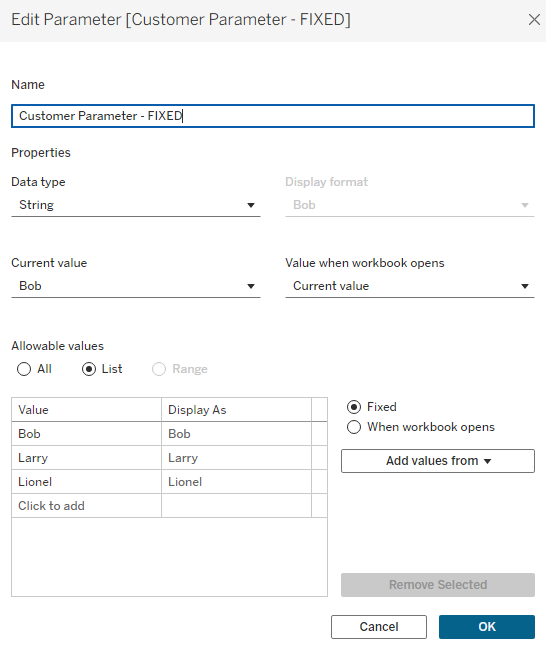
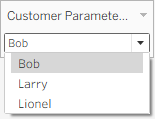
Therefore, even when you replace references to the field, the list in the parameter will remain unchanged.
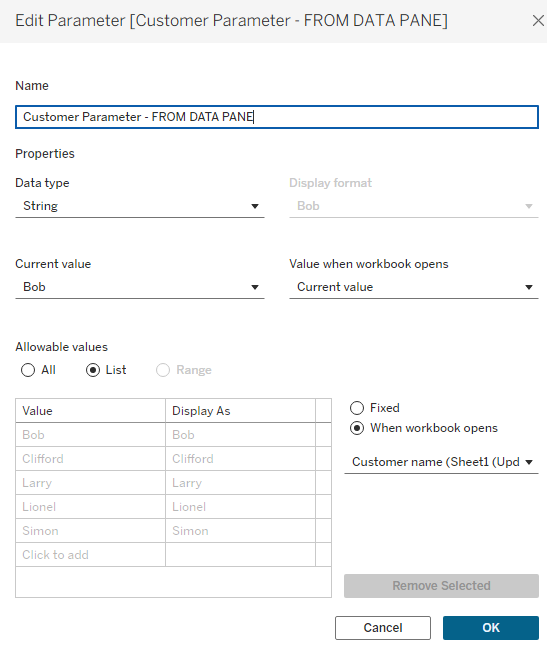
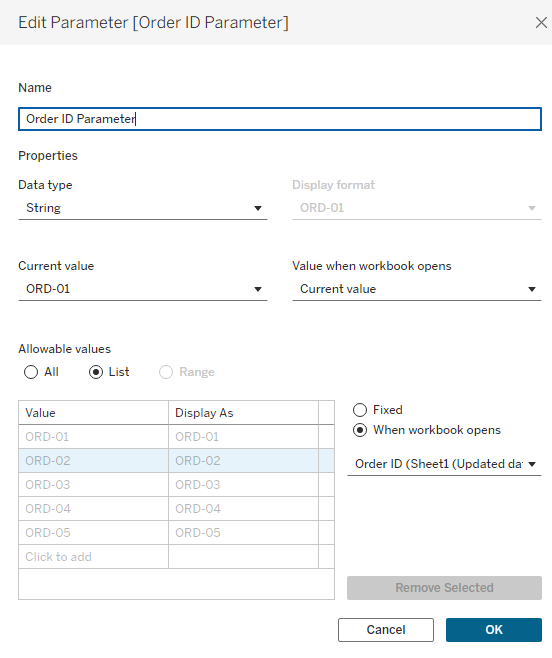
However, if you use the 'When workbook opens' option, then replacing your field reference like we did earlier will work automatically.
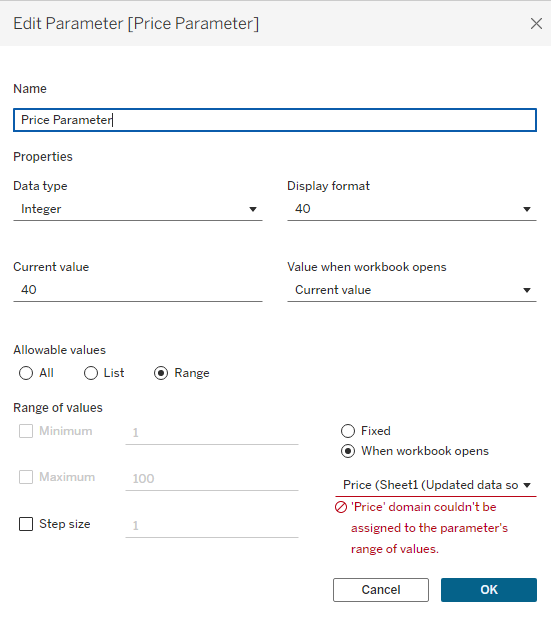
If you've created a parameter based on an integer field and want to convert it to a string parameter, this breaks the parameter itself and will create an error if you try to change it. From here, as far as I can tell, you need to start back at square 1 and create a parameter afresh.
To avoid this error, you need to make changes before the data source replacement occurs. This involves changing the data type like we mentioned before in the field, but also in the parameter itself. Lastly, as above, you need to make sure that the parameter is set to 'When workbook opens'.
For an integer to float change, you need to simply change the parameter data type before or after the data source replacement. Either works in this instance as long as the options are set to 'When workbook opens'.
I think that just about covers all of the key details about replacing data source extracts so that everything seems a little less intimidating when the big red pills and exclamation icons appear. I hope you've learnt something and feel more confident in your data source replacement skills. Until next time, happy replacing!