


I was recently working on a mini dashboard where I wanted to reset my parameters to their original values without having to individually go through and complete this manually. I like life to be as efficient as possible, particularly for my user, and that's why I thought a single reset button could solve all of my problems. But I'd never created a reset parameters button before, I didn't even know if it was possible. And yet, I never should have doubted the power of Tableau and that's why I'm here today: to tell you about how to create a reset parameters button for yourself. This blog covers string, integer and date parameters as they're very common but I can't see why the concepts wouldn't transfer across. So, without further ado, let's get started!
Step 1: Create your chart(s).
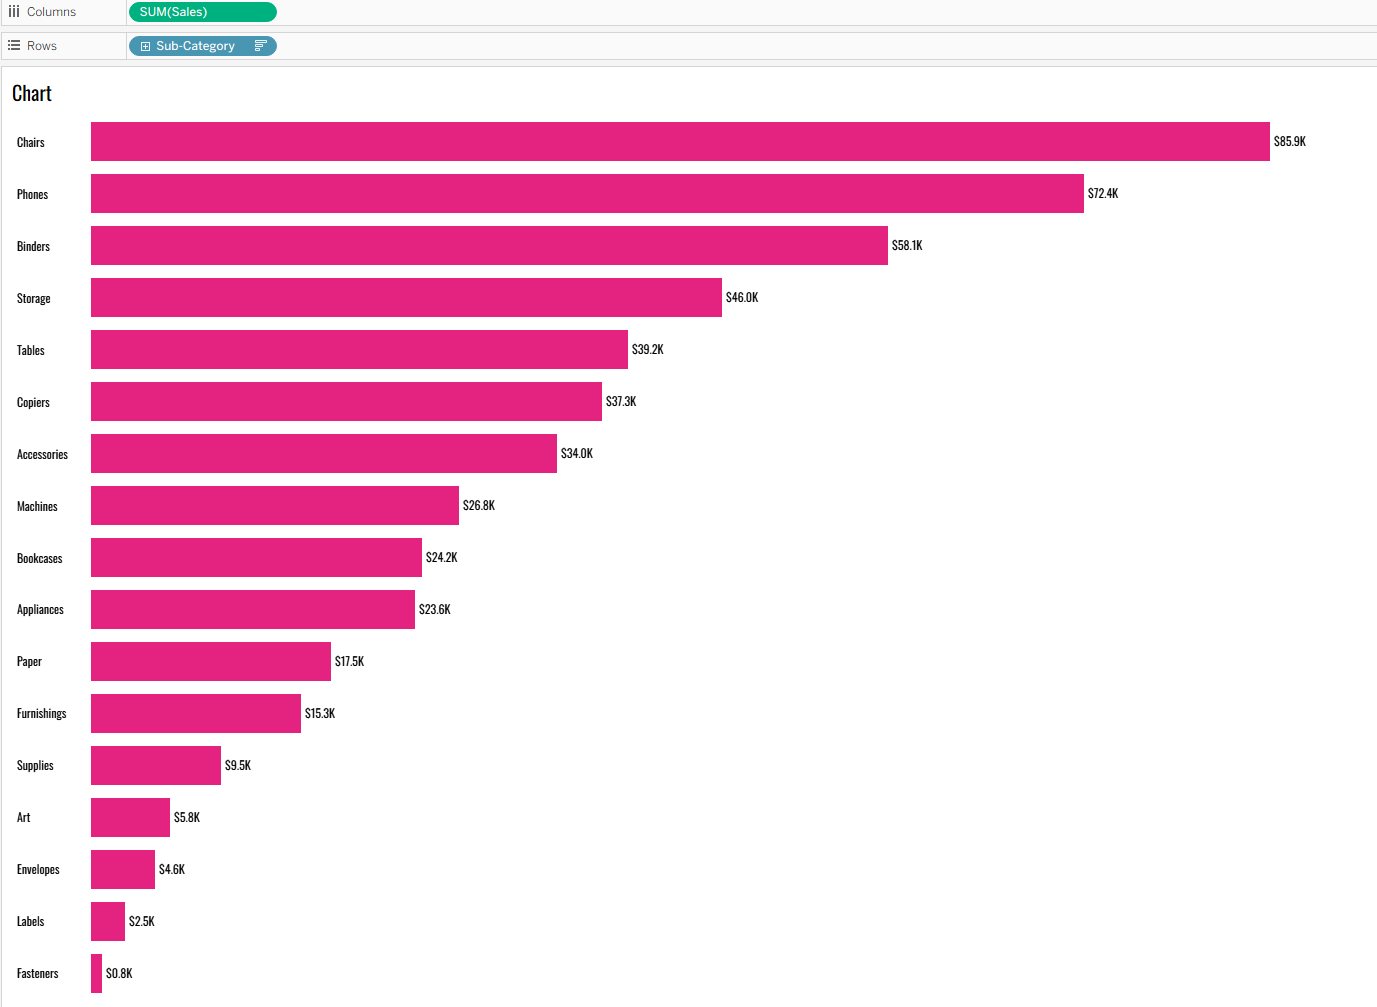
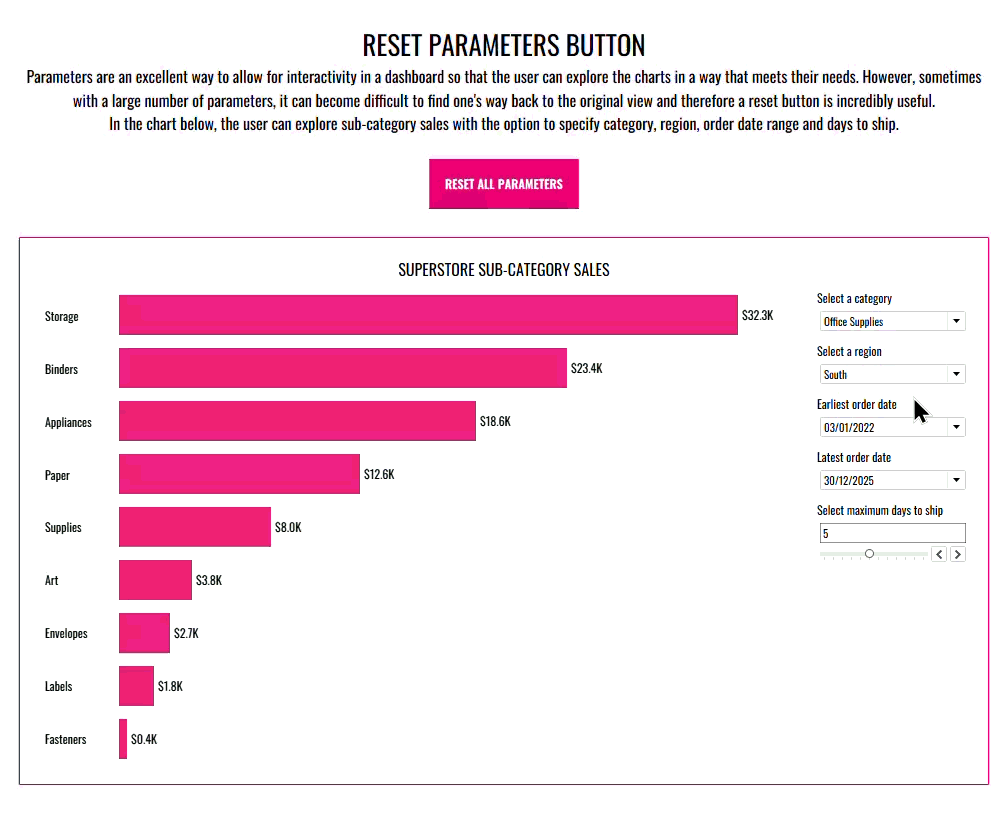
I feel like this is the first step that I frequently put in my blogs but you can't run before you can walk. Today, I've chosen to use a single bar chart as this is just for an example but you'll likely have a few charts if you've got a number of parameters to reset.
Step 2: Create your parameters.
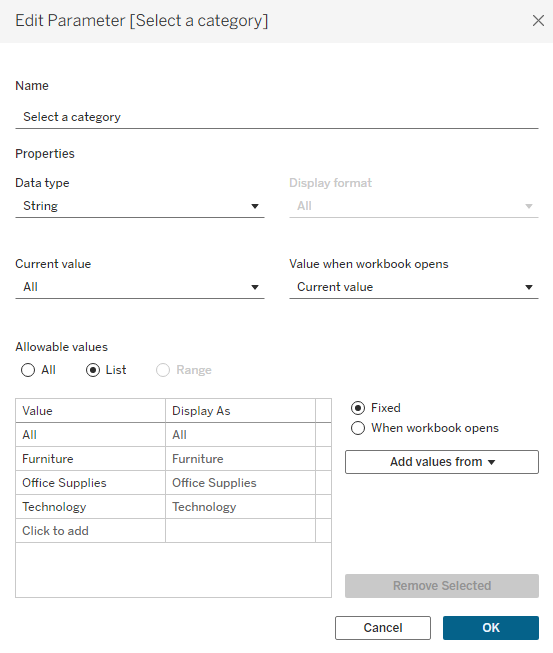
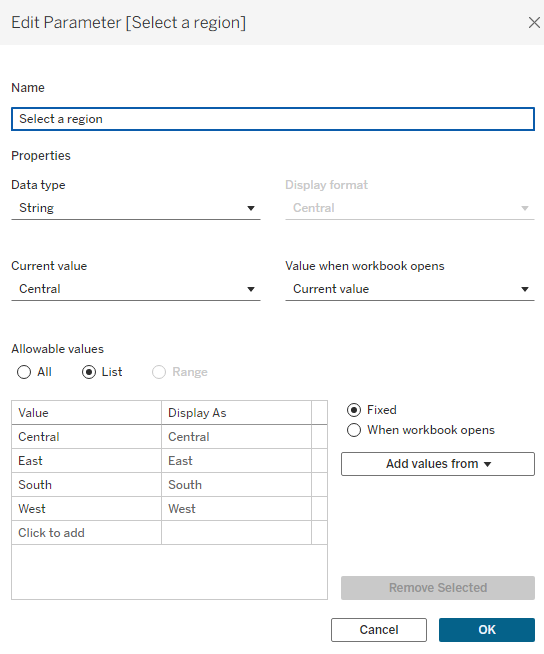
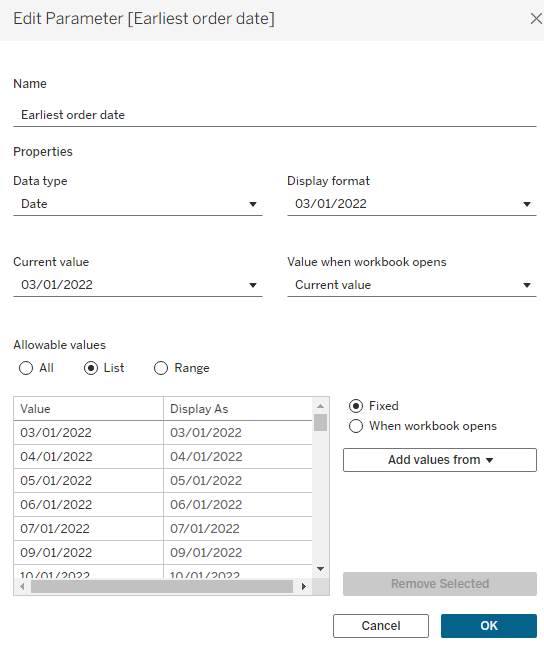
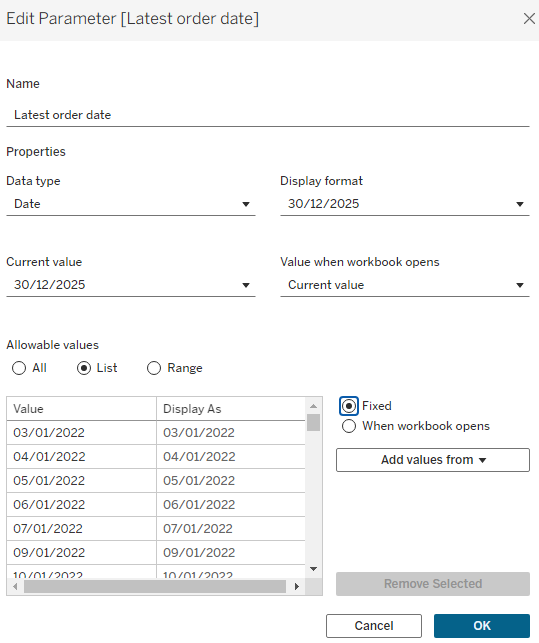
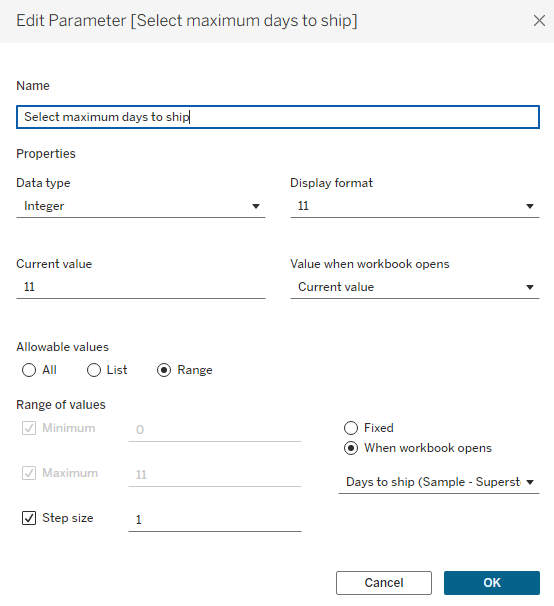
Create your parameters using the same method as normal - the special stuff happens later on. I've created two string parameters (one that includes an all option, and one that will reset to a default option), two date parameters (a minimum date and a maximum date to enable a date range) and one integer parameter (that will reset to a maximum value).
Step 3: Connect your parameters to your chart(s)
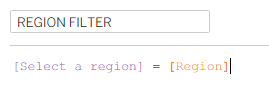
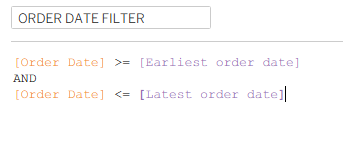
As your parameters won't yet impact your charts, you need to connect them with calculated fields. How you'd like the chart to be impacted will affect what you write in your calculated field. You can see below for how I wrote mine.

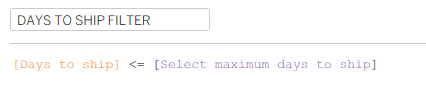
Then add your calculated fields to the filter pane of their associated charts and set each to 'true'.
Step 4: Create your button
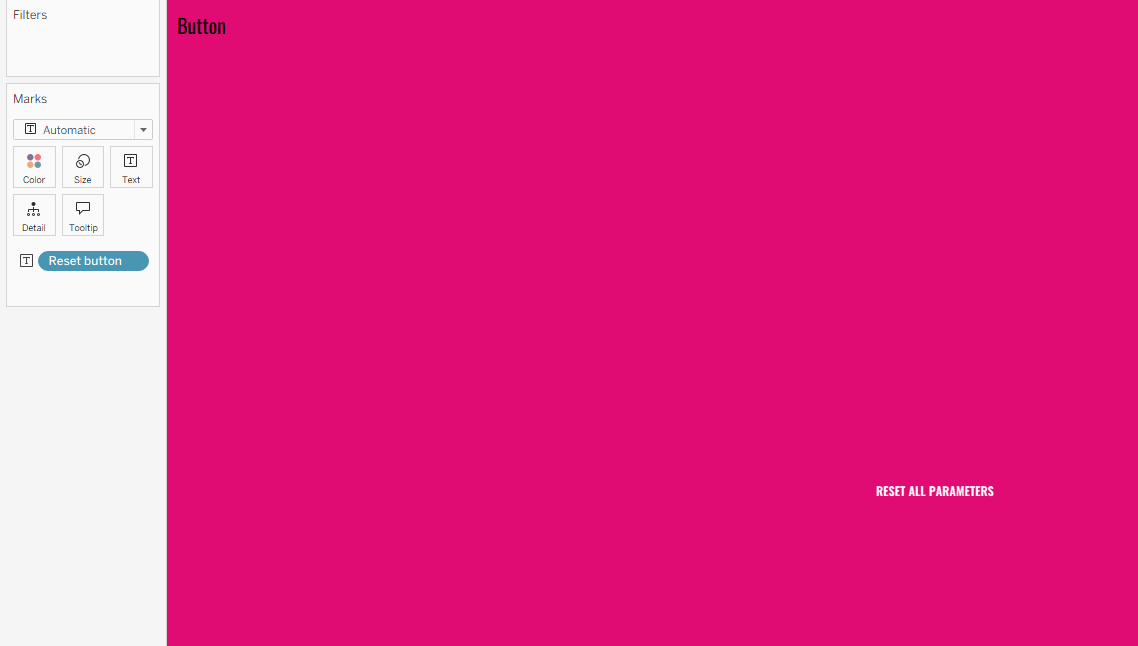
There are multiple ways to go about making your reset button. I went the simplest of them all by just using a sheet and some text but you could create an image if you'd like too.
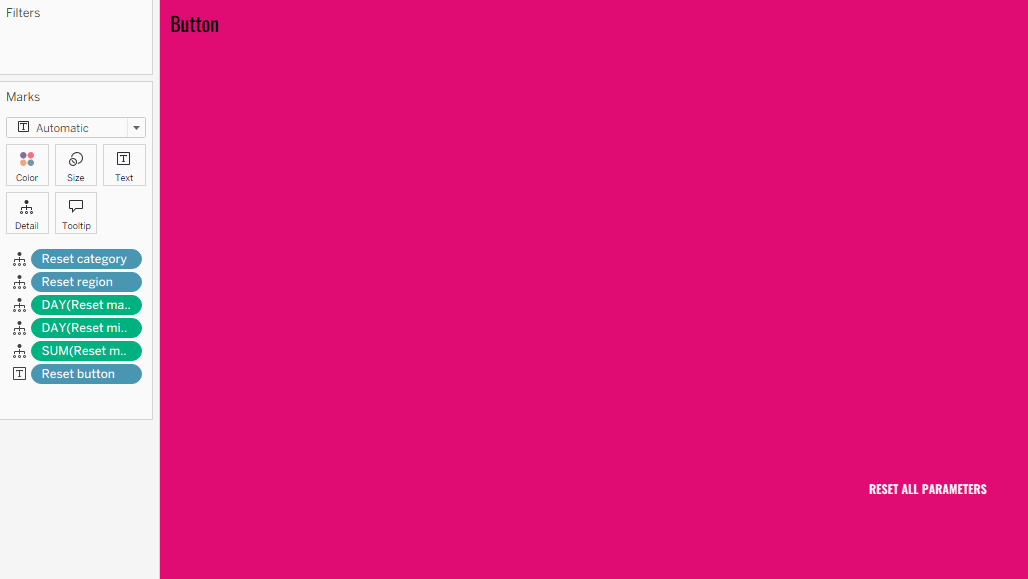
For my method, I simply created a calculated field and then added that to my worksheet. I also added a coloured background to make the button stand out.
Step 5: Define the resets.
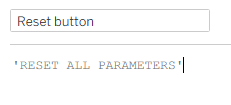
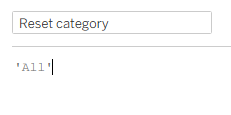
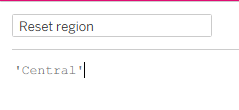
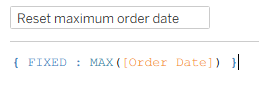
So that your parameters know what they should be reset to, you need to create another set of calculated fields that provide these definitions. And quite simply, all you have to provide in those calculated fields are the definitions alone.
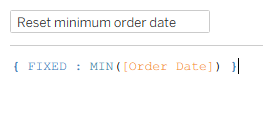
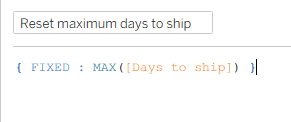
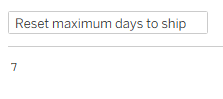
If you'd like to reset your integer to a minimum value instead, you can do the exact same method but use the min function like we did with the dates.
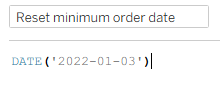
If you have a specific date or integer in mind that you'd like to set as your default instead, you can set it like you do with a string:
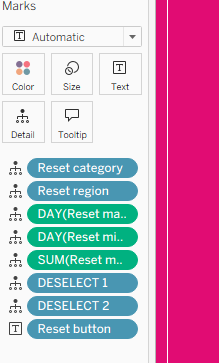
Once you've chosen all of your definitions, drag these onto detail in your button's marks card making sure that the aggregations are correct - particularly with the date calculated fields.
Step 6: Dashboard actions.
Before we get to the dashboard actions, of course you need to plop it all into the dashboard. Then we can get to the good stuff.
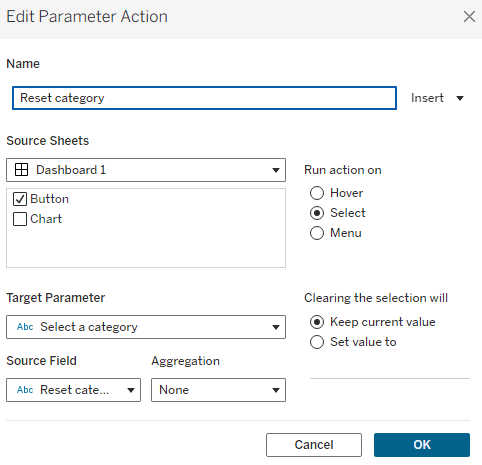
Head to dashboard > actions > add action > change parameter. Now this is where it's going to get a bit lengthy and a bit repetitive as you need to set an action for each parameter that you have so that it resets with the click of the button.
In each parameter action, choose your button as your source sheet with select to run the action on. You need to choose a different target parameter each time and the source field should be the associated calculated field we made in step 5. Aggregation should be set to none.
Now complete that for each parameter that you wish to reset. Then try it out in your dashboard! Everything should be working almost perfectly, other than the fact your button will be staying highlighted until you deselect it. That's something I just don't enjoy but thankfully we can find a way around that.

Step 7: The false filter.
To get the button to auto-deselect, we need to create a false filter. This is another step that I feel like I've said so many times in recent blogs because I find it very satisfying. I'll explain how to create it first and then we can go through how it all works.
Firstly create two calculated fields and add them to detail on your button sheet.
Then you need to create a filter action in the dashboard. In the toolbar at the top, go to dashboard > actions > add action > filter. Make sure that everything is set up like I have done below, particularly with the target sheet not being your dashboard.
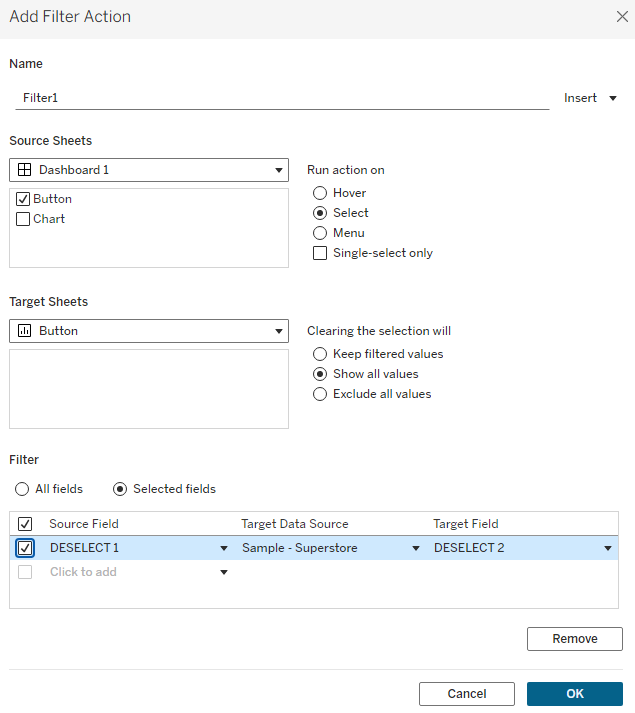
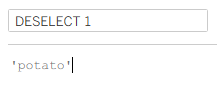
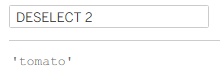
To explain how this works, essentially you're using a filter to say when I perform my selection, I want to filter my 'deselect 1' field to equal my 'deselect 2' field on my button. But potato can never be equal to tomato so it automatically clears the selection to show all values.
And there you have it, a single button that you can use to reset all of the parameters in your dashboard with one easy click. I hope you've enjoyed learning about this fun reset button and feel confident implementing it on your own in future. Until next time, happy resetting!