XML (Extensible Markup Language) is a language that is widely used to structure data. Alteryx Workflow files like .yxmd’s are written in XML and can be observed and changed like this. Therefore, you can open a workflow via the editor, to observe this. You can leverage this for different problems, although it’s rarely used since it is more complicated than to do changes in Alteryx Designer itself.
If you for example want to exchange many tools at once, Alteryx won’t give you an option to do this. In the XML you could replace the same text, e.g. a workflow path with a program (e.g. Notepad++) at all positions in a workflow. When you then save the XML File and open it in Designer, you will see all the changes applied there.
XML Parsing is also an important topic when working with data. Transforming XML data in a tabular form can be done with Alteryx if you understand how the input data is structured.
The Structure
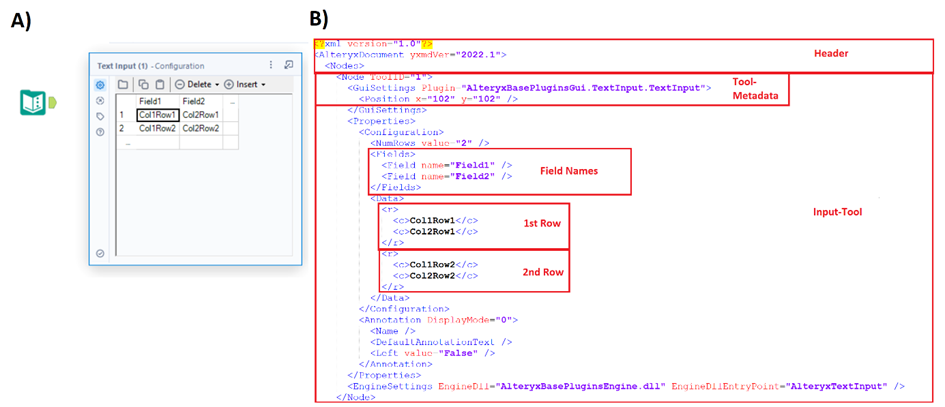
XML uses tags to structure the data. Each element must have a start-tag and an end-tag to it.
<tag> Some String </tag>
The start- and end-tag must use the same string to define the structure and the end-tag also needs a “/”, which indicates that it is the end-tag.
Empty elements can also be specified with <tag />. This is often required as programs require a certain input, even if it is empty.
XML has an hierarchical structure. The values coming in underneath an element are the child values.
An Alteryx Workflow as an XML File
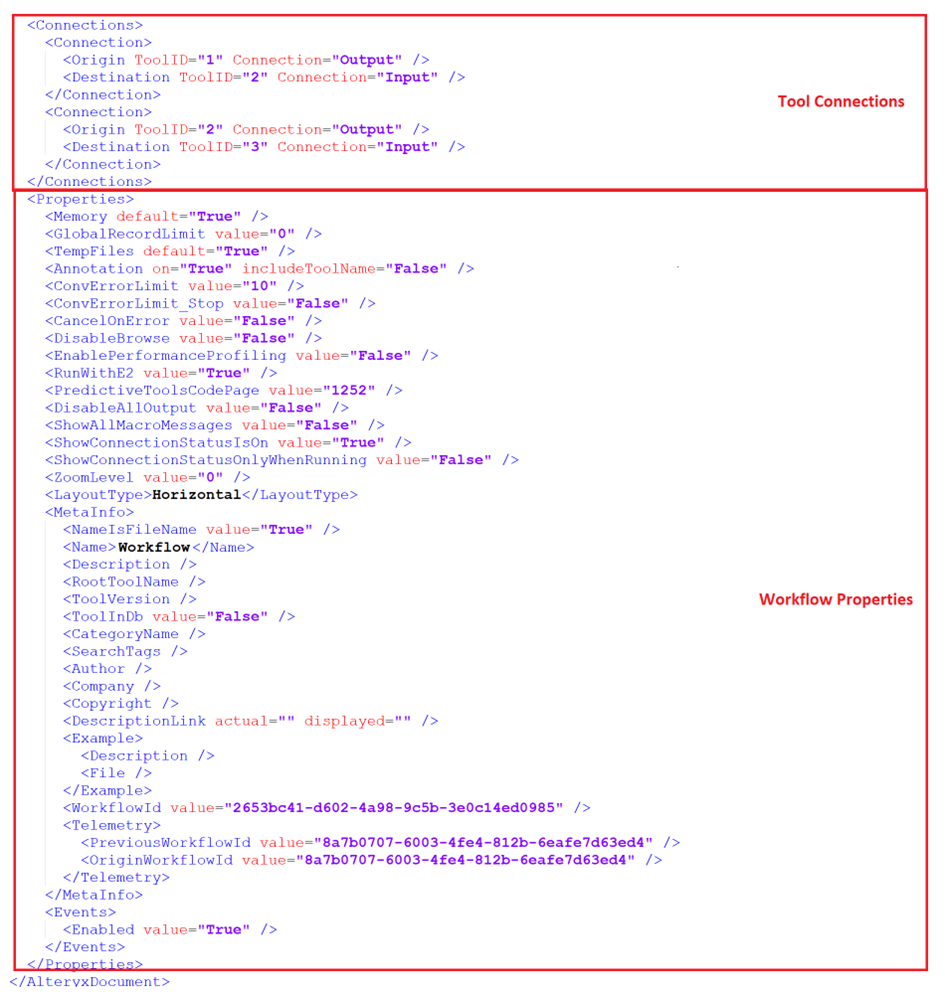
In Fig.1 we can see how such a file is written.
There is always some common code in the file, as each XML File contains information in the header, specifying the XML version and the Alteryx version. Underneath every single Tool is specified with the required information. The ToolID is used here to specify which tool is used. Other Information like the icon and the position is stored in the header.
The configuration contains what we put into the tool. At a text input tool, we can see the full table there. Other tools would write their formula, selected columns, etc. there.
After the tools, there is the last section, which contains other important information to build the workflow (Fig.2).
Here we see the additional info this workflow requires. The connections specified here are for a three-Tool workflow. The property part carries a lot of the information we can set up in Alteryx Designer in either the Configuration Window or the User Settings.
Reading an XML File in Designer
Reading and parsing XML files in Alteryx is often required to extract this data to a human-readable form.
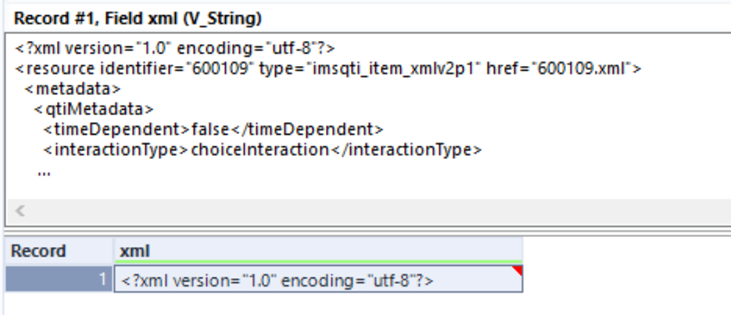
As you can see in Fig. 4, only the first few lines of an XML can be observed in the Results Window, therefore it is a good idea to take a look into it before opening it in Designer.
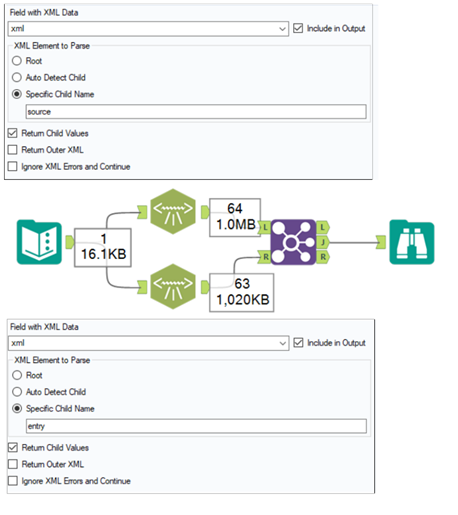
The XML-Parse Tool offers a few options for parsing an XML file (Fig.5).
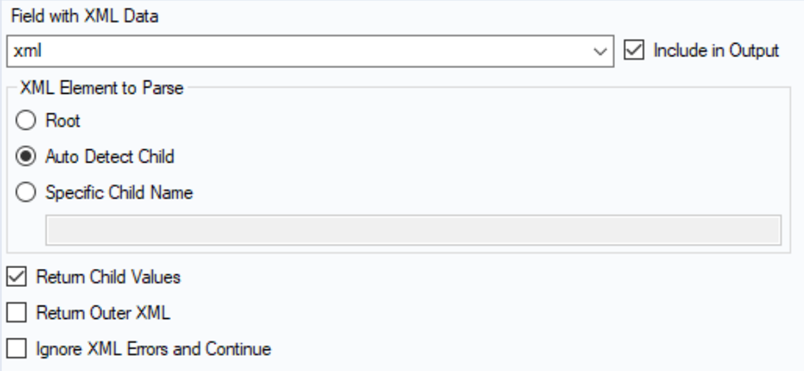
The “Root” option is rarely needed, it gives you information about the file itself. If you want to extract the data from the main part of the XML Code you need to choose either the “Auto Detect Child” or the “Specific Child Name”. Since the Auto Detect is often failing and returns the wrong information specifying the child is often important, therefore you need to understand how the XML is built.
With the tick boxes, you can specify whether you want to extract the outer of the inner (=child) part of your specified child name.
Example of XML Parsing
Disclaimer: The following part explains how to parse an XML file by solving Weekly Challenge 195, I recommend you to try it first by yourself.
The Alteryx Weekly Challenge 195 is a great example of how easy extracting information from an XML is, if you understand the language. If you take a look at the solutions, you’ll see most of the people who solved this made it overly complicated.
In Fig.6 you can see the structure of the input. The target of this challenge is to get the output in such a structured way.
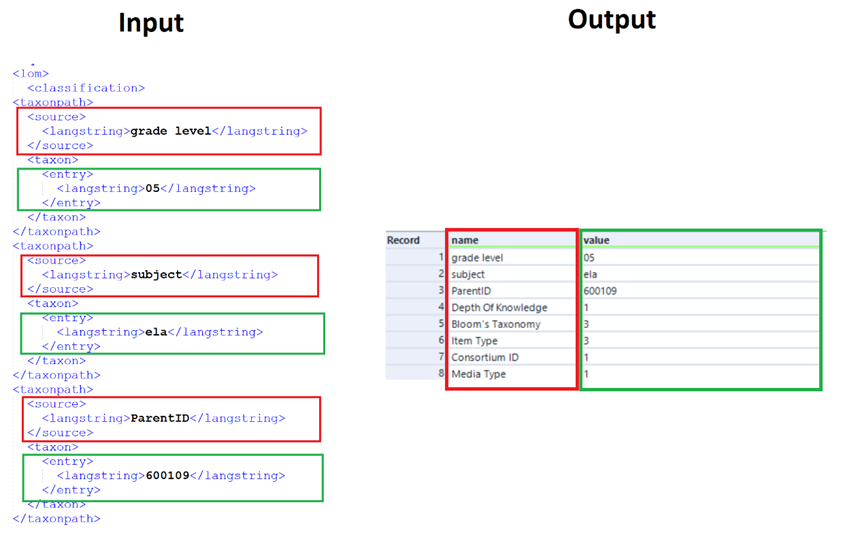
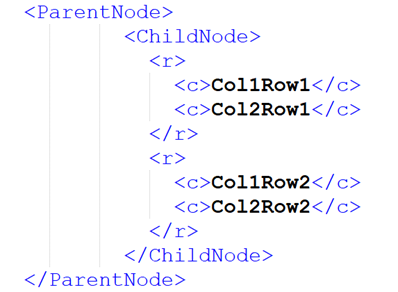
When you observe the structure of the XML, you will see that “source” and “entry” contain the values for each column of the output table. Therefore it is a smart solution to just use these two as the child names and then combine them after that (Fig.7). As “source” and “entry” don’t contain any further children, you will just extract the data from this node.
If you tried to use “langstring” as the child name, you would also get the correct data, but the target structure couldn’t be obtained.