


Does the Multi-Wow Formula tool in Alteryx frighten and bewilder you? If so, you're not alone. Unlike some simpler Alteryx tools, it's not immediately obvious what the tool is actually doing, and therefore when to use it and how to configure it.
This blog will answer that question, as well as tell you when to use it and how to configure it.
When do you need to use it?
A standard Formula tool will allow to to perform calculations between fields, e.g. multiplying all the values in a field by a constant, or creating logic to compare values in different fields on the same row.
However, what about when you need to compare information between different rows within your dataset? For instance, let's say you have a field of revenue where each row is a month, and you want to find the change from the previous month.
Because the Formula tool can only compare between fields and not between rows, the only way you'd be able to use it to generate this insight would involve pivoting and unpivoting that whole field. This is not only a very inefficient solution, but would also be long-winded to implement. Not fun!
So what can we do instead? Well, from the title of this blog, you might have already guessed: this is when the Multi-Row Formula tool comes in.
Okay, but what is it actually doing?
Rather than doing a computation on the whole column, the Multi-Row Formula tool will move down the rows in a stepwise manner, starting from row 1 and continuing until the final row of the dataset.
Let's look at an example to illustrate. I have a list of unique names, and I want to create an ID field for each name like so:
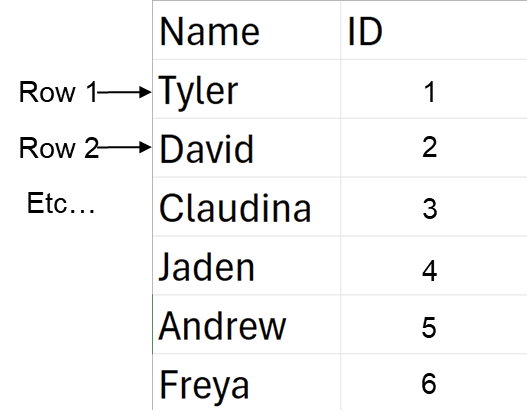
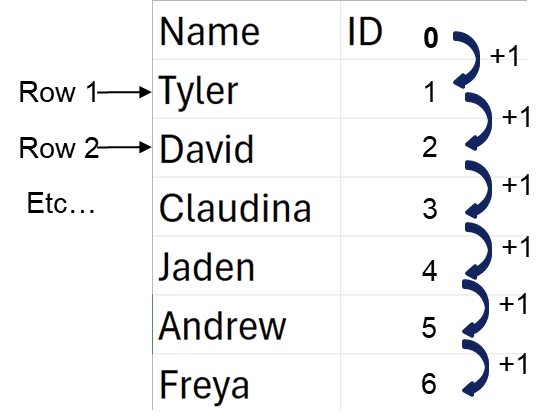
To build our formula, we can figure out what the relationship is between rows. Note that in Alteryx, we can set the value of the theoretical row before In this case, it's very straightforward: each row is the value of the previous row plus 1. Of course, there is no row 0 "previous" to row 1, which is where our tool starts, but within Alteryx we can set the value of all rows that don't exist (in this case, our row 0) to 0.
So how would we build this in Alteryx? Let's have a look at the configuration window for the Multi-Row Formula tool, nicely pre-configured for this example.
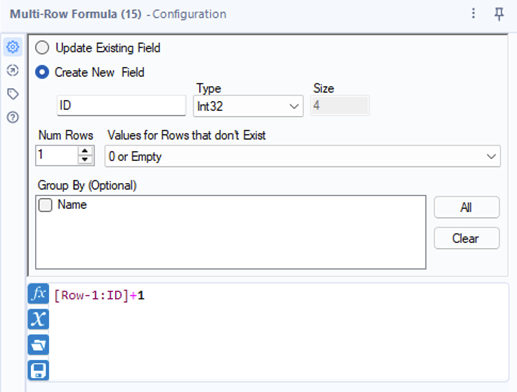
The formula box at the bottom of the window is the Alteryx way of writing "previous row plus one". The plus 1 part is hopefully self-evident, but let's talk a little bit about the syntax for "previous row". It goes as follows:
- Current row = [ID]
- Previous row = [Row-1:ID]
- Next row = [Row+1:ID]
- Two rows ahead = [Row+2:ID]
...and so on! If you don't like typing this out, You can also see all fields, including the previous/next rows following this syntax by clicking the X button. (And as with the Formula tool, fx can be used to see Alteryx's functions, which can also be used within this window.)
In the example above, Alteryx will start from 0. At row 1, it'll add 1 to make 1. At row 2, it'll add 1 to the value of the previous row, which is 1, to make 2...and so on, until our ID field is filled in. That's how we make our ID field.
Conclusion
This is only a brief introduction to the Multi-Row Formula tool, using a very simplistic example; there are many more powerful use cases. But hopefully this gives you a good foundation to build upon when tackling your own use cases. Writing formulae in this tool to solve real-world problems is something that takes practice, since you need to learn to think the same way the tool does. So go practice!