This blog will provide a guide to downloading multiple images from an online website and automatically assigning them as custom shapes in Tableau. I will walk through the process I took to web scrape chess opening images from lichess.com, then attach them to the opening information I have in my data set.
1) Python Image Web Scraping
Gathering images from websites can be done in a few different ways. The easiest, as explained in this blog (https://thedataschool.com/a/robbin-vernooij/dashboard-week-day-3-api-image-extraction-with-alteryx-and-assign-multiple-images-as-custom-shapes-in-tableau/) by Robbin Vernooij, is using an API. Unfortunately for me, the images I wanted to download from lichess.com were not able to be retrieved using the lichess API. I decided to instead use a Python library called Playwright. Playwright, created by Microsoft, is a tool that automates control of a web browser. With it, I was able to automatically send my browser to all the lichess opening pages, screenshot the images of the openings, and save them locally as PNGs.
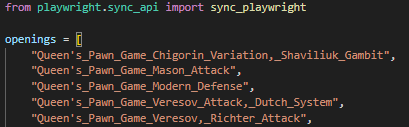
The first step needed for this process is to attain a list of all the webpages that need to be navigated to. For me, the lichess opening web page URLs all start with https://lichess.org/opening/, then have the name of the opening. All that was needed from me was to get a list of all the opening names in my data, then attach them all to the beginning of the URL. To do this, I created a small Alteryx flow to gather them and format them correctly.
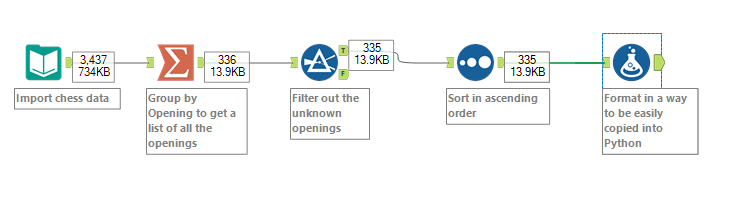
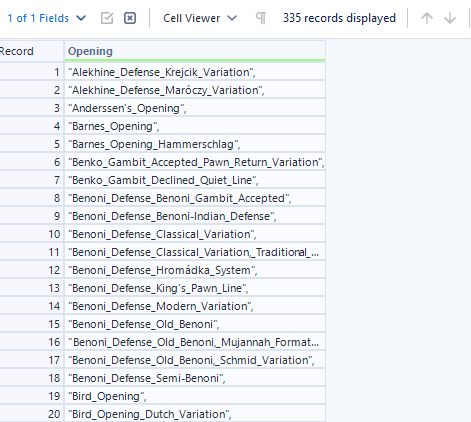
I was able to get this list of chess openings, formatted so that I could copy them straight into my python script.
In python, I then imported playwright and copied all the openings in. These opening names, combined with the start of the lichess URL, could open up all the websites needed for the desired images.
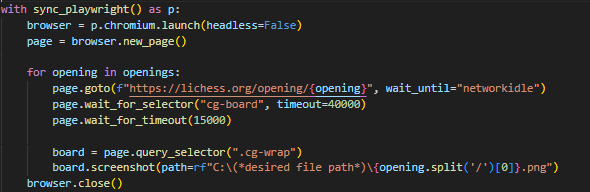
Once a list of all the websites is saved in python, it is relatively simple to instruct playwright what to do. The script shown below opens up a new browser and navigates to the website's URL. It waits for it to load, then waits an additional short amount of time in order to not hit the website's server too quickly. It then locates the html of the image, takes a screenshot of that area, and saves the image as a PNG in the file path given. This process repeats for each webpage in the list, getting a screenshot of each one.
It is important to note that in my case, lichess.org is an open sourced site that does not have any web scraping restrictions. Some websites might have more rules and restrictions on what is allowed to be scraped using this process, so it is important to check what is allowed first. In any case, it is important to give a little break between new webpages opened and to not instruct the script to open too many in one go, as this could overwhelm a websites server and cause it to slow down for every user on the site.
2) Automatically Assigning Multiple Shapes in Tableau
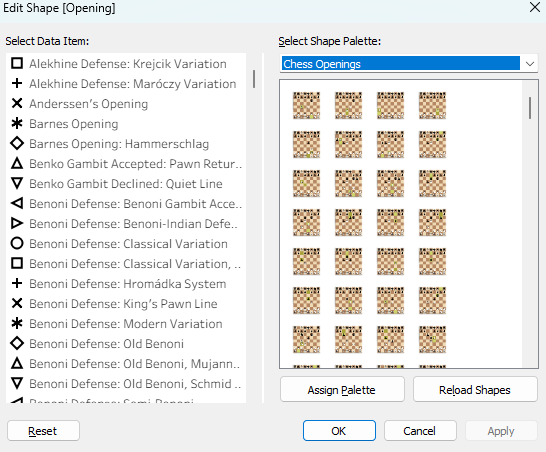
Now that you have your images saved, it is important to know how to attach them to your data. Firstly, open the folder in your file explorer titled "My Tableau Repository", and open the folder inside titled "Shapes". Drag into this "Shapes" folder the folder of all your collected images (there should be nothing else in the folder other than your images). Now, when you open Tableau, you should be able to see the name of that folder in your shape palettes.
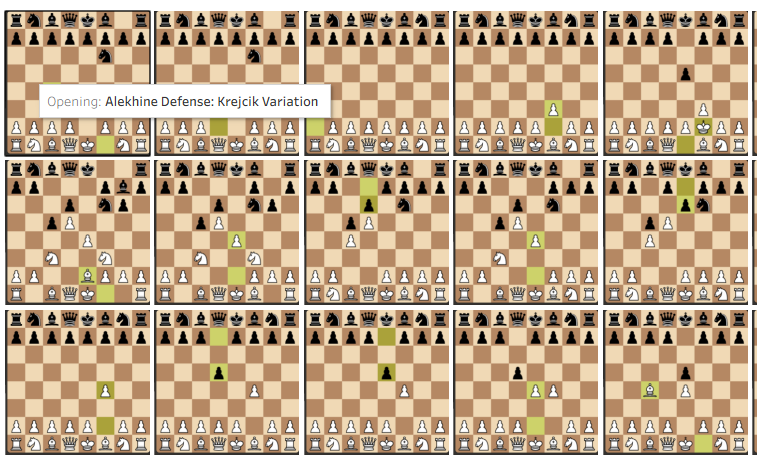
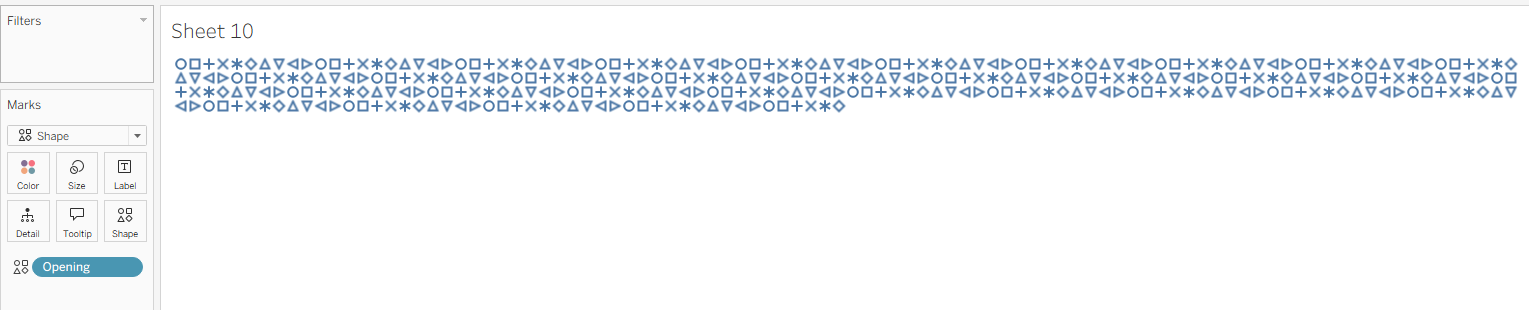
To assign these images, create a new sheet, change the viz type to Shape, and drag your desired dimension onto the Shape section in the Marks card. Tableau should assign a default shape to each field that looks something like this:
Click on the little arrow on the right of your dimension on Shapes, go to sort, and make sure to sort by alphabetic, ascending. This is necessary to automatically line up the correct piece of data to the correct image, as the web scraped images in the shapes folder are automatically sorted in this way.
To finish, all that is left to do is to click on the Shape button in the Marks card to open the Shape menu, select your new custom shape palette, and click "Assign Palette". Because they are both sorted in the same way, they will perfectly line up, and your custom images will be added!