


For this week’s project, I have presented an Alteryx app that allows you to select a food product and find out its ingredients and nutritional values. To select the desired item, we simply type in its name (e.g. Digestive) and then select the type of Digestive we want to check (e.g. Digestive Dark Chocolate Mcvities) from a drop-down menu. From here, it is possible to view the information. To do so, I needed to use two Analytic Apps chained together.
But what is exactly an Analytic App and when do we need to chain two apps together?
Alteryx Analytic Application allows the user to input some preferences that changes the original workflow. The App creator can allow this process with a parameter (Interface tool), where the user is able to type or chose his/her specifications. When two or more parameters are linked to each other (the second question depend on the choice of the first question) we need to use two Analytic Apps chained together.
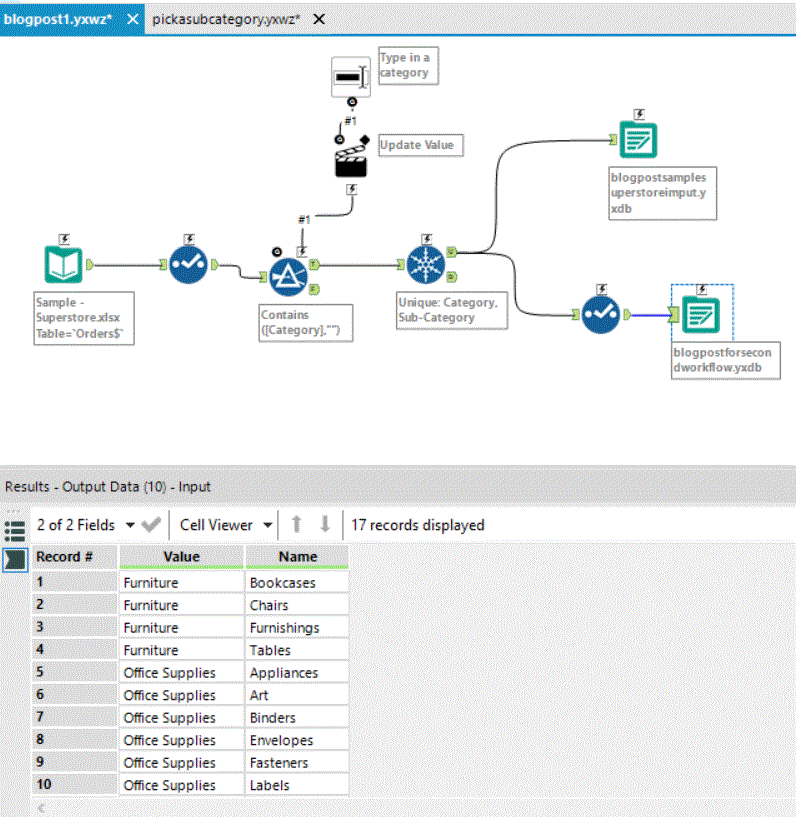
Let’s make a simple example to better understand the use of chained Analytic Apps. We can use the sample superstore dataset. In this case, our outcome will allow us to type in a Category, which will then present a scroll-down menu and show the related Sub-Categories.
First Workflow
The first thing we need to do is input our dataset and convert it into an app. In order to do so, we must change the configuration of the workflow and choose Analytic App. From there, we can simply add our Interface Tool.
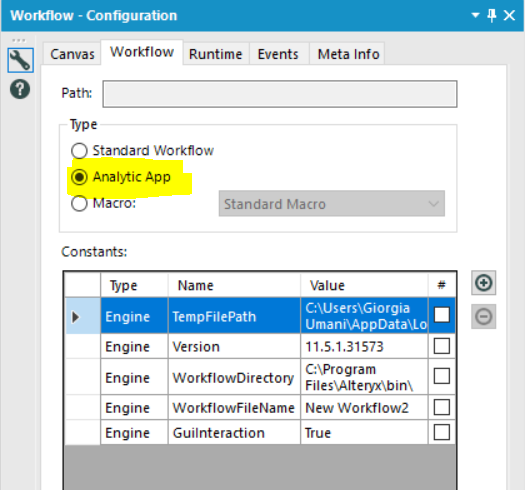
Once we change the workflow configuration, these are the steps we need to take for the first workflow:
- Select only the fields we want to keep (the one we want to see in the output)
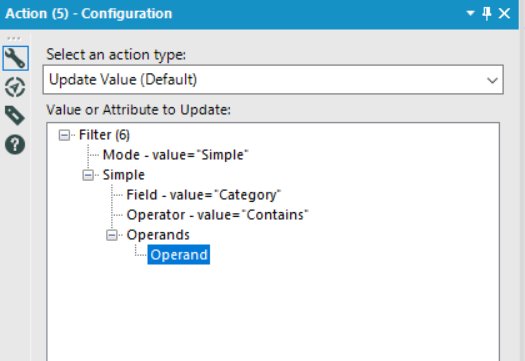
- Create a filter related to the first field we want to filter (in this case, Category) and we equal it to a blank space
- We connect the filter to a Text Box (Interface tool)
- For the first tool (Clapperboard), we setting it as follows
 5. On the second tool we type in instructions (e.g. select a Category)
Now our workflow is almost complete. Next, we need to use a Unique tool for both Category and Sub-Category and then connect it into two outcomes. The first one is going to be the input for the second workflow and the second one is going to be used for the configuration of the second Interface tool. The second outcome will need to have two fields: one called Value (Category) and one called Name ( Sub-Category). We can use a Select tool to select and rename the two fields.
Second Workflow
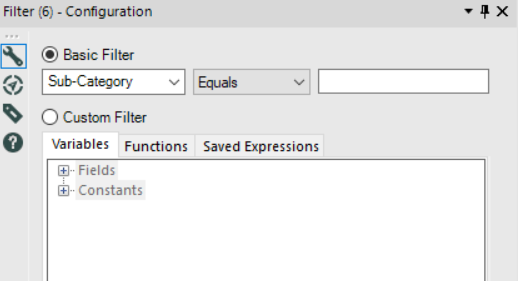
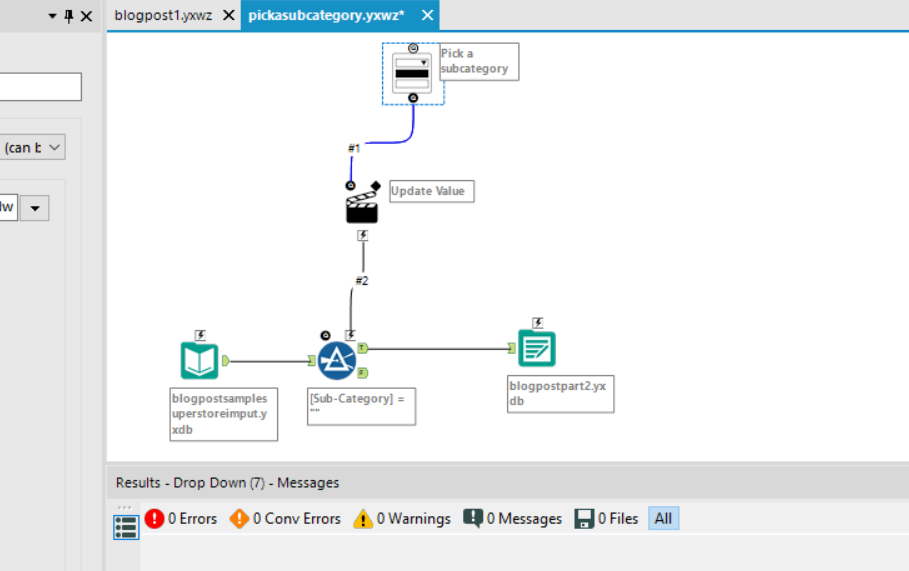
For the second workflow we are going to use the output created from the first workflow and connect it to a second filter, where we are going to equal Sub-category to a blank space and then connect it to a second Interface tool.
It’s at this point that we are going to use the second output created in the first workflow. First, we change the setting for the Clapperboard as we did in section 4, and then we change the setting for the second tool as follows.
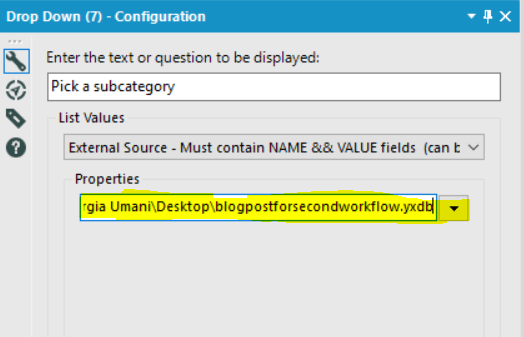
(Please use the second output created in the first workflow as the external source).
We can now output the workflow and remember to save it as we are going to use it for Interface Designer settings.
Interface Designer Settings
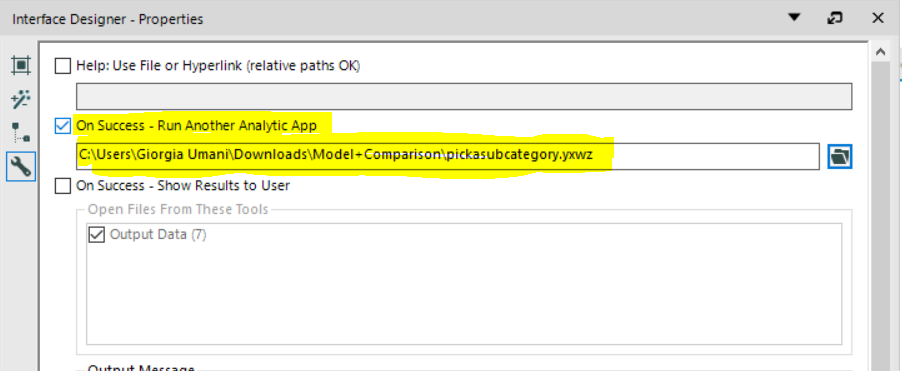
Finally, we need to change the configuration of the Interface Designer for both the first and second workflow. For the first one we need to chain the two apps together as follows.
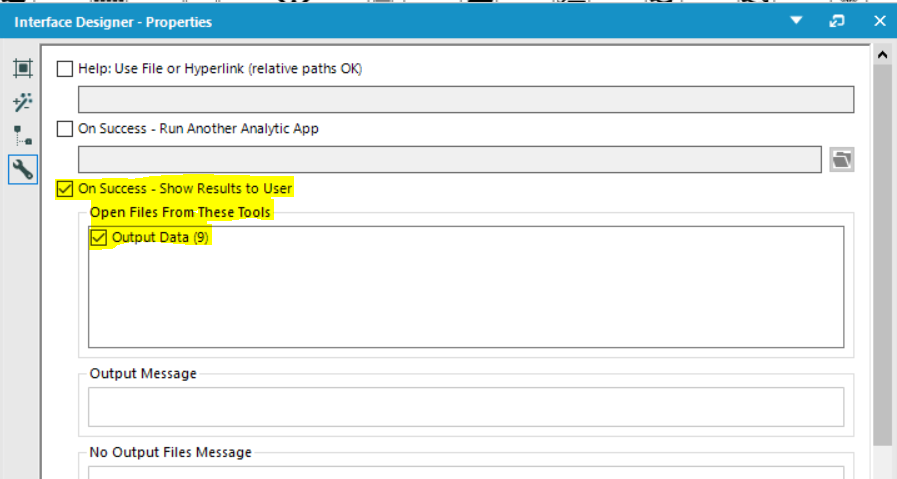
For the second workflow, we can set the Interface Designer as follows.
Now our two chained Analytic Apps should work perfectly together as shown in the video at the top of the blog post 🙂 You should be able to chain more than two apps with the same method. Thanks to Ben Moss who came to Data School for our Alteryx week !