


What is an analytical app?
An Alteryx analytical app is a workflow with a user interface – it allows the app user to execute a workflow using their own data and parameters without having to build the workflow. In this blog post I will be going through the basics of analytical apps and how to build them in Alteryx.
Rules for building analytical apps:
1. Start with a functional workflow - make sure your workflow runs with no errors before adding any interface tools
2. Decide on how your user is going to interact with the workflow before you build it - what is the user interaction going to look like? What is the user expecting to input/output when using the app?
Let's go through an example...
Question: Read in any file and sort the file by numeric or date field
Dynamically sorting of input files for users where only NUMERIC and DATE fields are allowed to be selected from a drop down. Both Ascending and Descending should be allowed for sorting, with Descending as the default value.
Step 1:
Create a simple workflow - input data file 'Scholarships database 2018', sort by 'application deadline' field and then browse the output.

Step 2:
Now we need to change the workflow to make it an App - we do this using the Interface Tools:

The first part of the question is to enable the app user to input a data file. To do this we need to use a File Browse tool - when we connect this to the Input Data tool, an Action tool appears between them. Now we need to configure the File Browse and Action tools.
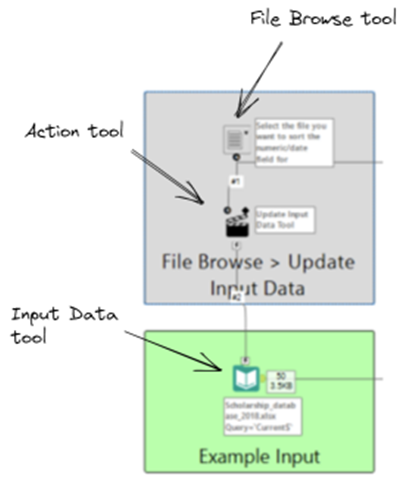
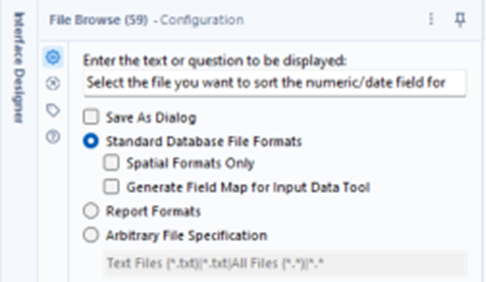
For the File Browse tool, we need to rename the tool to let the user know what the tool is used for, and select 'Standard Database File Formats'.
For the Action tool, we want to update the input data tool so we select 'Update Input Data Tool (Default)' from the 'Select an action type' dropdown. We also want to make sure that 'Required' is selected as we require the app user to select a data file.

The second part of the question is to enable the app user to sort the file by numeric or date field. To do this we need to use 2 Drop Down tools – one that it connected to the File Browse Tool and Sort Tool, and one that it connected to only the Sort Tool. When we connect the Drop Down tools to the Sort tool, an Action tool appears between them. Now we need to configure the Drop Down and Action tools.
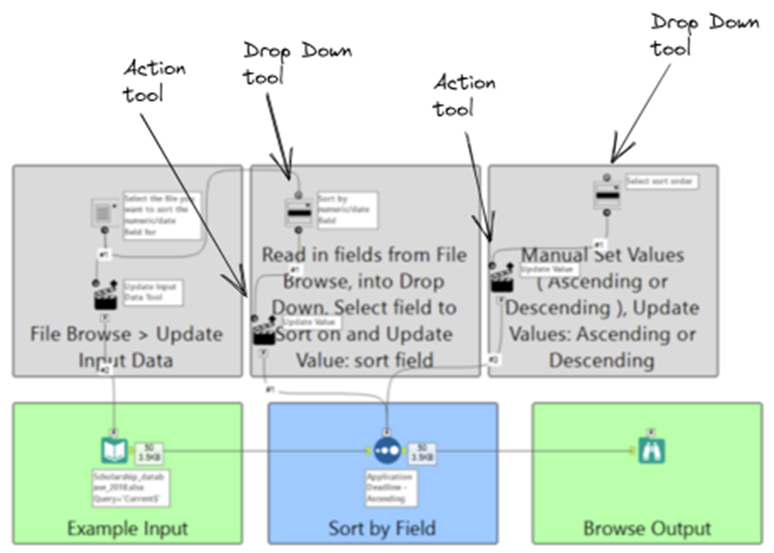
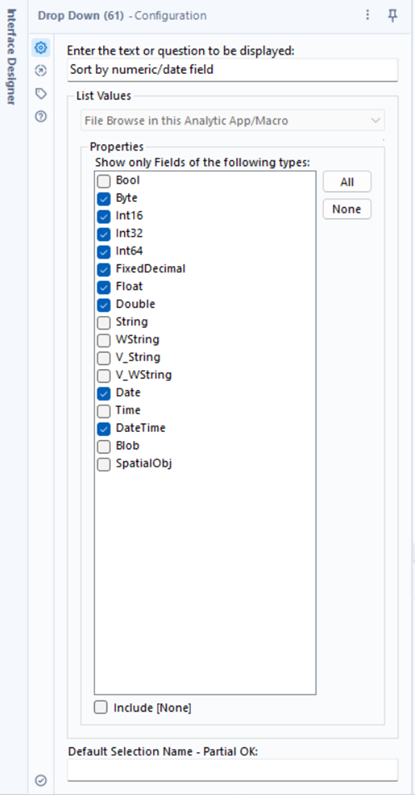
For the first Drop Down tool, we need to rename the tool to let the user know what the tool is used for, and we need to select the required data types under the ‘Properties’ window as we are only interested in numeric and date fields.
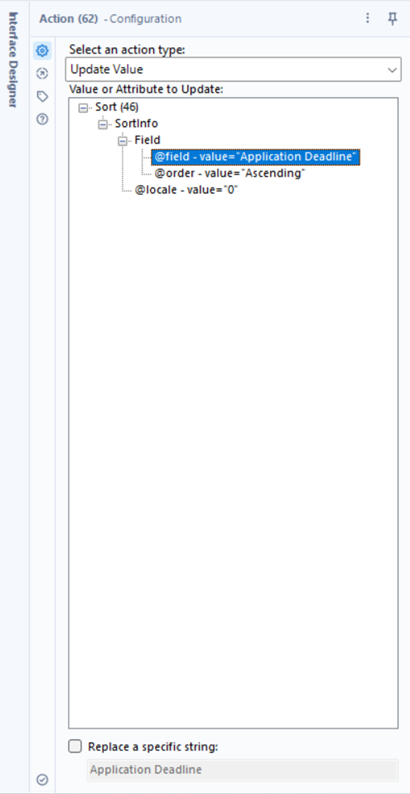
For the first action tool, we need to update the value in the Sort tool so we select ‘Update Value’ from the ‘Select an Action Type’ dropdown. We also select ‘Field-value’ which refers to the field we’re sorting by (hence why ‘Application Deadline’ shows up in the greyed-out box in the bottom).
For the second Drop Down tool, we again need to rename the tool. We also need to select ‘Manually set values (Name: value – one per line’ from the List Values dropdown and enter ‘Ascending’ and ‘Descending’ in the ‘Properties’ window as we want the app user to be able to sort the data by either ascending or descending.

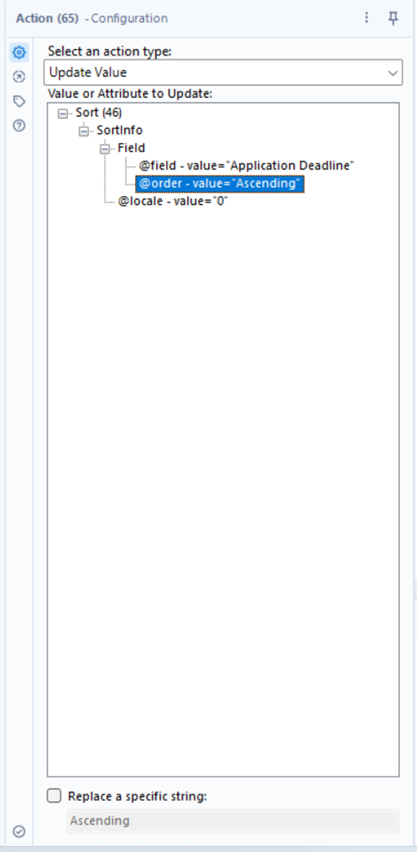
For the second Action tool, we need to update the value in the sort tool so we select ‘Update Value’ from the ‘Select an Action Type’ dropdown. We also select ‘Order-value’ which refers to the order we’re sorting by (hence why ‘Ascending’ shows up in the greyed-out box in the bottom).
That's it. Alteryx automatically updates the workflow, making it an “Analytical App” (with the .yxwz file extension), which we can see in the workflow configuration window. We can then save this workflow and run it. We can then choose ascending/descending and choose if we want to open the resulting output file.
