Often on a dashboard in Tableau there is not enough space to display all the levels of detail in your dataset. Users will also prefer to see a less granular level of detail before looking into what is driving the trends by investigating the underlying data.
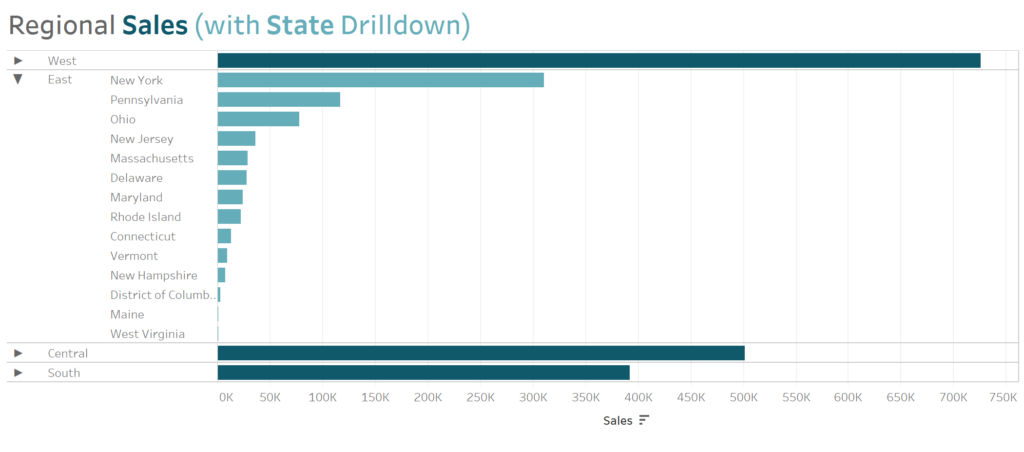
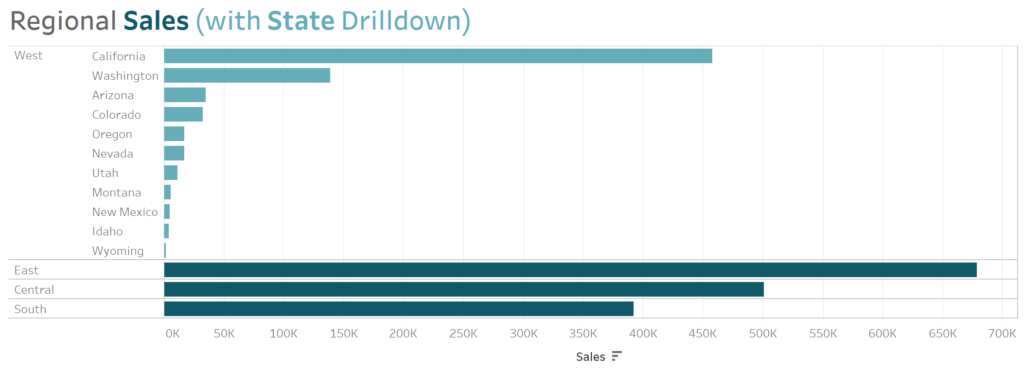
Both of these problems with data visualisation can be solved using a Set Action drilldown. The marks can be clicked on at the less granular level of detail to reveal the more granular level of detail:
What is a Set Action?
Similar to a Filter Action, which Tableau users may be more familiar with, a Set Action allows users to click on marks on a chart to affect the view. In the case of Filter Actions, clicking on a mark filters the data on display. A Set Action allows a user to change the members of a set by clicking on a chart.
How to build a Bar chart drilldown:
Firstly, drag your less granular level of detail onto the view, in my example, this is Region which is plotted against Sum(Sales):

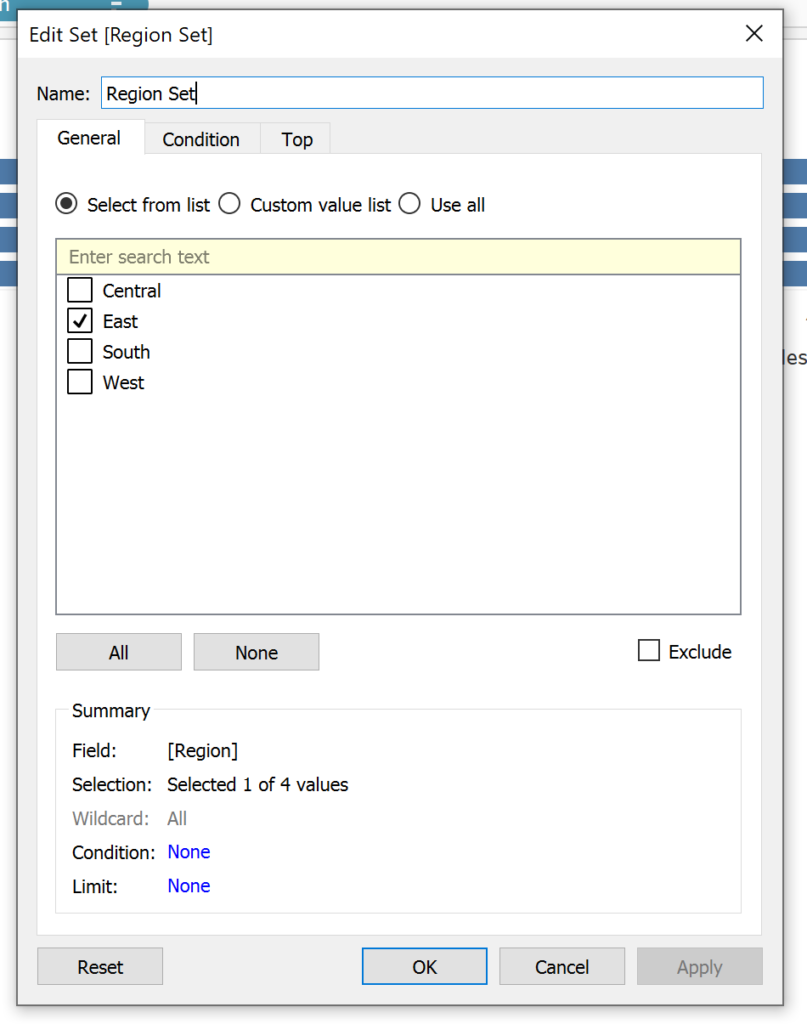
Then create a Set from the Region Field (East is selected arbitrarily):
Next, write out an IIF statement:

This says, if the Region is in the Region Set, then show the States (in that Region). If the Region is not in the Region Set, then show a blank. In my example below, because West is in the Region Set then States within the West Region are shown. All other Regions show a blank because they are not in the Region Set
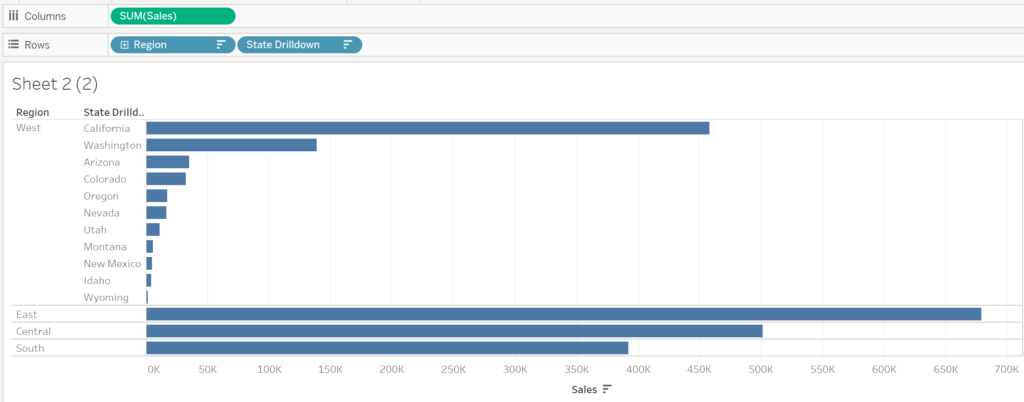
Now we are almost there except the Region Set is not dynamic, it is controlled by a manual selection (of the West Region in the example above). We want to click on a Region and that Region to be added to the Region Set so that its States are shown. This is where Set Actions come in.
Under the Worksheet tab at the top of the screen, select Actions > Add Action > Change Set Values. The configuration below could be read as “when I click on a Region on Sheet 2 (3), update the Region Set by adding that Region, when I click on a mark that isn’t a Region, clear all values from the Region Set”.
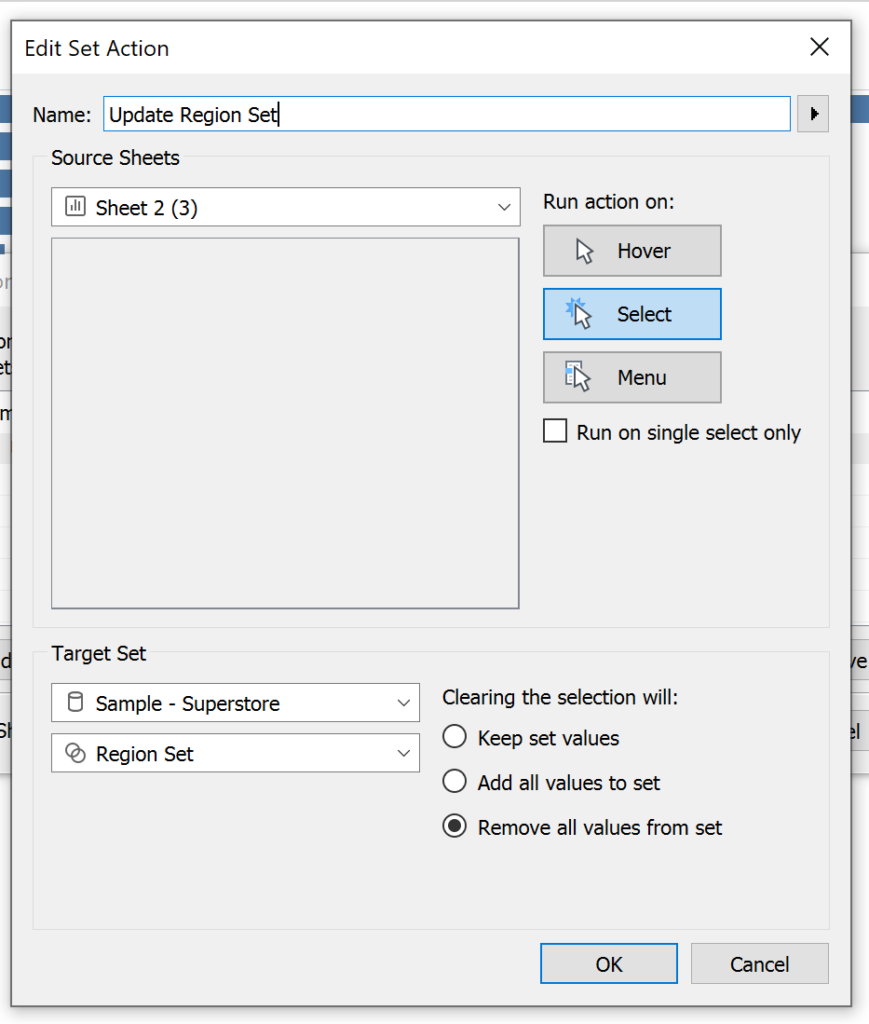
Now the Bar Chart drilldown is working. When we click on a Region, it is added to the Region Set, according to the Set Action. The IIF statement shows the states for the Region selected as it is in the Region Set.
Dragging Region Set to colour and hiding field labels for rows finishes the view:
Formatting your Bar Chart drilldown:
The second part of this blog lays out some neat formatting tricks that the coaches at the Data School have shown us. These take the Bar Chart drilldown further from a design point of view.
Showing the maximum for the underlying data

This trick encourages the user to investigate the underlying data within the drilldown. This is done by showing the State with the most Sales within each Region within the tooltip.
To build this we need two calculated fields, the first is a nested LOD expression:

This should be read inside out – the first part (highlighted in yellow) adds up sales for each State within each Region. The outer part could be read ‘for each Region, return the maximum value for total Sales for a single State within the Region’. Overall this shows the sales for the highest selling state in each Region.
Secondly an IF statement is required that returns the highest selling State in each Region. Therefore, our statement should read, if the State’s Sales equals the maximum Sales of the States within the Region, then return the State’s name:
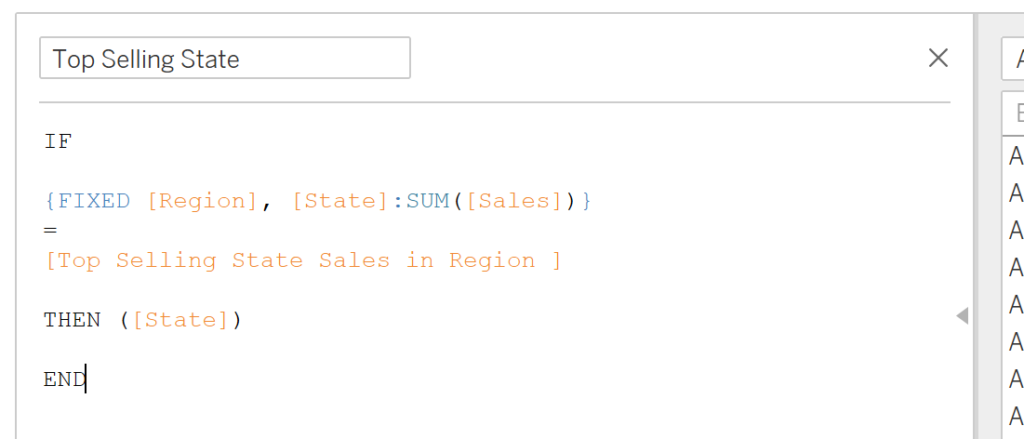
Wrapping the above expression in a Window_Max ensures the Top Selling State in the region is returned for each State’s tooltip when the user drills down into the State level:

Finally, Window_Max Top Selling State is dragged onto the Tooltip icon of the Marks card and computed using Pane (Down). The tooltip can be formatted to show the Top Selling State within the Region and its sales.
Drilldown arrow headers

To introduce drilldown arrow headers to your view, write the following IF statement:

This statement says, if the row is in the Region Set (ie expanded and showing all the states within it) then show a down arrow. If the row is not in the Region Set then show a right arrow. Drag this Calculated Field to the view to the left of Region. Finally, to make one arrow per Region, duplicate the Region field and drag the copy to the left of Rows.
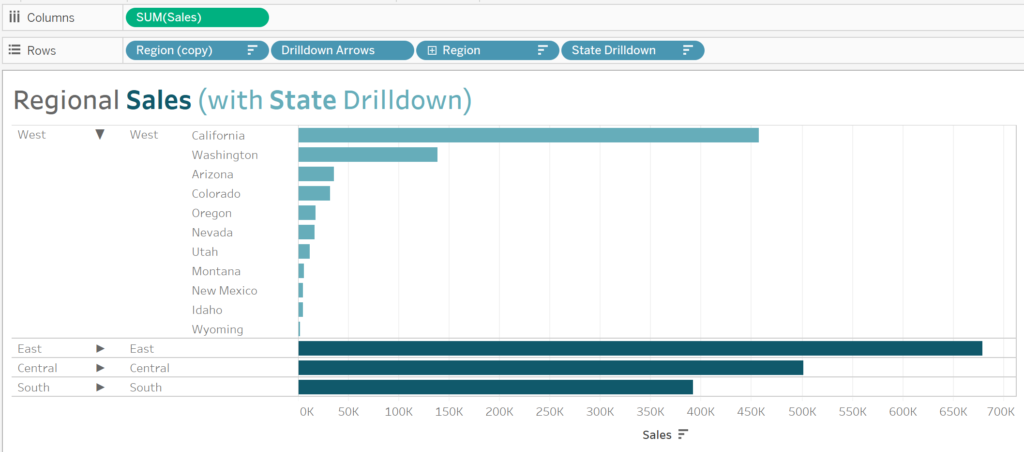
Uncheck ‘Show Header’ for the Region (copy) field – your drilldown arrow headers are now complete.
Vertical Region Headers
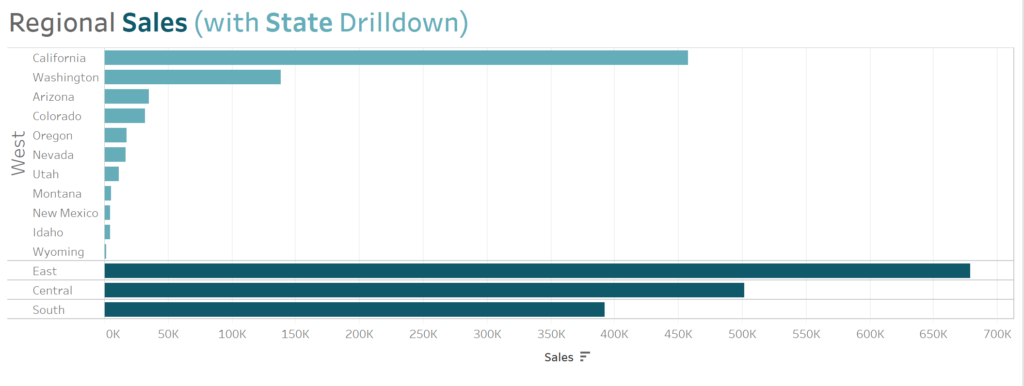
To create Vertical Region Headers, our Calculated Fields on the view change slightly. Notice how both the unselected Regions and the selected Region’s States are in the same column. Our State Drilldown Field needs to show the State if the Region has been selected or the Region if the Region has not been selected (ie. Region is not in the Region Set). This updated calculation shows this logic.

Secondly create a Vertical Headers Calculated Field using the following logic which shows the Region if it is in the Region Set or a blank if not. Drag this field to the view, this will become the Vertical Header.

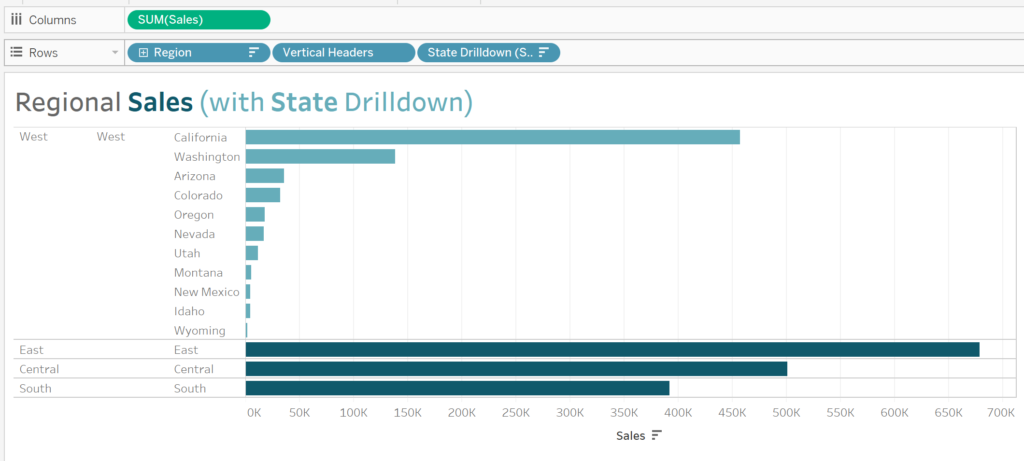
Right click and format the Vertical Header field. Under Alignment, change the text direction to Vertical. Finally, uncheck Show Header for the Region Field and you should now have a vertical header for the selected Region.
Set Action drilldown is an incredible powerful technique for allowing your user to investigate underlying data at more granular level of details. The examples above outline how to build a drilldown for bar charts however, in addition, this logic can be extended to almost all other chart types! Thanks for reading.
