


Tableau’s Layout Containers are not always the most intuitive, and I am probably not the only person who has simply dragged worksheets onto a dashboard until they look about right.
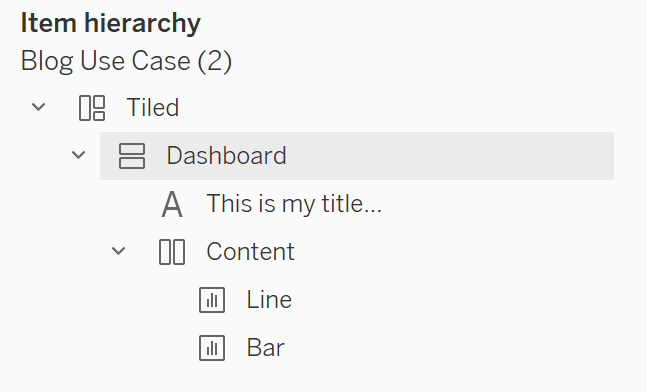
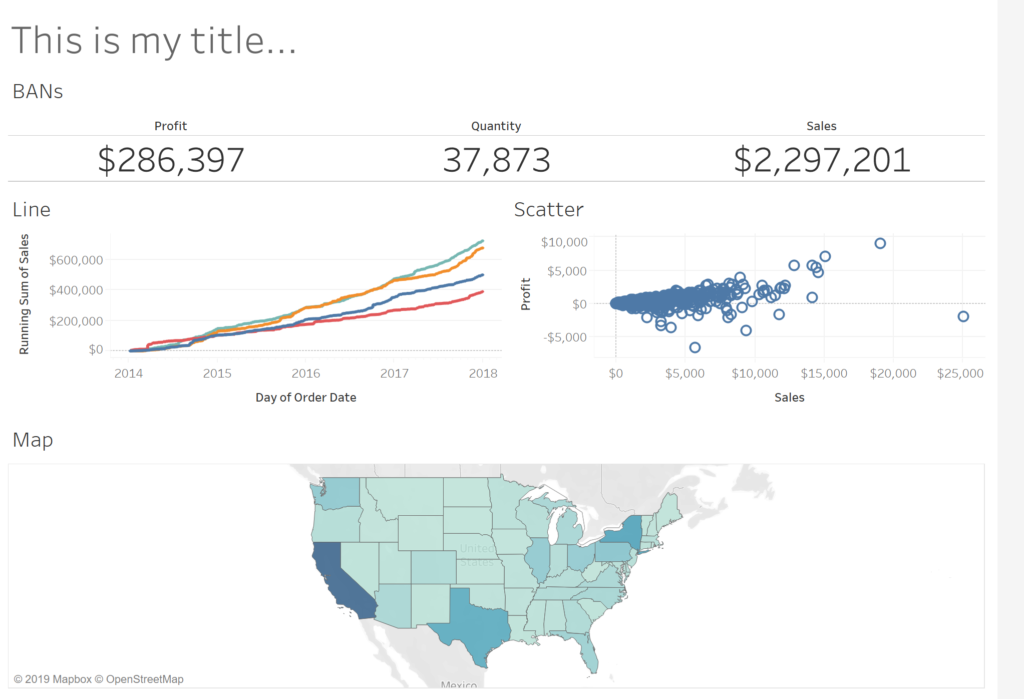
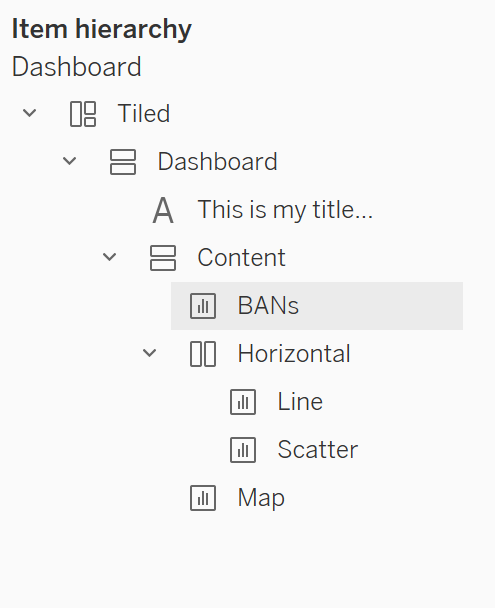
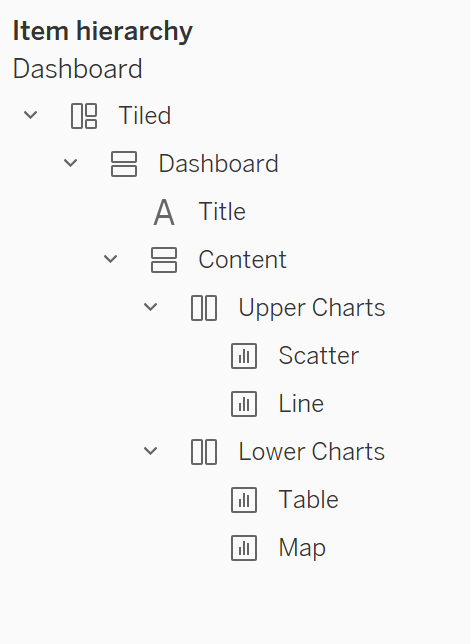
The problem with this comes later on when trying to align worksheets or bring more worksheets onto the view. Often, I have found myself having to clear the dashboard and start again because it wasn’t possible to drag a sheet into the exact place I wanted. Last week at the Data School, we had a session from Jonathan on how to build dashboards in a clean way using layout containers, and how to avoid Item Hierarchies like this:
Layout Containers
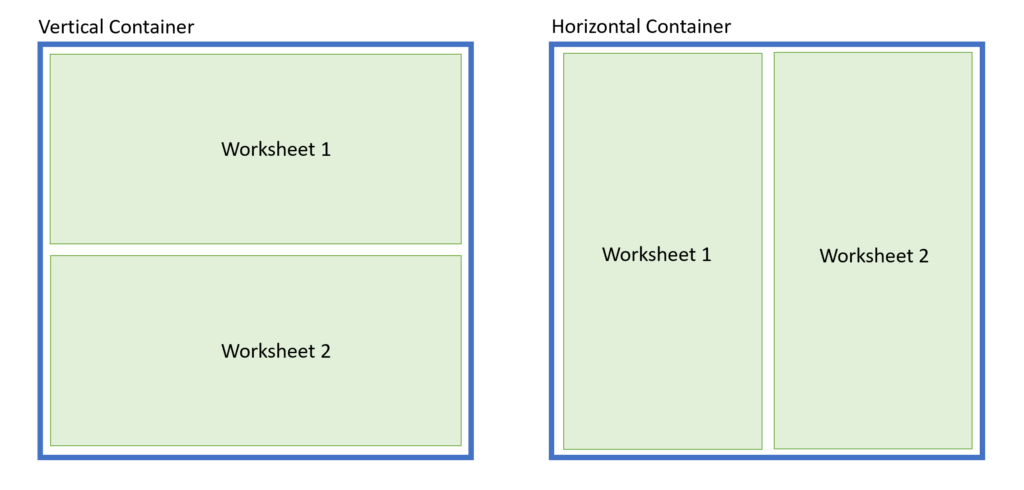
Layout Containers provide the basis for building well organised dashboards in Tableau. There are two types:
- Horizontal containers – used when you want to fill the container with objects side-by-side
- Vertical containers – used when you want to fill the container with objects top-to-bottom
How to Build a Well-Structured Dashboard Using Layout Containers
The following section sets out a method for building dashboards using Layout Containers. This will build up a simple dashboard:

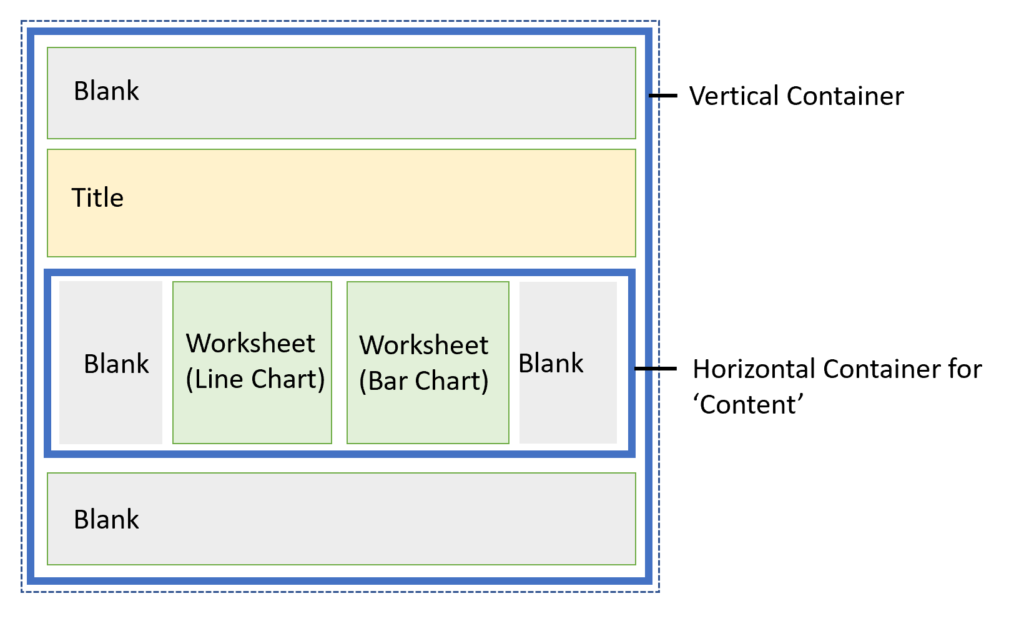
Making use of the following structure and Item Hierarchy:

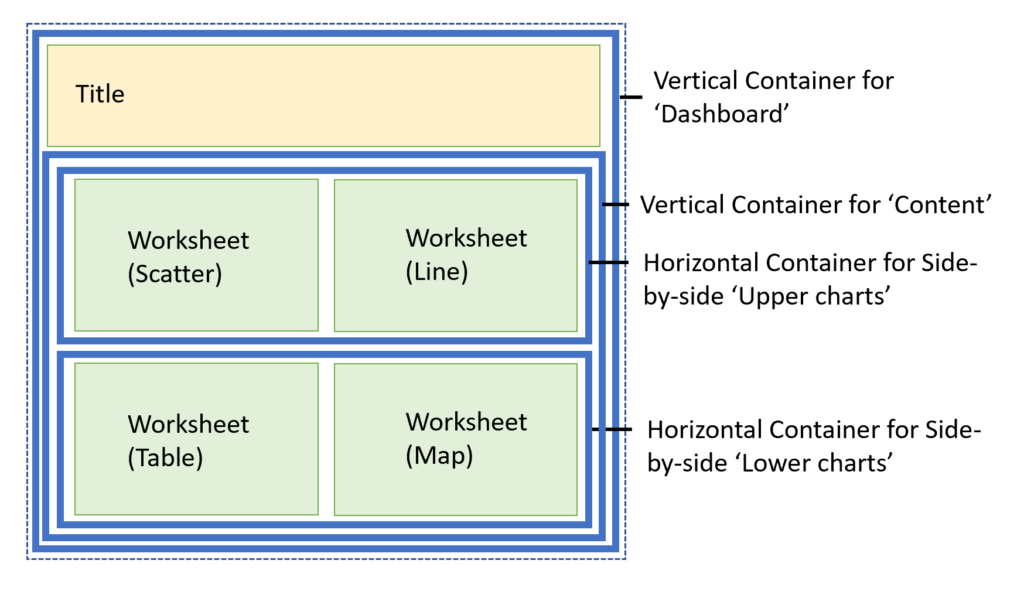
So how would we build this dashboard with a well structured hierarchy? I would use the following steps. My example serves as a use case for building more complex dashboards (see further down). So, here we go:
1. Insert Outer Container
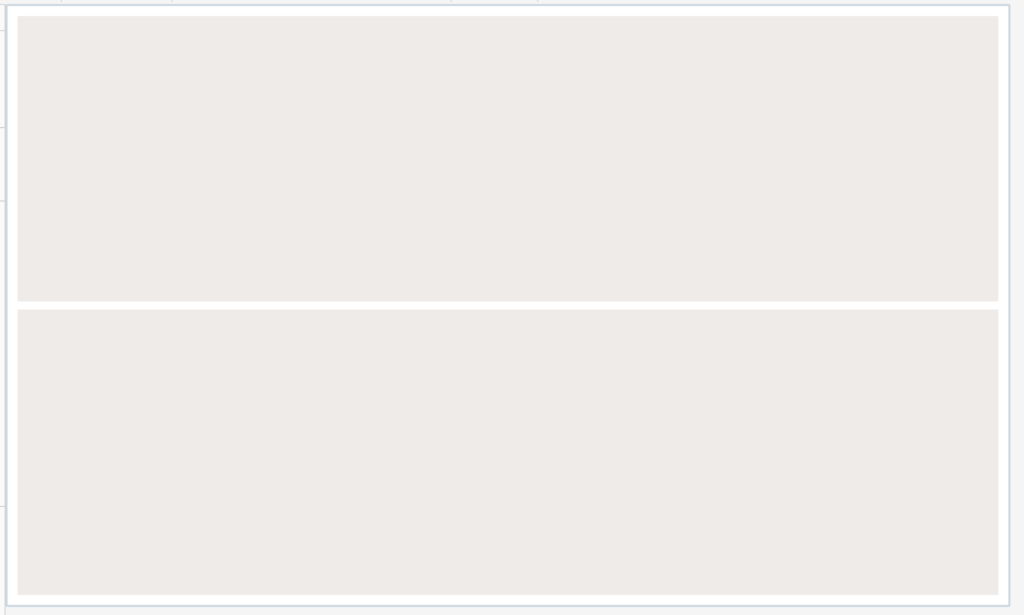
The first step is to insert a Container that will house both the dashboard title and its ‘content’. As the title will generally be above the content (stacked top-to-bottom) the first step is to drag a Vertical container to the view.
Every time we drag a container onto the view, the next step is always to populate it with two Blanks in the stacking direction (top and bottom if vertical, left and right if horizontal). To ensure the object is within the container, make sure the dark blue container outline appears before dropping the object. Populating with Blanks makes it easy to insert further objects into the container. Using blanks will also force you to stack sheets according to the container type (i.e. top-to-bottom or side-by-side). Finally, using blanks makes it easier to place and reorder sheets within the container.
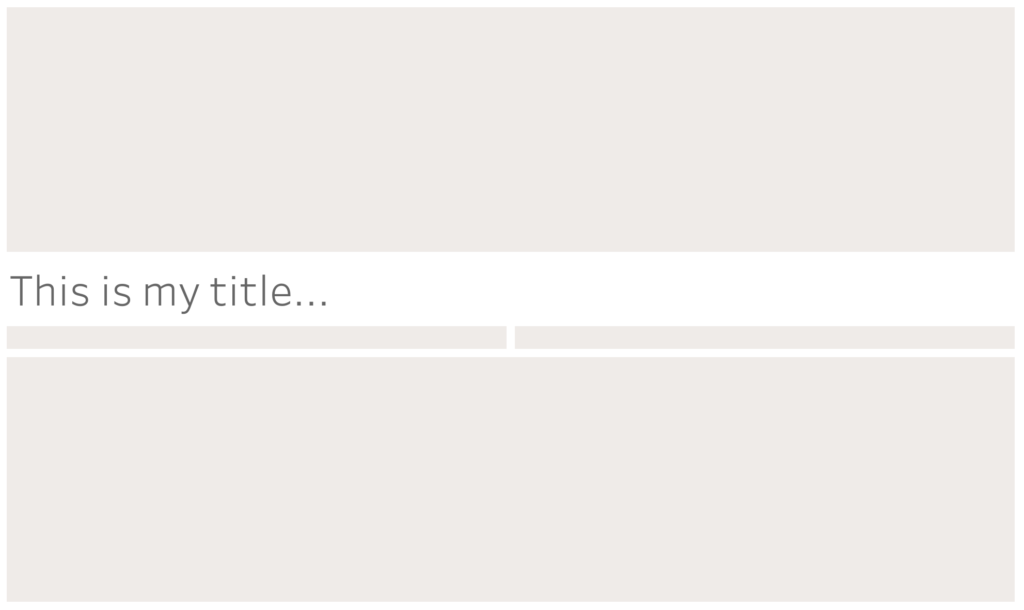
The final output of this step should look like this (Blanks will not have a background by default, they have been manually coloured here):

2. Insert Dashboard Title and Container for ‘Content’
This second step highlights how blanks act as placeholders, making it easy to populate a container. Drag a Text object to the centre of your outer container. It should automatically position itself between the two blanks. This will be the Dashboard Title so write your title in the text box.
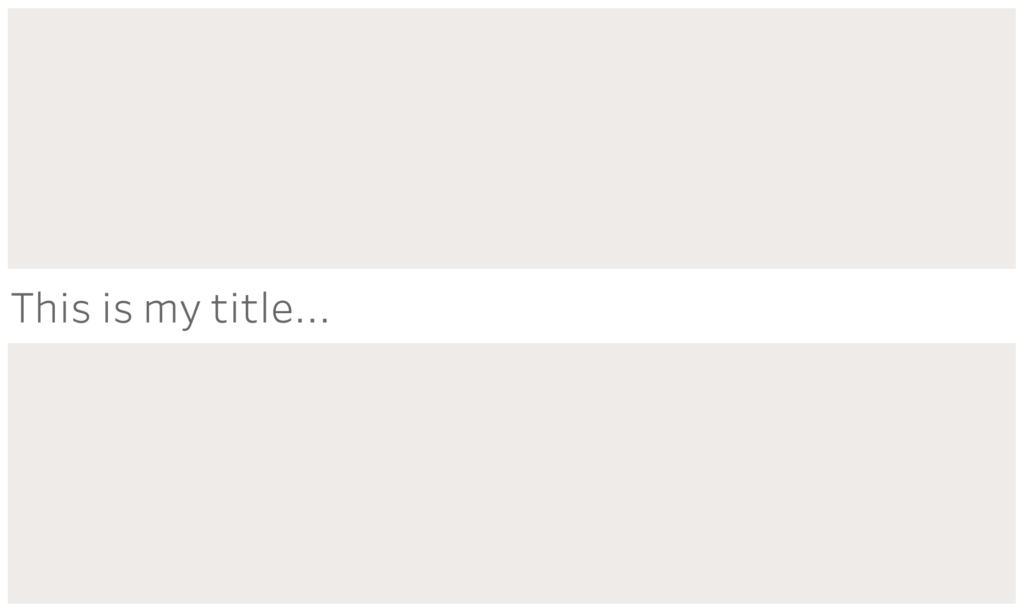
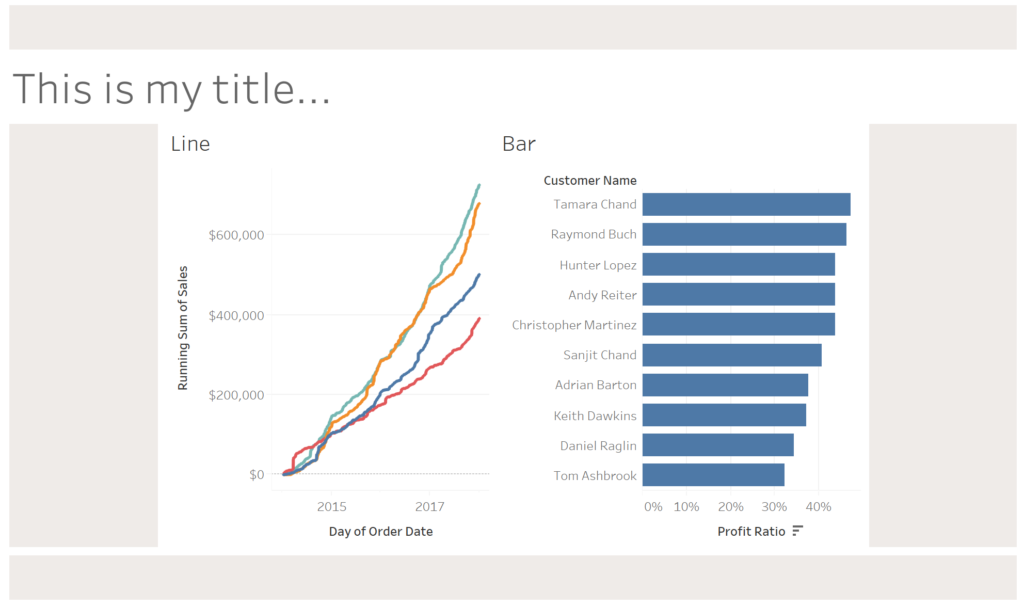
Then, between the title and lower Blank, add a Container that will contain any worksheets on the Dashboard (ie. the content container). I want two charts side-by-side on my Dashboard so the container I chose was Horizontal. As ever, fill this with two Blanks – as the container is Horizontal, the Blanks should be side-by-side.
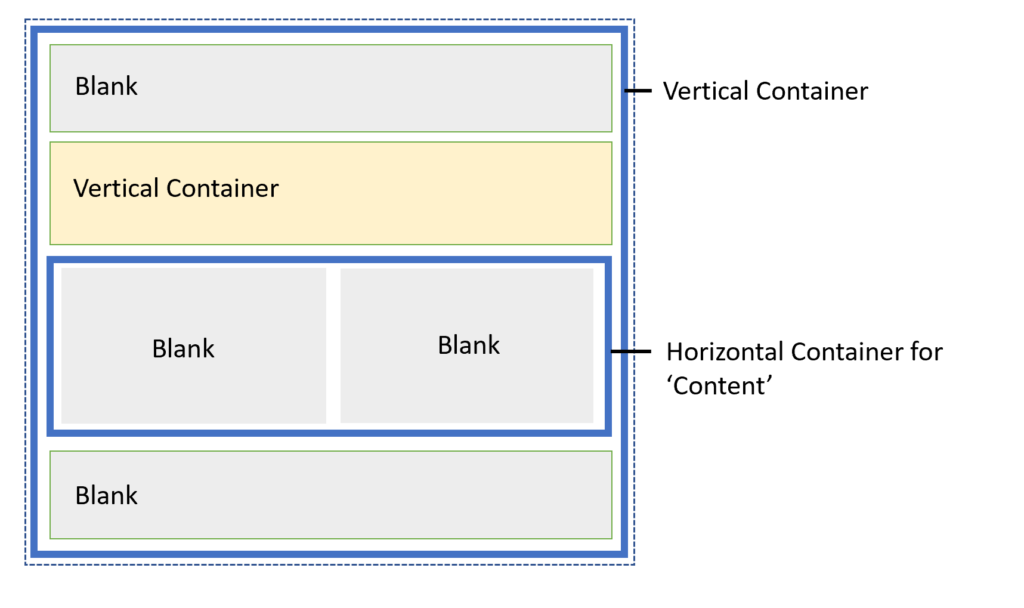
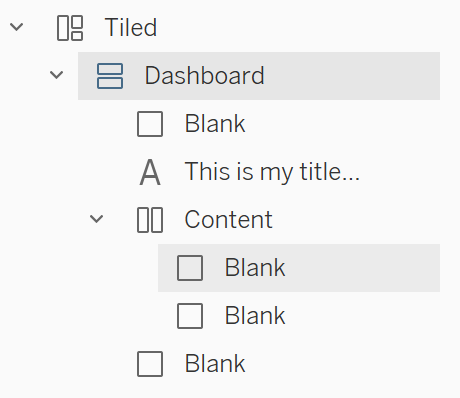
Now is a good time to start looking at your Item Hierarchy which appears at the bottom of the Layout tab on the left of your screen in Tableau. We can rename every container by right clicking on the container and selecting ‘Rename Dashboard Item’. This helps keep track of the objects on the dashboard. I renamed my outer vertical container as ‘Dashboard’ and my inner horizontal container as ‘Content’.
3. Populate Content Container with Worksheets
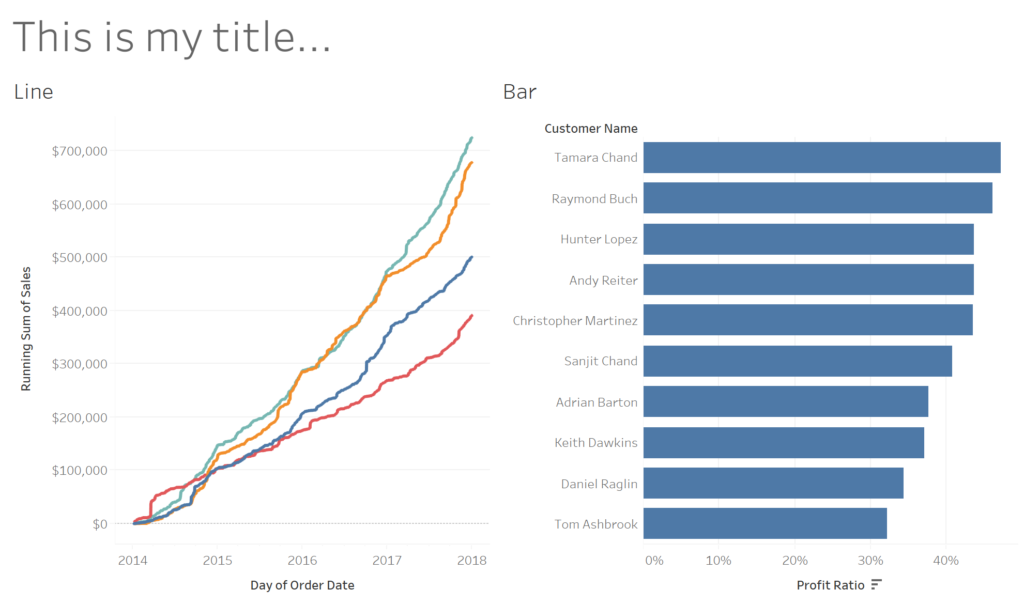
Drag further objects into your Content Container. In this simple example, I just want two side-by-side worksheets so they are dragged between the blanks. If you have a more complex design in mind, more containers will probably be needed within the Content container (see my further examples below).
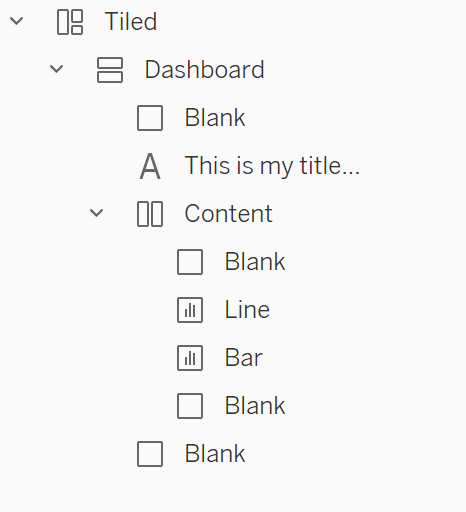
4. Delete Blanks
At this point, your dashboard is probably looking quite unusual because Blanks are filling a lot of the space. The final stage is to click through them and remove them from the dashboard. I would recommend doing this for each container, deleting both blanks then moving on to the next container. This ensures none get left behind.

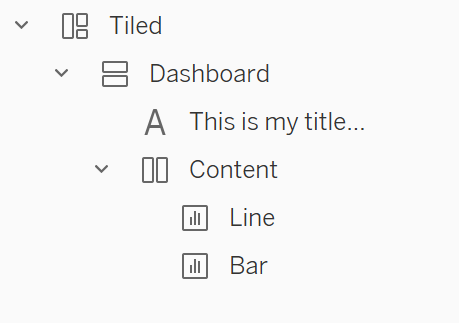
An alternative approach is to delete blanks as you go along. This can be effective if you know your target final structure. However, if you would like to experiment with different layouts, it may be easier to leave blanks in until the end as I have done here.
And there you have a simple dashboard with a well structured Item Hierarchy. All content sits within the ‘Dashboard’ container, all worksheets sit within the ‘Content’ container. This simple example highlights the use of Blanks and the choice between Vertical and Horizontal containers as well as how to keep on top of your Item Hierarchy by renaming objects. Take a look further down at some more complex dashboards that could be built up using more Layout Containers.
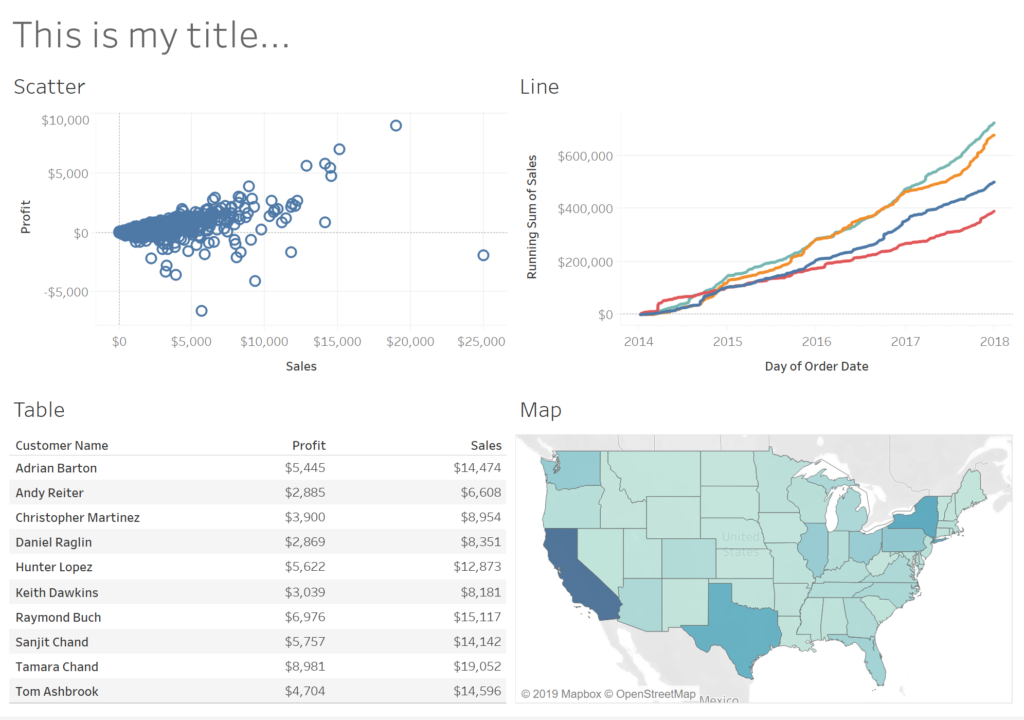
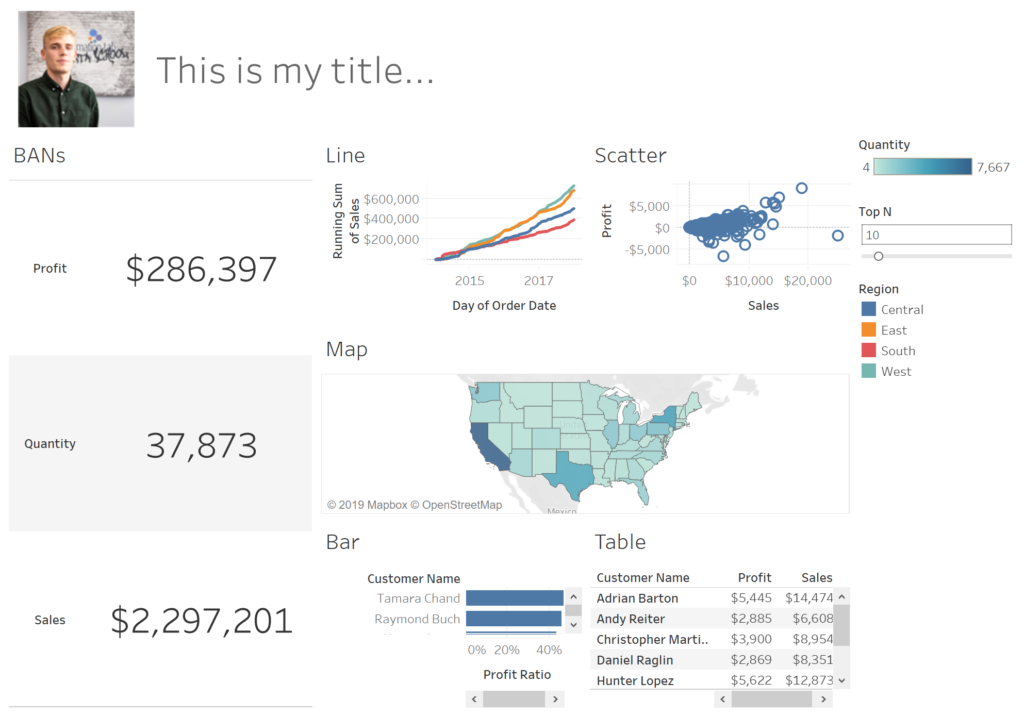
More Complex Dashboards
Example 1:

Example 2:
Example 3:

The collapsed Item Hierarchy showing only the containers:
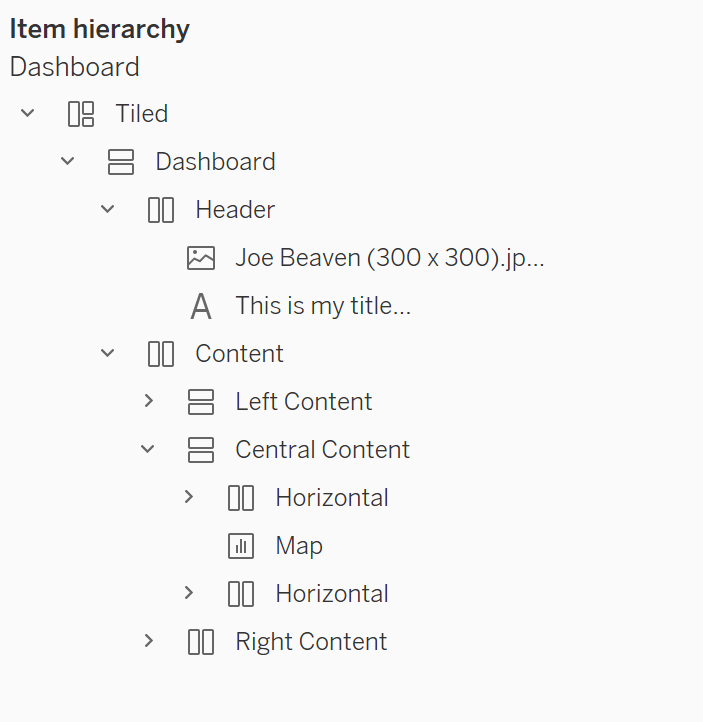
The complete Item Hierarchy:
A note about Legends, Filters, Highlighters and Parameters
Legends, Filters, Highlighters and Parameters always populate a separate container to the right of the dashboard when a worksheet is dragged onto a dashboard. The container they are shown in can be dragged within your any containers on your view.
When Legends, Filters, Highlighters or Parameters are first brought onto the view, they also create a larger layout container that contains any content on the view and the new container for the Legends, Filters, Highlighters or Parameter. This larger container should be deleted by right clicking on it, in the item hierarchy and clicking ‘Remove Container’
Final thoughts
In general, my advice on building a dashboard using layout containers would be
- Think about your layout container structure before attempting to build a dashboard
- Always populate with blanks first
- Rename your layout containers in the Item Hierarchy as you go to keep tabs on your structure
Hope this helps! Thanks for reading