On Day 2 of the Data School as part of DS13, Carl Allchin continued dropping little knowledge bombs – this time in the form of a quick little map hack for displaying only the country or region you actually want. For example, if you want to display a bunch of data points that are spread around the UK, you may not want Europe or Ireland weaselling their way onto your map and cluttering it up. We want to go from this:

To this:

This may not be the best long term solution, and it becomes much less simple if you want more than one region, however it is incredibly quick if you want to throw something together without having to muddle around with custom maps and map options.
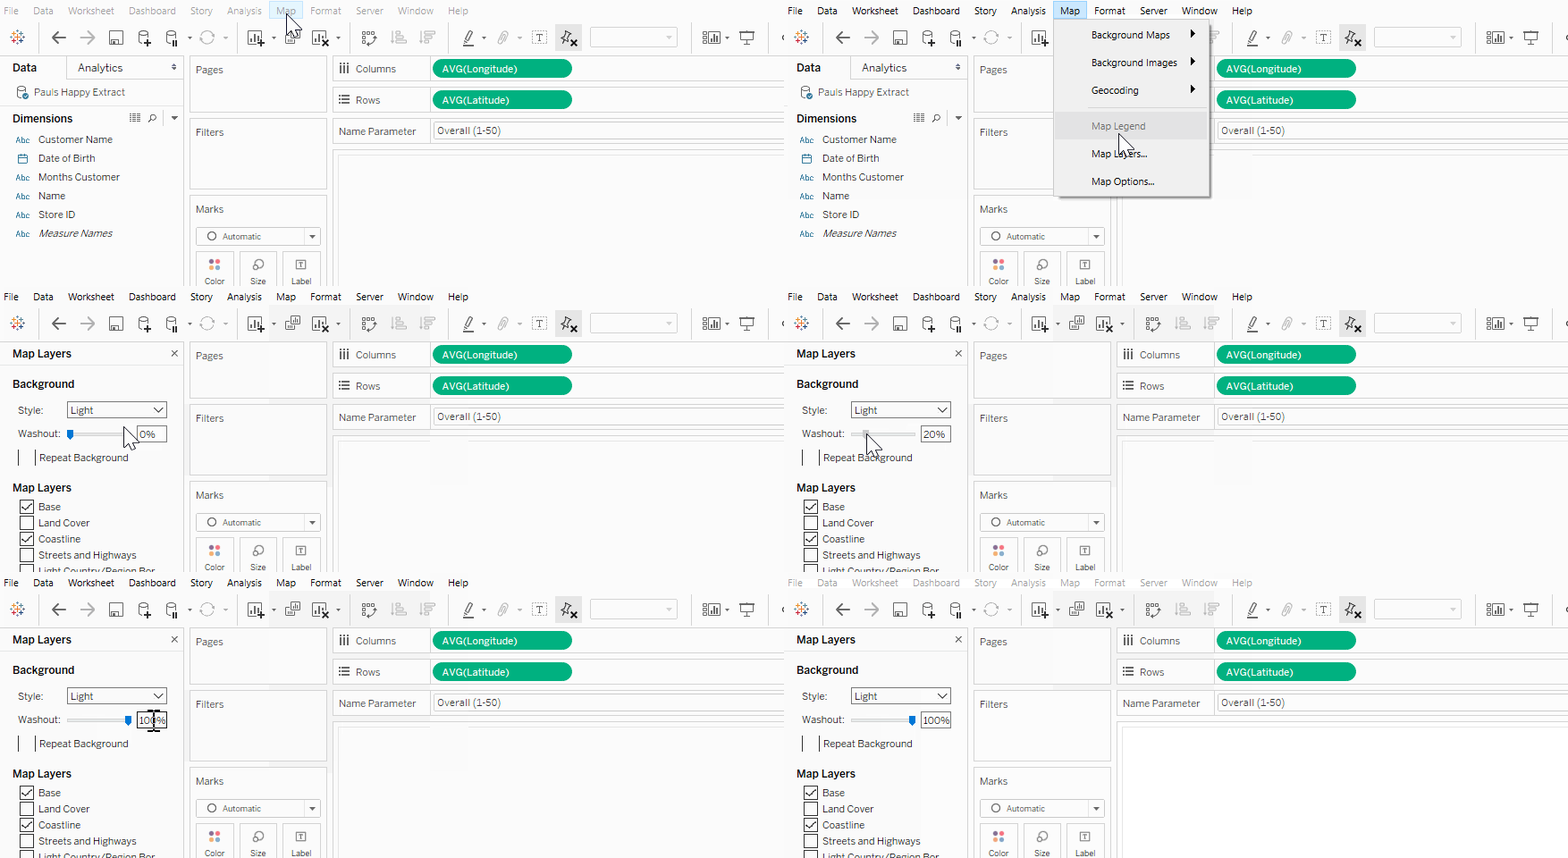
1. From a starting point of having your points plotted on the default map, go to Map > Map Layer and set the Washout to 100%.
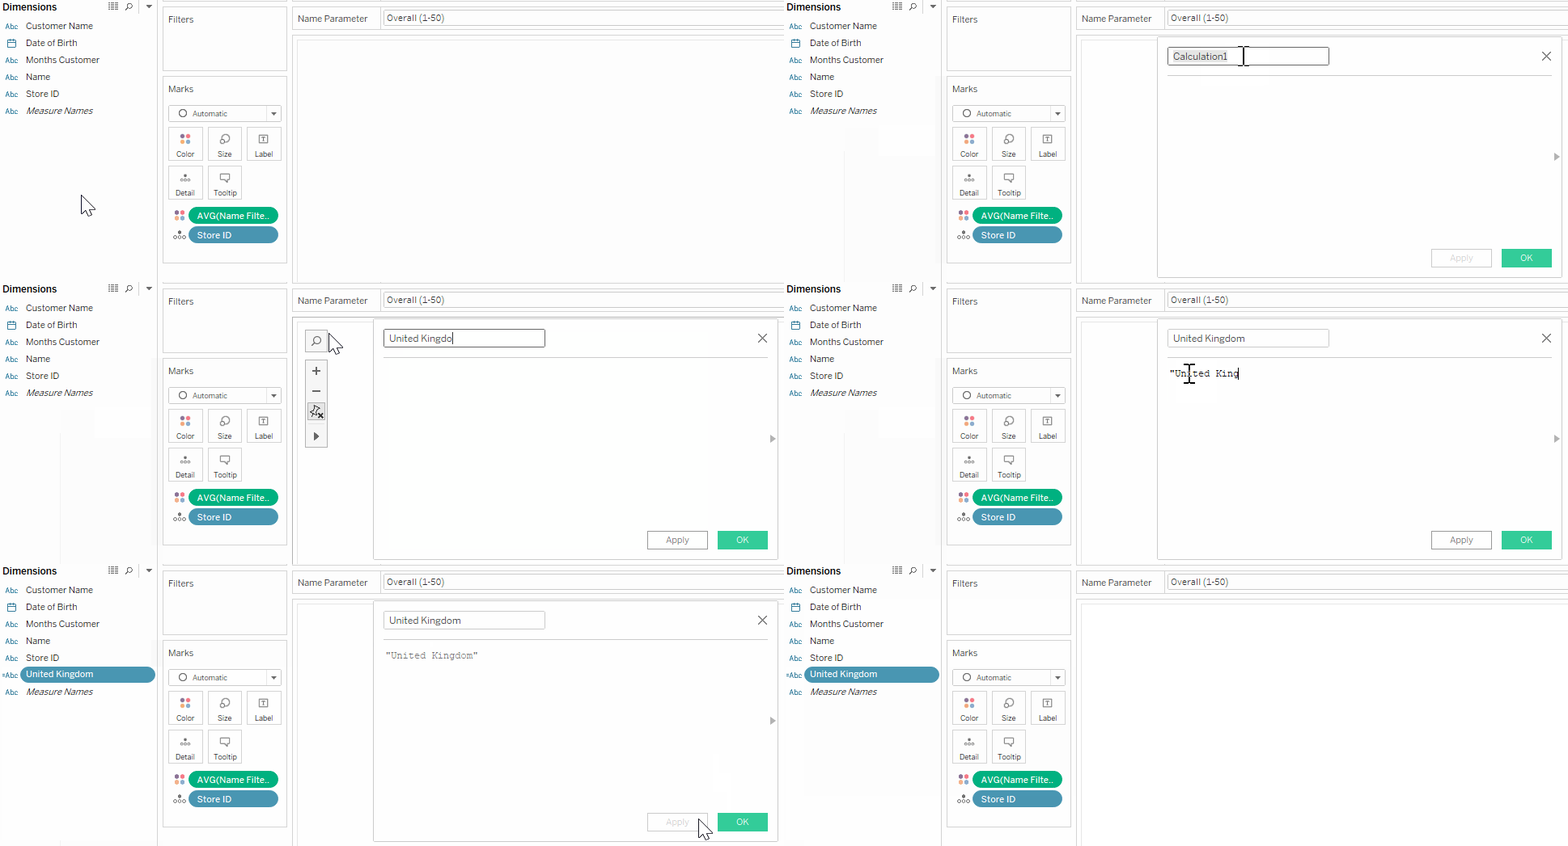
2. Create a Calculated Field that only contains name of the country you want on your map. In my example I named my custom field “United Kingdom” and contained the string “United Kingdom”.
3. Change the geographic role to the regional type for your region. In my example with would be “Country/Region”.
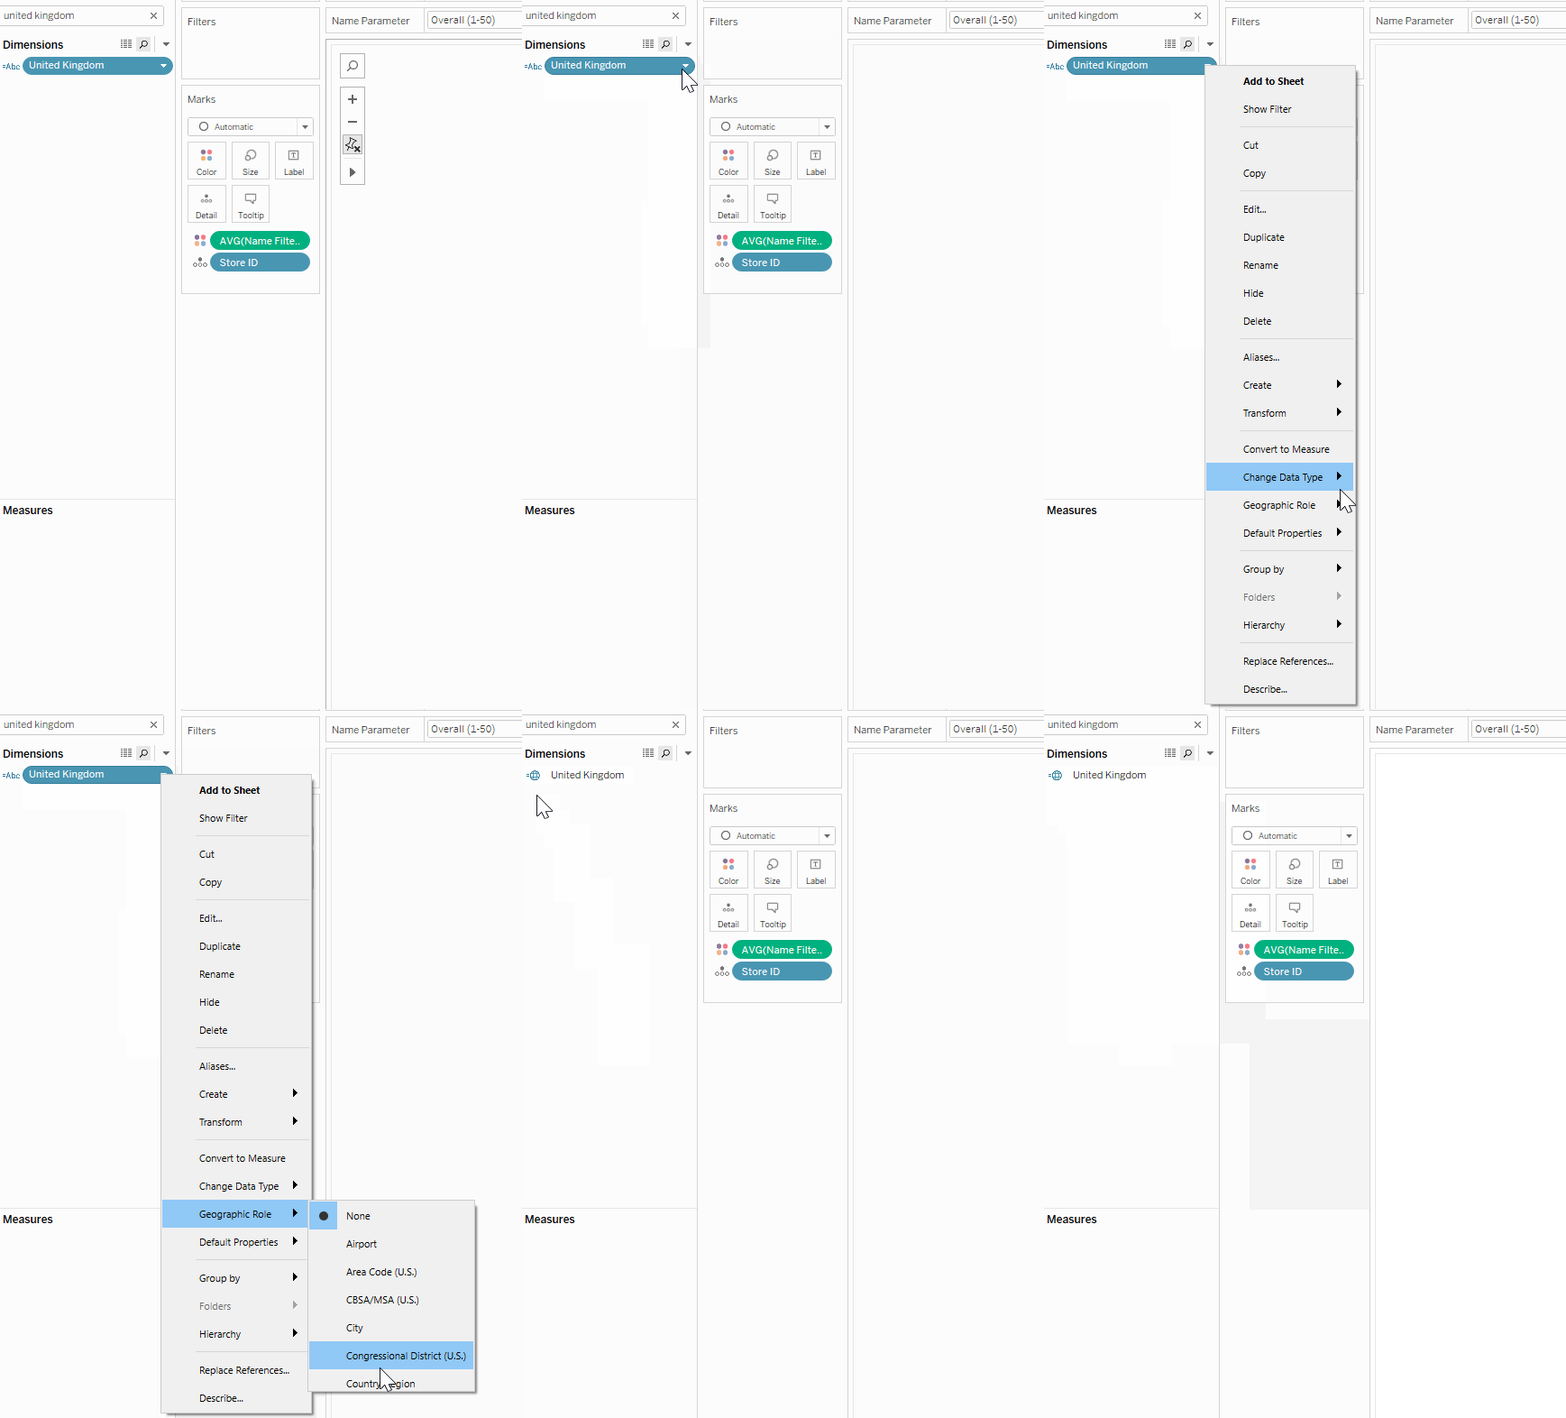
NOTE: If your data points aren’t using Generated Longitude/Latitude measures then this will create these for you – if this is the case for you then in the next step do not use these generated measures and instead use your original ones.
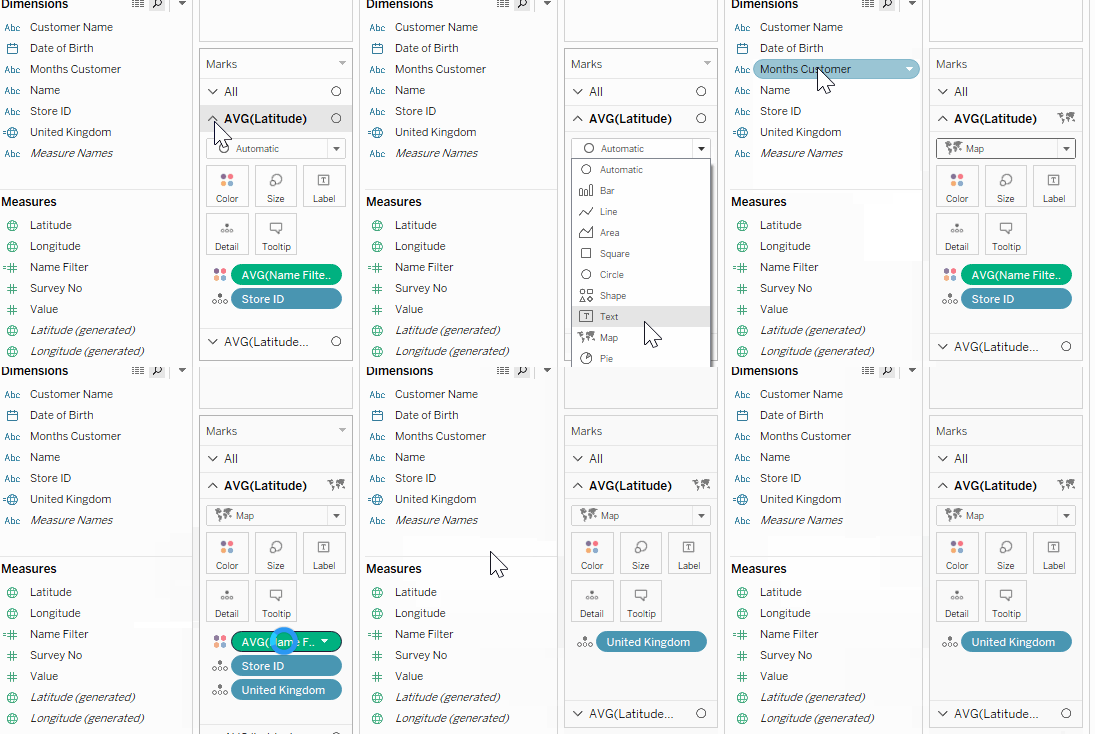
4. Drag Latitude onto the Rows shelf alongside your original Latitude pill and set it to Dual-Axis.
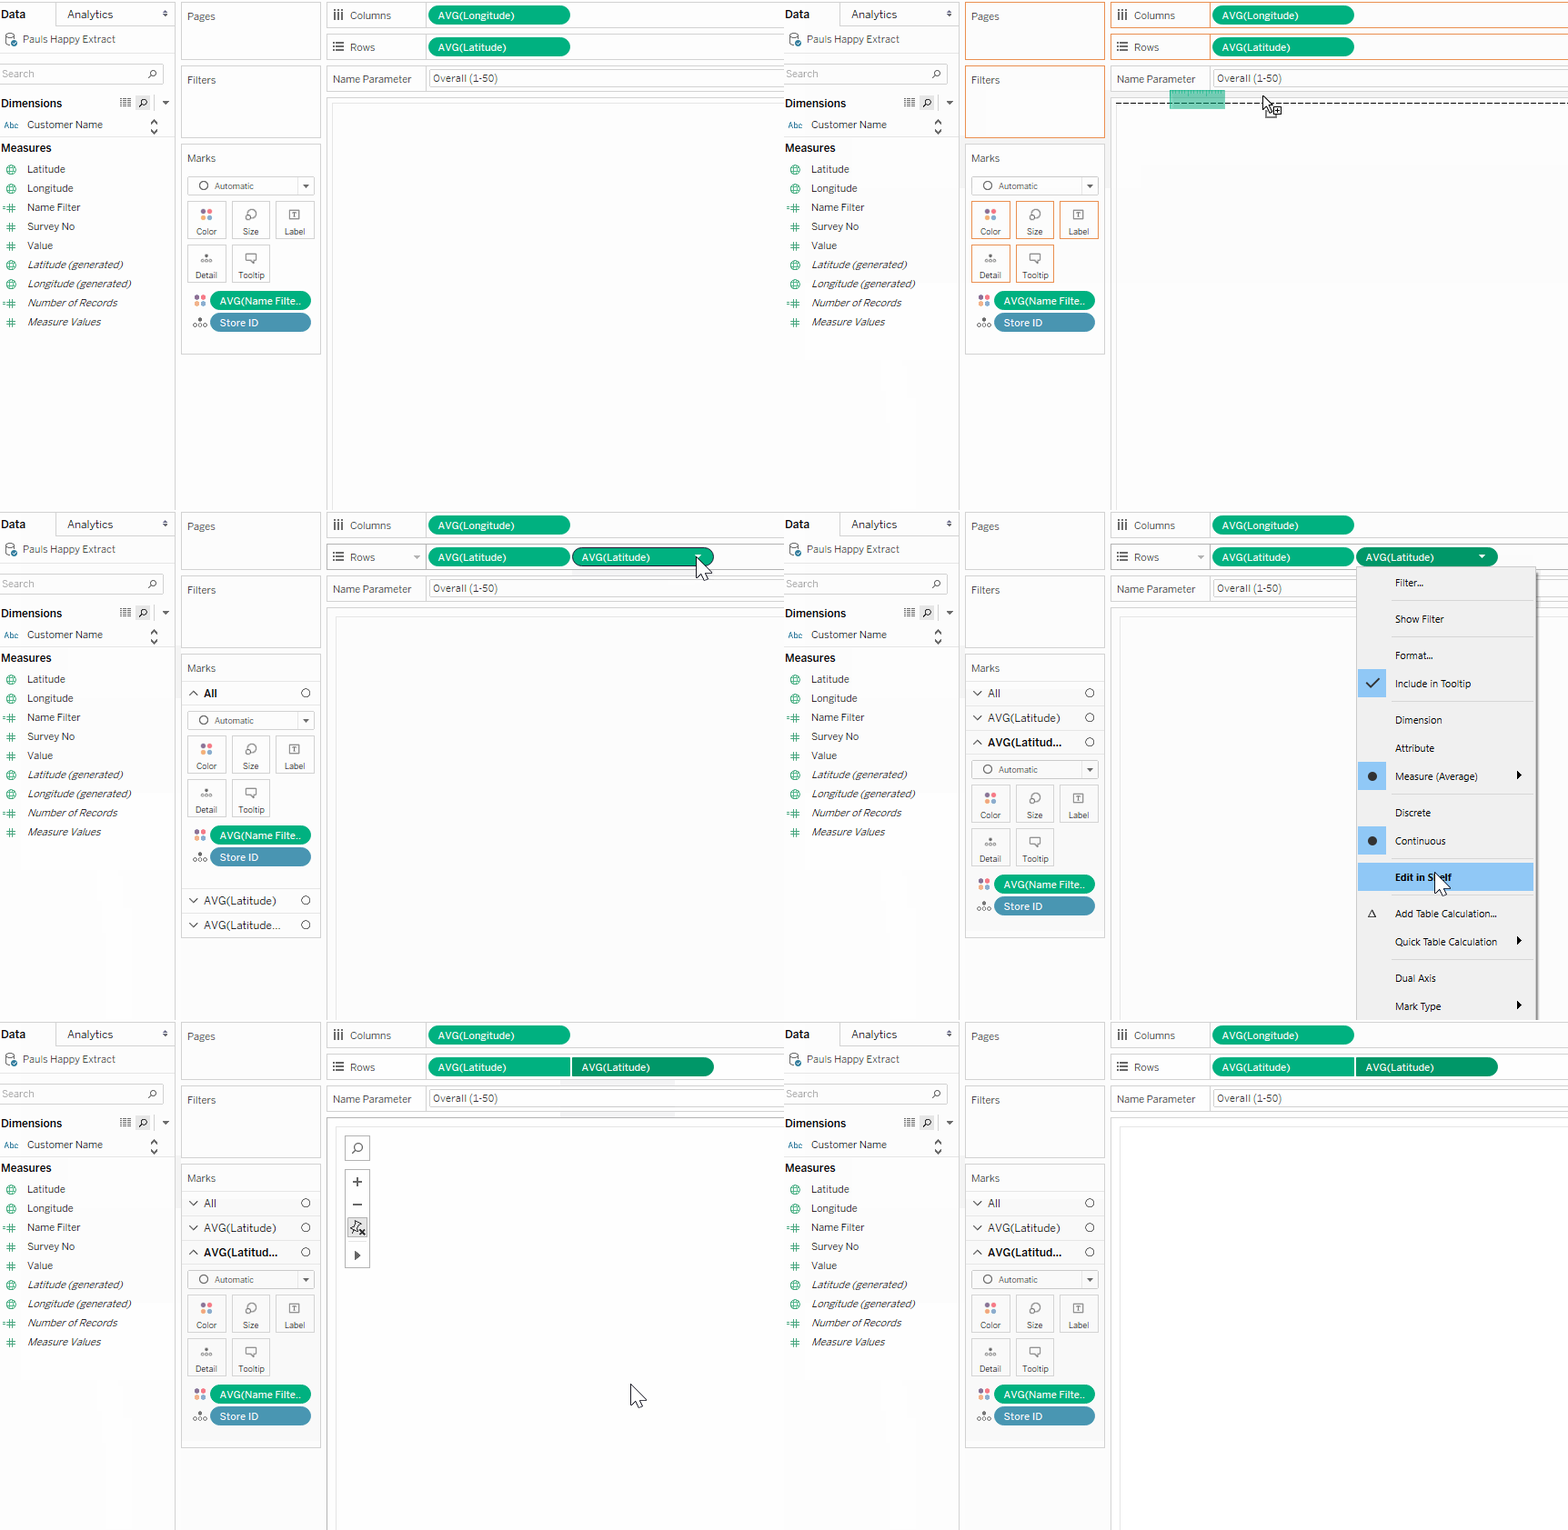
5. Change the mark type for the first copy of Latitude in the Marks shelf to Map. If you modify the second copy of Latitude on the Marks shelf your country will be laid over the top of your marks instead of underneath.
6. Set the Detail to just be your calculated field from Step 2 and remove any other settings.
You should now have a map similar to the one below which displays only the region you want! From here you can customise the map to your heart’s extent using the Color settings on the Marks shelf, e.g. to change the colour, border, opacity, etc.

