


Firstly, a quick terminology note for some terms I’ll be using from this point:
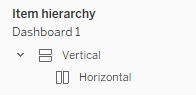
- “Parent” container: A container that has another container inside of it. In the item hierarchy, a parent container has an “V” next to it.
- “Child” container: A container that is inside another container. In the item hierarchy, a child container can be hidden when clicking the “V” next to its parent container.
- A child container and be a parent of other containers and vice-versa.
So, continuing from Part 1 I’m going to kick off the tips and tricks section of this series with what I believe is the most important tip in my mind, in terms of its impact and frequency of use in dashboard design and creation:
TIP 1: You can drop floating containers inside other floating containers.
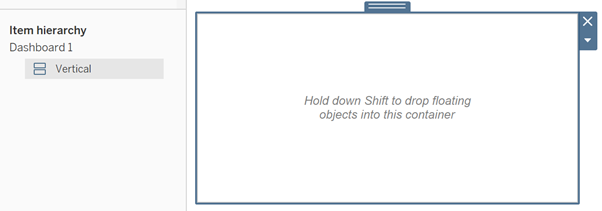
In my original post I mentioned that whilst floating containers will stay wherever you drop them, they can in fact be dropped inside other floating containers. Tableau actually gives a big hint on how to do this. As you can see below, when you drop a floating container onto a dashboard it says “Hold down Shift to drop floating objects into this container”.
When you drag a new floating container over one already on the dashboard and press shift you can see how it’ll look when dropped in the parent floating container.
As seen above, when a floating container is dropped inside another container, it fills up the available space opposed to just sitting where you left it. It also gets shown in the item hierarchy that your new container is inside the original one.
This tip will be incredibly important later when we come to building dashboards entirely made of floating containers as it allows us to treat a floating container as a “master container” that we build our dashboard inside.
An important note for this is: the legends and filters of a child container do not get put inside the parent container. Instead they get added into their own Tableau generated Tiled container.
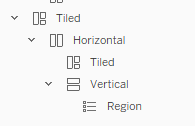
A brief explore of how complex this new container hierarchy is begins to demonstrate why I hate Tiled containers, especially when Tableau takes care of how they fit together.
You can easily get rid of the legend and entire set of new Tiled containers by right clicking on the top parent Tiled container and selecting “Remove from Dashboard”.
However, what if you want to keep your legend and add it to your floating container? Well, here’s where tip 2 comes in handy.
TIP 2: You can use the Item Hierarchy to select containers.
If the new legend is clearly visible, then you can simply drag and drop the legend into your floating container by clicking on the legend and selecting the tab at the top.
From here you can safely delete the Tiled container without losing your legend. However, once you start building dashboards out of floating containers the new legend can be difficult to find and click as Tiled objects get added UNDERNEATH floating containers.
In this case, you can use the item hierarchy selection trick in order to get hold of your legend.
- Open up your Tiled container hierarchy.
- Navigate down to your legend.
- Click on your legend in the hierarchy.
This selects your legend on your dashboard so that you can now click on its tab and drag it into your floating container!