


Alteryx Macro Workflows
This week André came in and taught us about macros in Alteryx. There are three different types of macro workflows you can create in Alteryx:
- Standard – runs once
- Batch – repeat a process for each incoming record
- Iterative – repeat a process until a condition is met
If you are just starting out, there are many great guides out there, here are two by Phillip Lowe and fellow DSer Ben Moss
My first macro
My first Alteryx macro was an iterative one designed to pull data from all the result pages of an API call. I will walk you through the steps I took:
- Select an API – I chose the Open AQ Platform API for open air quality data. I selected this API because it was well documented, it used pagenation, didn’t require an API key, and the topic interested me after seeing Carl Allchin’s IronViz entry on the air quality in London.

- Normal Alteryx data prep – Downloaded the first page of data into Alteryx. Next, I created a workflow to get the data into a Tableau friendly format.
- Create the next page logic – I needed a way to tell Alteryx to download data from all the pages, not just the first one. I did this using the headers in the metadata. The first Filter tool in the workflow is filtering out this info. I stuck a Browse tool on the false output of the filter. Now I know the page number, the limit of records per page and the total number of records found.
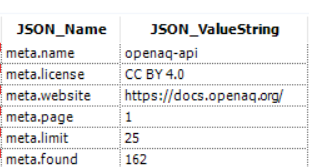 I pivoted this data to get the page, limit and found number all in the same row. Then I calculated the total number of pages and created a formula to check if we are on the last page.
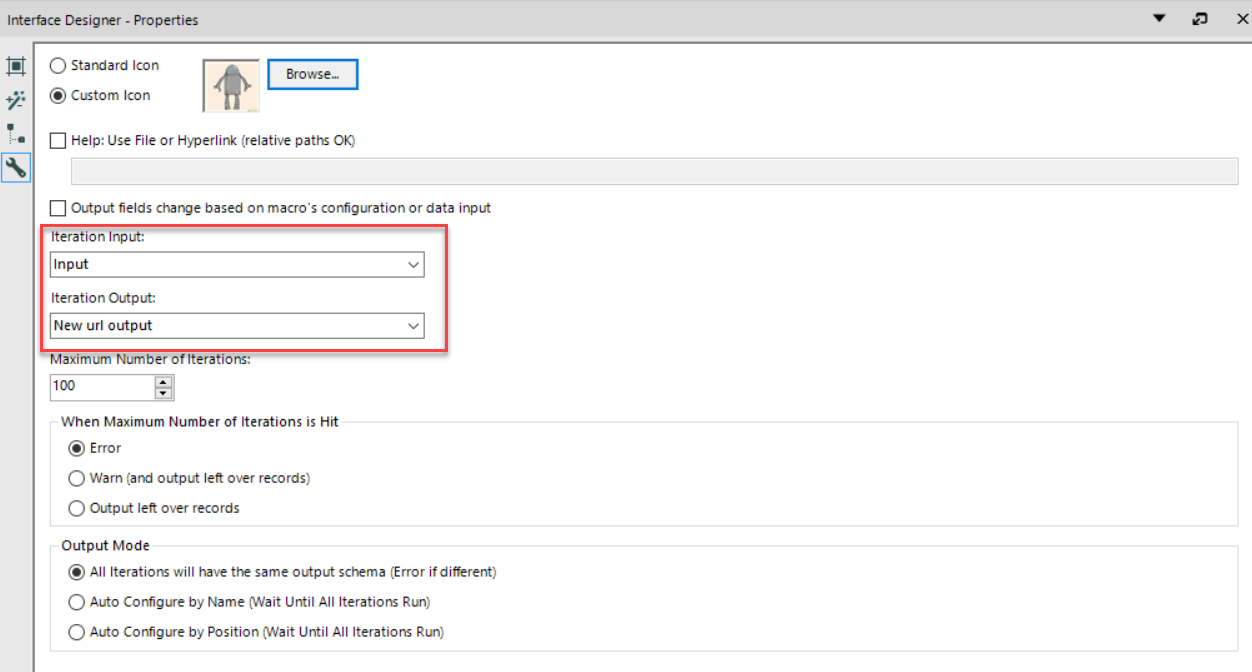
- Turn the workflow into an iterative macro – I turned the workflow into a macro in a few simple steps. I left-clicked on my canvas and in the configuration window I changed the type from Standard workflow to Macro and selected “Iterative Macro” in the drop down.
 Next, I went back to my canvas and right-clicked on my Input tool and selected “Convert to Macro Input.” Then I added Macro output tools. My final workflow looked like this:
- Configure my Macro – Before I can use my macro I needed to configure it. (Ctrl+Alt+D) brings up the configuration window. Then I told the macro which tools it should use to run the iterative macro. I also uploaded a custom icon for my macro tool!
- Save! – Last but not least, I saved my macro as a .yxmc file.