


Welcome to Challenge One of the spillthedbt series. In this challenge, we will take the first steps in setting up and working with a dbt project. In the first challenge, you will set up a dbt project to analyse LEGO data using a provided DuckDB database, along with a supporting SQL script and Python script. You will create dbt models, configure your project settings, and learn how to run and test your models within the dbt framework.
Prerequisites:
Before we begin, make sure to activate your virtual environment and open the project in Visual Studio Code. If you need a refresher on how to activate the virtual environment or launch Visual Studio Code, refer to the previous blog post, which walks through the setup in detail. These initial steps will ensure your development environment is properly configured to run and manage your dbt models.
Once you are in the virtual environment, navigate to the directory where the spillthedbt repository lives on your local drive. Use cd and the file path to update the location in the command prompt.

Create the dbt folder for the first challenge using the following prompt:
dbt init challenge_01
When prompted, select DuckDB as your database adapter (you will need to enter a number). This will create a new directory named challenge_01 in your current location.

Next, copy the entire contents of the requirements/ch01_data folder into your challenge_01 project directory. This folder contains the necessary data files and scripts required to complete the first challenge. While in the spill_the_dbt folder, use the following command to copy the entire ch01_data folder into your challenge_01 directory:
xcopy requirements\ch01_data challenge_01\ch01_data /E /I
/E copies all subdirectories, including empty ones.
/I assumes the destination is a directory, even if it does not yet exist.

You can inspect the data in the ch01_data folder by navigating to the challenge_01 directory and running the provided Python script named read_database.py. This script is designed to read and display contents from the included DuckDB database, allowing you to explore the structure and values before building your dbt models.
To run the script from the Command Prompt, make sure you are in the challenge_01 directory, then enter:
python ch01_data/read_database.py
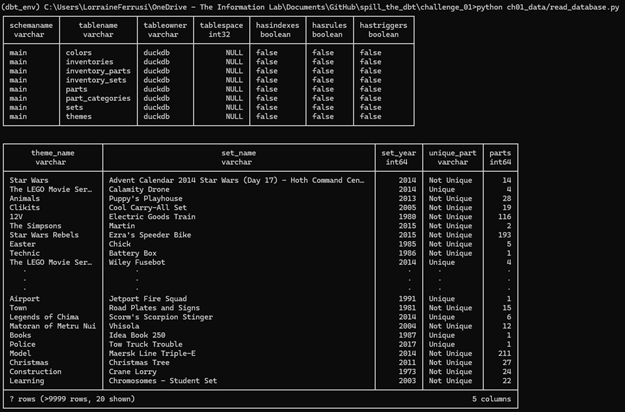
This script reads the DuckDB database and displays the available tables. It provides a quick overview of the data structure, which can help inform how you design your dbt models.
With the files copied and the repository set up, you can now begin editing files within your dbt project to complete the challenge. There are several tools you can use for this task; however, in this guide, we will be using Visual Studio Code (VS Code).
To get started:
Open Visual Studio Code.
From the top menu, navigate to:
File > Open Folder
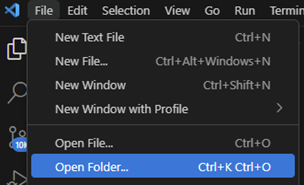
In the file browser, select the challenge_01 folder and click Select Folder.
This will load your project into VS Code, where you can begin modifying configuration files, editing models, and running dbt commands.
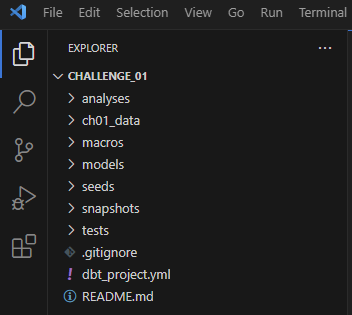
The project includes an example folder that contains sample SQL files with example code. Since this folder is not needed for the challenge, you can go ahead and delete it.
To remove the folder:
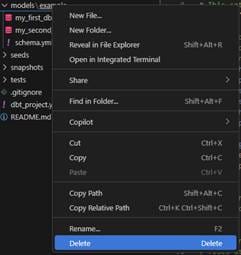
In Visual Studio Code, locate the example folder in the file explorer panel on the left.
Right-click the folder and select Delete.
Confirm the deletion if prompted.
This will help keep your project organised and focused on the files relevant to the challenge.
In a File Explorer window, navigate to the location of the .dbt directory. This directory typically resides in your user folder. The full path is usually:
This PC > Local Disk (C:) > Users > YourName > .dbt
Replace YourName with your actual Windows username. If you do not see the .dbt folder, it may be hidden by default. You can make hidden items visible by clicking View > Show > Hidden items in the File Explorer toolbar.

Note: The profiles.yml file must live in the .dbt directory located in your user home directory, not inside your dbt project folder. dbt looks in this specific location by default when attempting to read your connection settings. If you place the profiles.yml file inside your project directory, dbt will not detect it unless you explicitly override the path
Open the profiles.yml file by double-clicking on it. If you have Visual Studio Code installed and set as your default text editor, the file will automatically open in VS Code.
Once open, edit the file to include the following configuration:

This configuration defines a profile named challenge_01, sets the default target to dev, and specifies the path to the lego.db database file located in the ch01_data folder.
Getting into the challenge:
We have now reached the stage where we can create a new model. Although it is possible to do this through the command line, I chose to use Visual Studio Code.
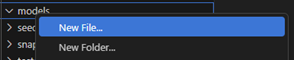
First, we will create a directory within the models folder named lego. To do this, right-click on the models folder and select "Create Folder." A new entry field will appear—enter lego as the folder name. Next, right-click on the newly created lego folder and select "Create File." When naming the file, be sure to include the correct file extension. In this case, enter lego.sql.

Once the file is created, click on it to open a new editing window. Locate the ch01_sql_scripts.sql file and copy its contents into the newly created lego.sql file. Make sure to delete the semicolon (;) at the end of the SQL statement, as it may cause an error when running the model.
Before we proceed with editing the SQL query for the LEGO dataset, we need to configure the model in the dbt_project.yml file. This file is automatically generated when you create a new dbt project. Locate it in the file list on the left-hand side of the Visual Studio Code interface and click on it to open it for editing. Add the following configuration at the bottom of the file:
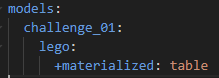
materialising
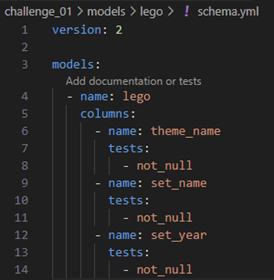
One of the requirements for the table we are materialising through the lego.sql model is that three fields—theme_name, set_name, and set_year—must not contain any null values. We can enforce this requirement by defining tests in the schema.yml file located within the models/lego directory.
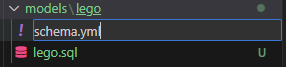
To create this file, follow the same steps as before: right-click on the LEGO folder and select "Create File." Name the file schema.yml.
We will make use of dbt’s generic not_null test to ensure data quality. In the schema.yml file, you will configure the model and define tests for each of the required fields. Refer to the screenshot below to see how the model should be configured and how the tests should be applied to theme_name, set_name, and set_year.
Next, we want to refactor the lego.sql query for modularity. This involves restructuring the SQL code into smaller, reusable, and more manageable components to enhance clarity, maintainability, and scalability. By separating distinct pieces of logic into dedicated models, we create a cleaner and more efficient project structure that is easier to test and update over time.
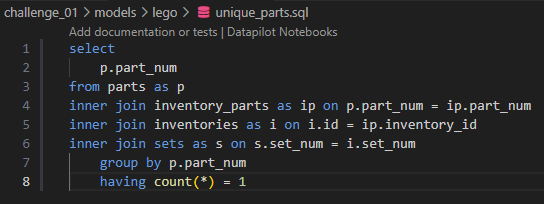
Open the lego.sql file and locate the SQL code for the UNIQUE_PARTS common table expression (CTE). Copy this portion of the code into a new file named unique_parts.sql. Make sure that unique_parts.sql includes all necessary logic and ends with a valid SELECT statement so that it functions as a standalone model. Refer to the screenshot below.
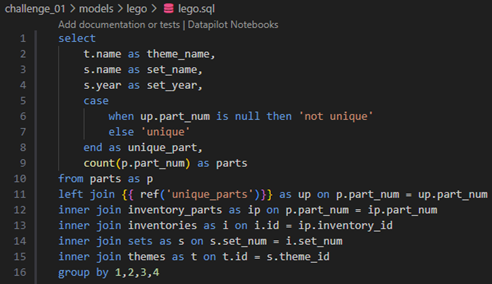
Now that we have created a separate model for unique_parts, we can reference it in the lego.sql query and remove the corresponding CTE. To do this, we will use dbt’s Jinja ref() function to point to the unique_parts model. Refer to the screenshot below to see how the query has been updated to incorporate this change.
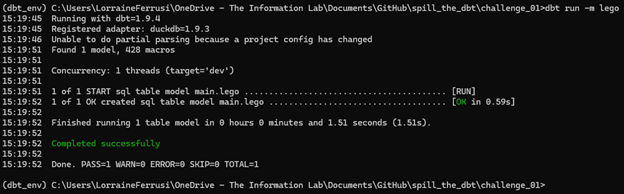
Open the command prompt window again and enter the following command:
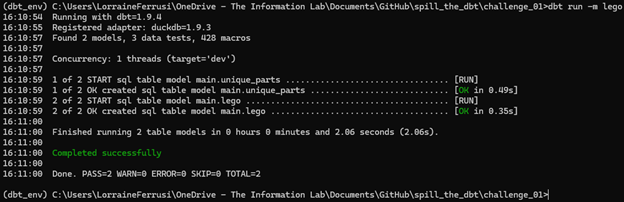
dbt run -m lego
Both models should materialise successfully. Your output should match the screenshot shown below.
The final step is to generate your documentation, which provides a visual representation of your models, their dependencies, and key information about the project. To generate the documentation, run the following command:
dbt docs generate
Once the documentation is generated, run the following command to launch a local web server and view the documentation in your browser:
dbt docs serve
This will open an interactive site where you can explore your project's structure and model relationships.
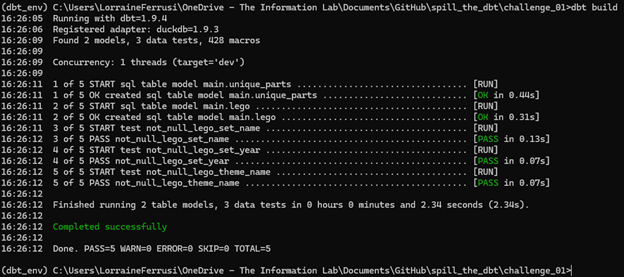
The final step in the project is to run the dbt build command. This command executes your models, runs any defined tests, and generates documentation—all in a single step. If everything materialises and generates successfully, you will see output in your command prompt similar to the screenshot shown below.
Task Complete!
This project served as an introduction to working with dbt. We set up a dbt project, created and configured a model, and successfully ran, tested, and documented it. Be sure to commit your project to GitHub to track your progress and maintain version control. In the next blog, we will move on to Challenge 02, where we will build upon this foundation and explore more advanced features of dbt.