


If you’ve landed here, I’ll assume you’ve used Notion and Alteryx before, and you’re curious about how the Notion API works. Before diving in, a quick disclaimer:
- This blog is about calling a Notion Database (which is different from a Notion Page). I’ll cover the Page vs. Database difference at the end.
- Alteryx isn’t doing anything magical here—it’s just our tool of choice to call an API. You could swap it out with any tool that makes API calls.
Overview
Here’s the high-level flow:
- Pick the Notion database you want to connect to
- Grab your authorization token
- Convert your database’s URL into an API-friendly URL
- Open Alteryx and use:
- Download Tool → to call the API
- Parse Tool → to break down the JSON response
- Data Cleaning / Transformation → to shape it how you want
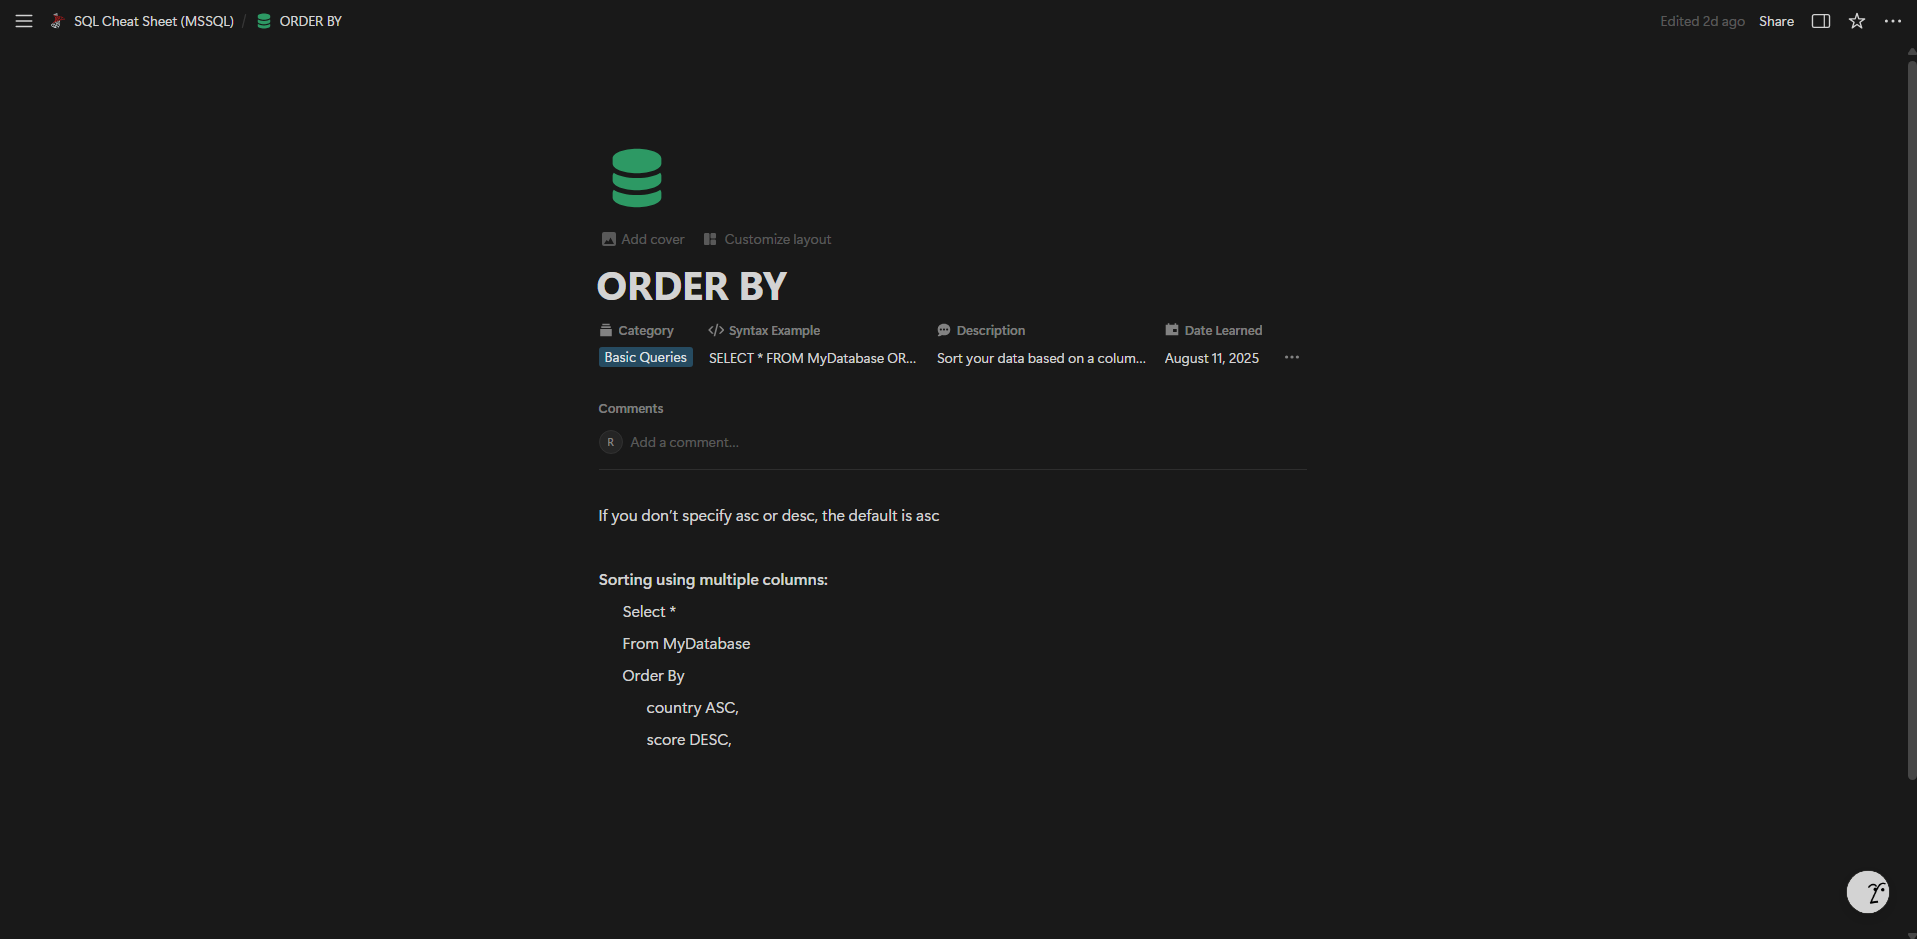
The Notion database I used
Here’s the database I was working with. Since I’m currently learning SQL, I was using Notion to set up a simple table where I could take notes as I went. My final plan is to make a visualisation on SQL syntax, so I wanted to fetch the data programmatically rather than just copy it by hand. Notion does give you the option to simply download the table as a CSV, but… where’s the fun in that?
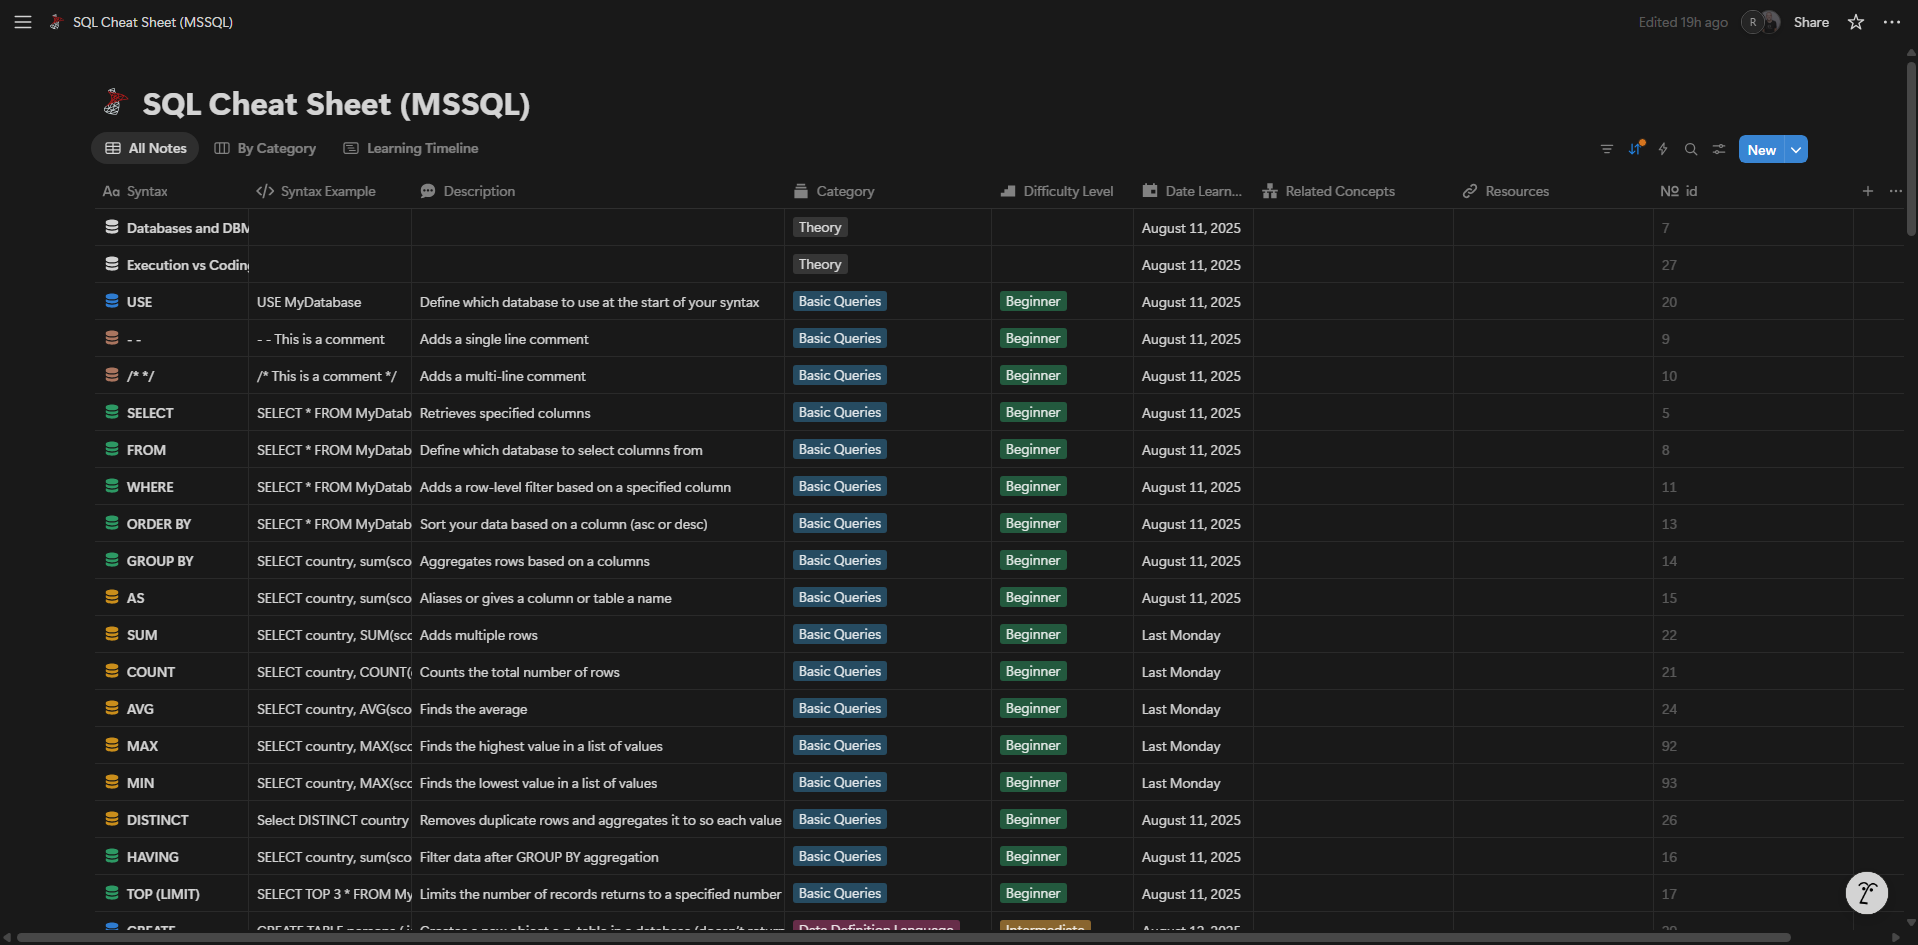
Now, you might be thinking: “Hang on… this just looks like a page with a table. Why is Notion calling it a database?”
Good question. The short answer is that in Notion, any table you create with rows and columns is technically a database, even if it looks super simple. The reason is that Notion databases aren’t just static tables—you can filter, sort, link them to other databases, and query them through the API. That’s what makes them more powerful than a regular page.
I’ll go into the Database vs Page difference properly at the end, but for now just keep in mind: if it’s a table in Notion, the API treats it as a database.
Grab your authorization token
How you get an authorization token will depend a lot on how your Notion workspace is set up. In my case, I had to speak with our CTO. I gave him access to the database I wanted, and he created something in Notion called an integration. That integration then gave him an authorization token (the ntn_... string below) which he shared with me. I couldn’t do it myself because I didn’t have permission to create integrations. If you’re not sure how things work in your setup, the easiest thing is to check with a Notion admin or someone technical who’s done this before—they’ll be able to point you in the right direction.
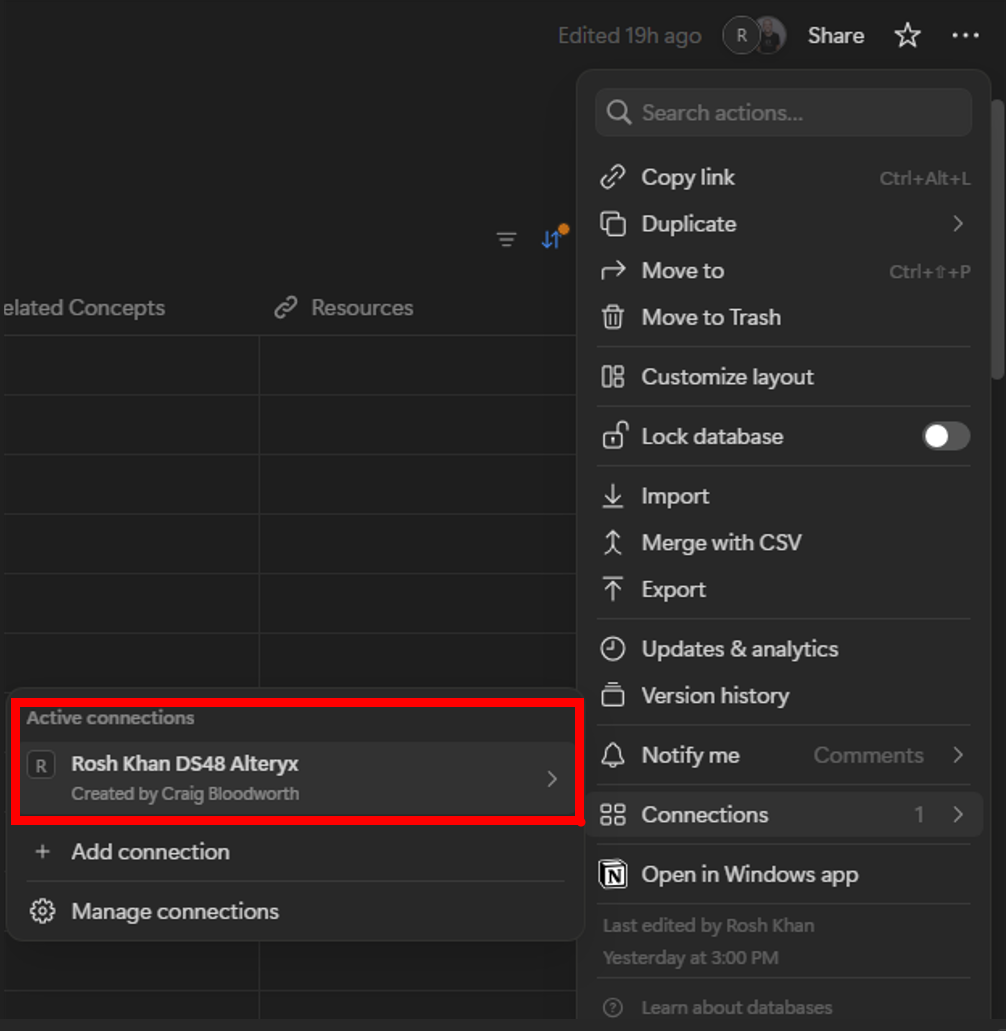
Once a connection has been made, it will show up like this:
My authorisation token looked like this (X to hide details):
ntn_XXXXXXXXXXXXXXXXXXXXXXXXXXXXXXXXXXXXXXXXXXXXX
What is a Notion integration and connection (and can you do it yourself)?
An integration in Notion is the “app” you create that can talk to the API—it’s what generates the token. But creating the integration isn’t enough on its own. You also need to give it access to your database, and that step is called a connection. So think of it like this:
- Integration = the identity (who’s talking to the API)
- Connection = the permission (what the integration is allowed to see or do)
Without the connection, the integration can’t access anything.
If you have the right permissions, you can create the integration yourself and then connect it to your database. To do this, you go to Developer integration then create a new integration.

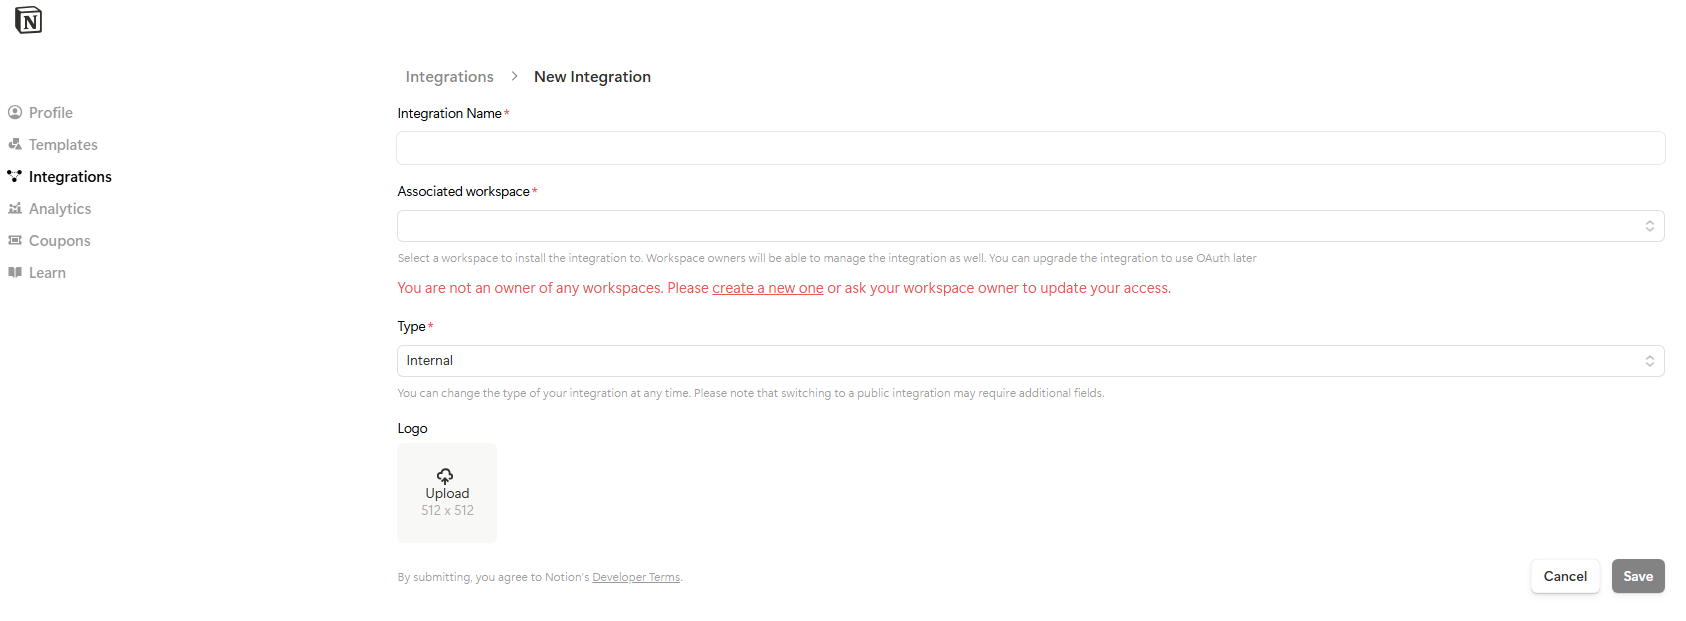
Because I don’t have the right permissions, I can’t show you the full setup, but the official Notion docs walk you through it step by step.
Convert database’s URL into an API-friendly URL
Once you’ve got your database, the next step is to turn its normal Notion URL into an API-ready URL.
Here’s what a standard Notion database URL might look like:
https://www.notion.so/workspace-name/1234567890abcdef1234567890abcdef?v=9876543210abcdef9876543210abcdef
That’s the link you’d see in your browser when you open the database in Notion. But the Notion API needs it in a different format. Specifically, it only cares about the database ID, which is that long string in the middle (1234567890abcdef1234567890abcdef in this example).
So when you convert it, your API URL will look like this:
https://api.notion.com/v1/databases/1234567890abcdef1234567890abcdef/query
Notice how:
- www.notion.so/... becomes https://api.notion.com/v1/databases/
- You drop the ?v=... part at the end
- You add /query to actually fetch data from the database
Open Alteryx and call the API
Now that you have your API-friendly URL, it’s time to open Alteryx and start pulling data. Here’s how to set it up:
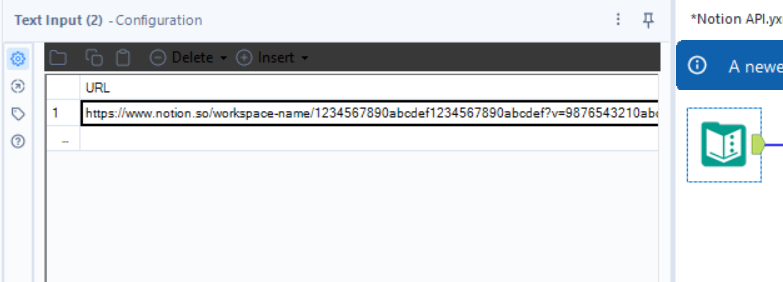
Text Input Tool
- Create a column called
URL - Paste your formatted API URL in the first row
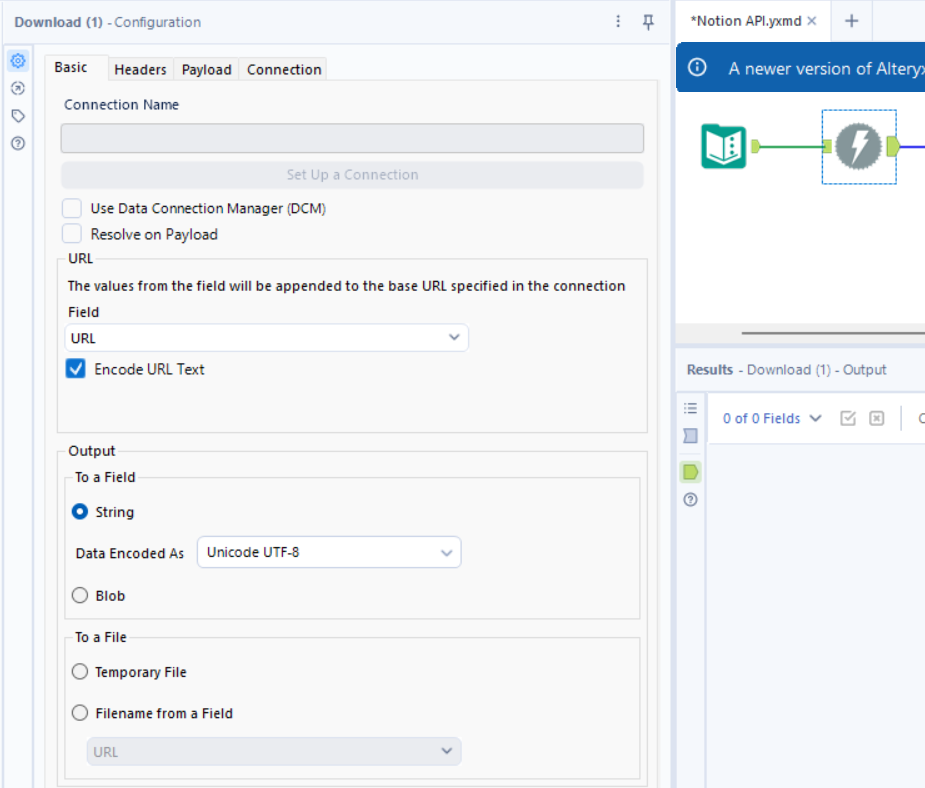
Download Tool
- Connect it to your Text Input tool
- Configure it as follows:
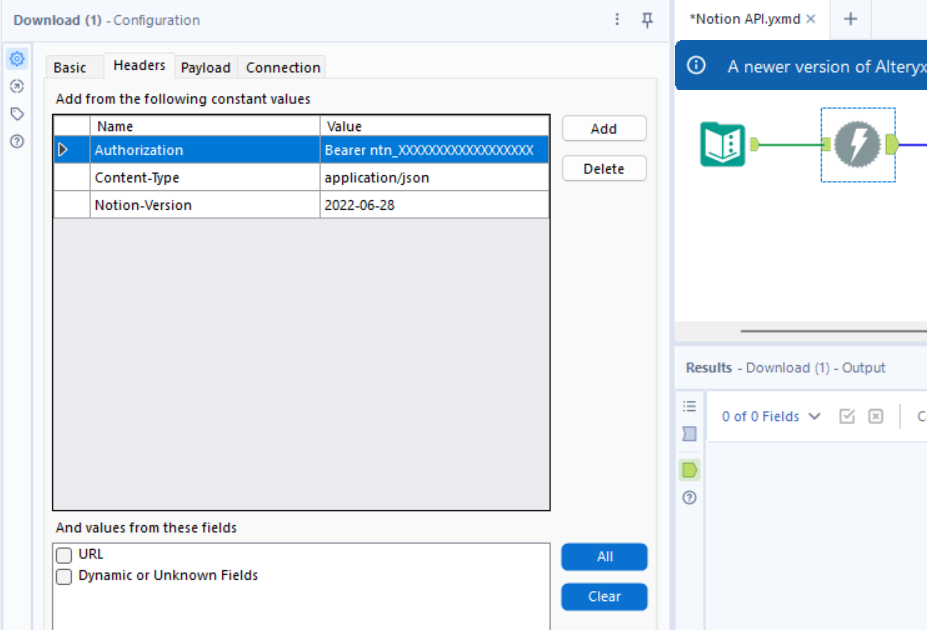
- Authorization header:
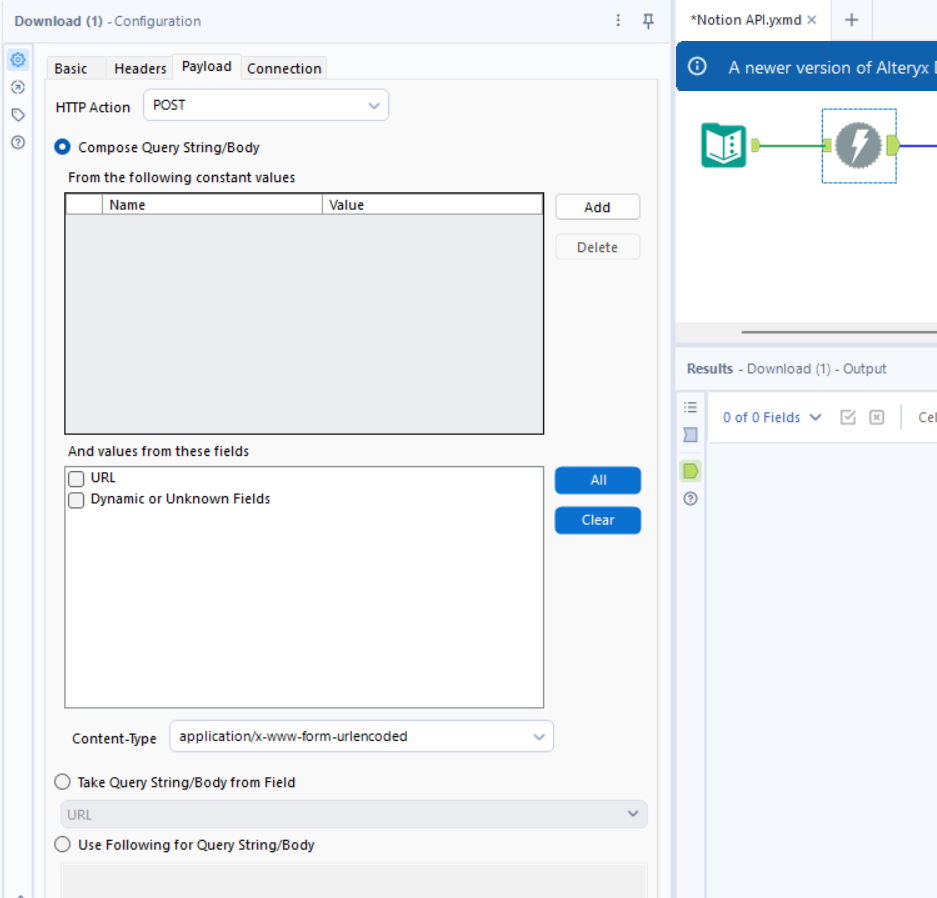
Bearer YOUR_TOKEN_HERE(for example,Bearer ntn_XXXXXXXXX) - HTTP Action: POST
- URL field: point it to your
URLcolumn
- Authorization header:
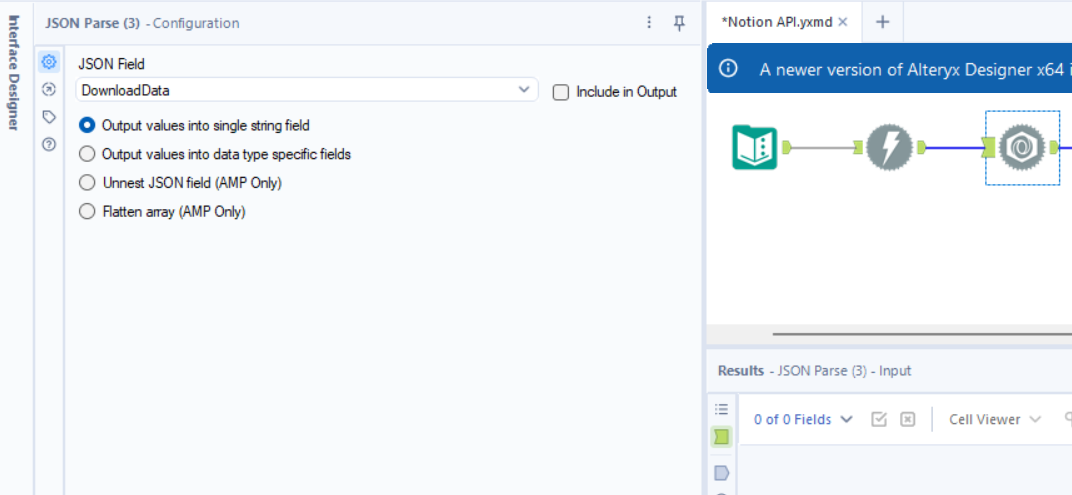
JSON Parse Tool
- Connect it to your Download tool
- This will parse the JSON response from Notion so you can start working with the data
From here, you can start cleaning and transforming the data however you like using standard Alteryx tools.
Data Cleansing and Transformation
Once you’ve parsed the JSON from Notion, the next step is cleaning and transforming the data so it’s usable. Here’s how I approached it:
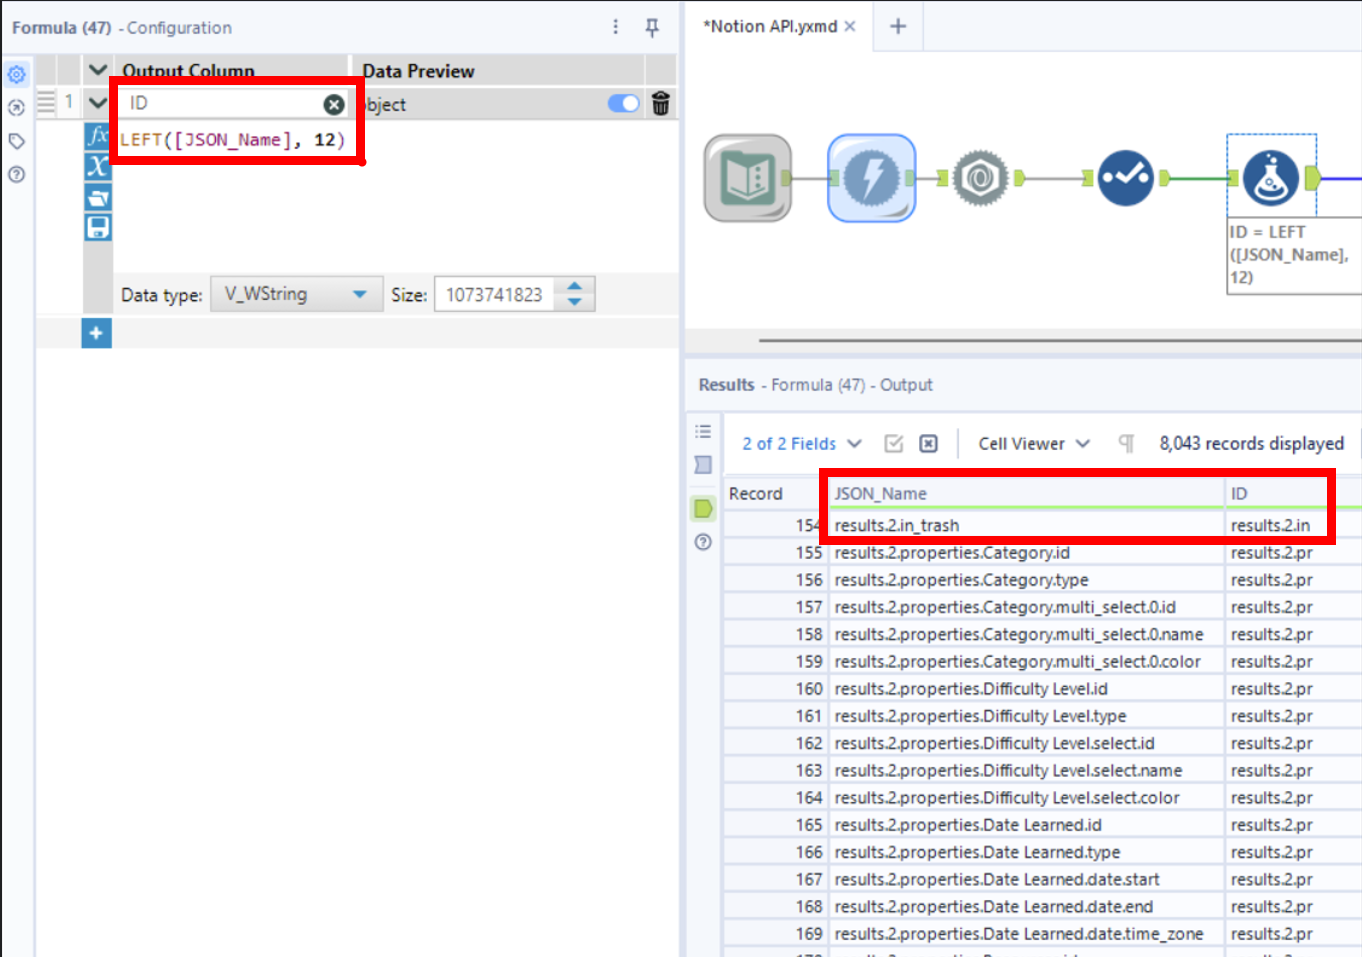
Create an ID for each row
In the JSON output, each value starts with results. followed by a number. That number is the unique ID for each row in the Notion table. I use a formula to extract that number.
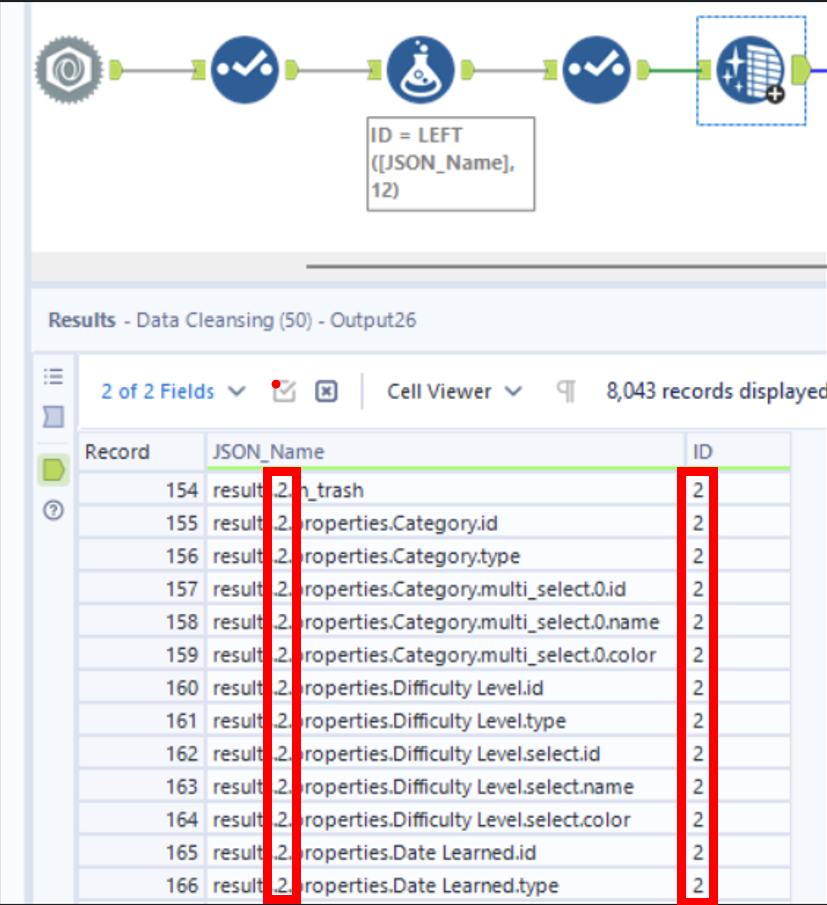
Clean the numbers
I then use the Data Cleansing Tool to retain only the numbers.
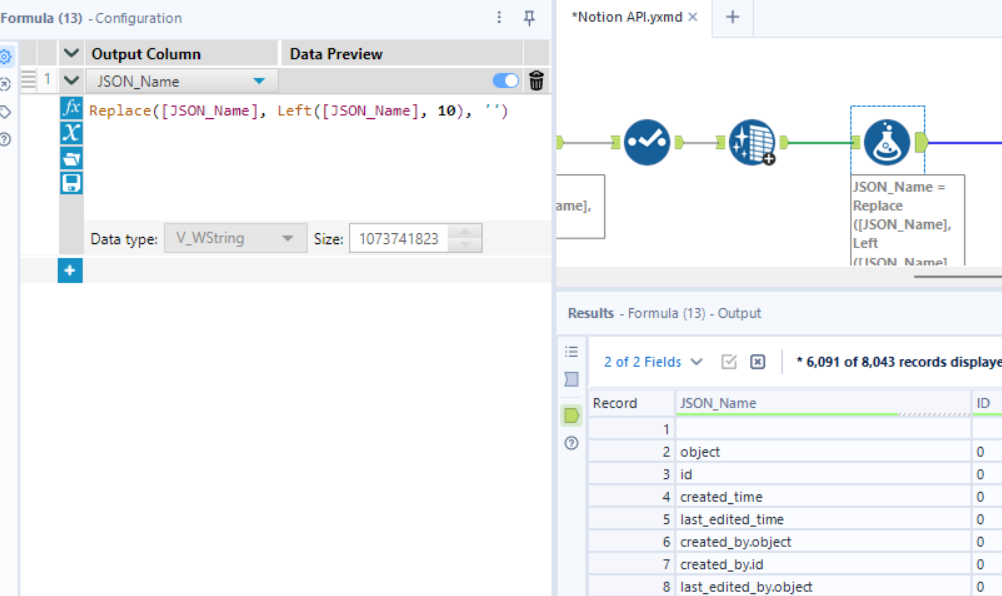
Remove repeating text
Using a Formula Tool, I remove the repeating results.X. part so the data is cleaner.
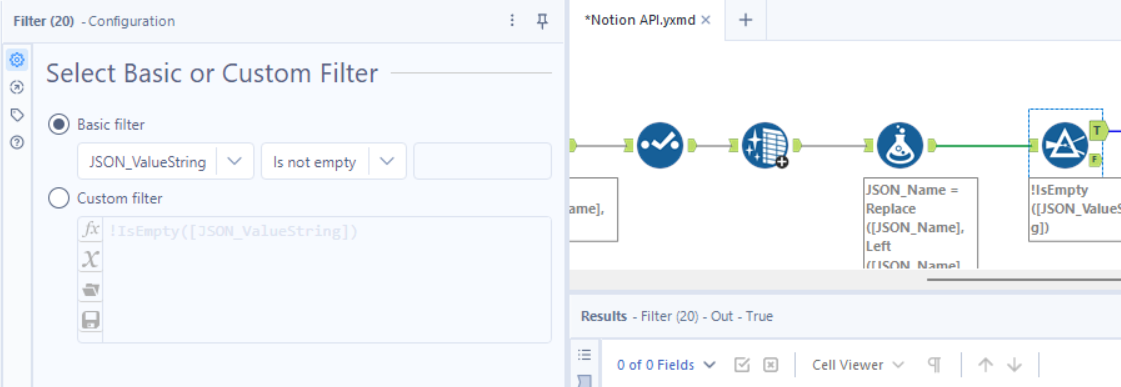
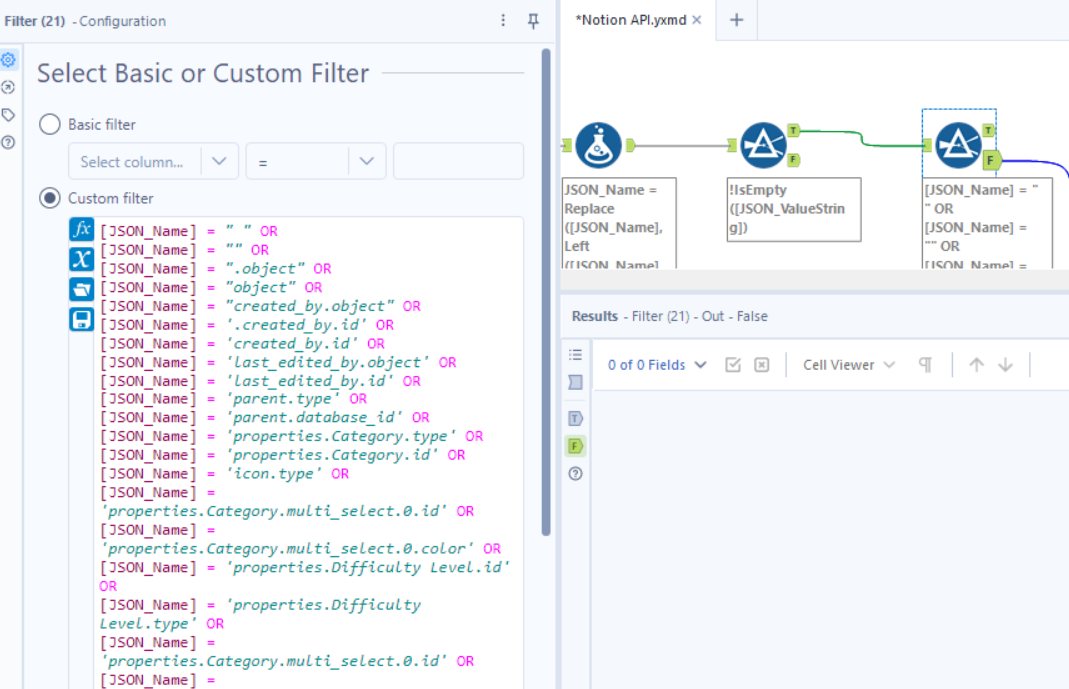
Filter out empty rows
A Filter Tool removes any empty rows that aren’t needed.
Remove unwanted columns
Another Filter Tool helps get rid of any columns you don’t want.
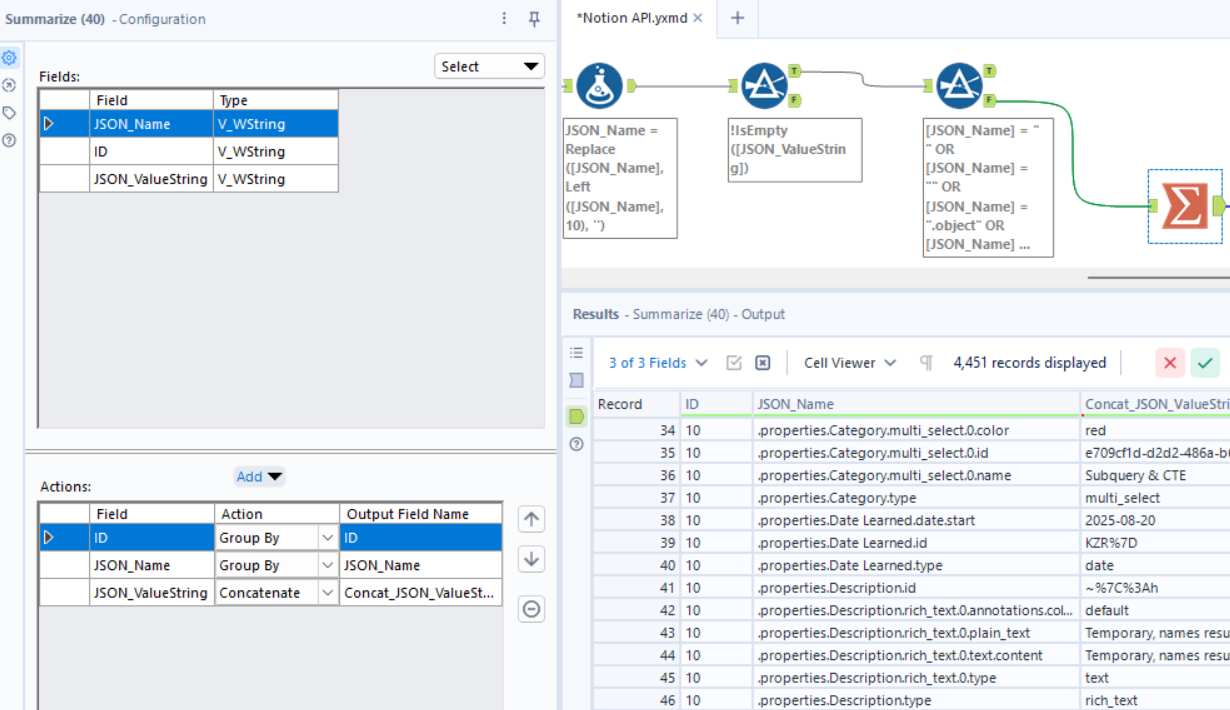
Summarize
I use the Summarize Tool with the configuration that suits the type of data you’re extracting.
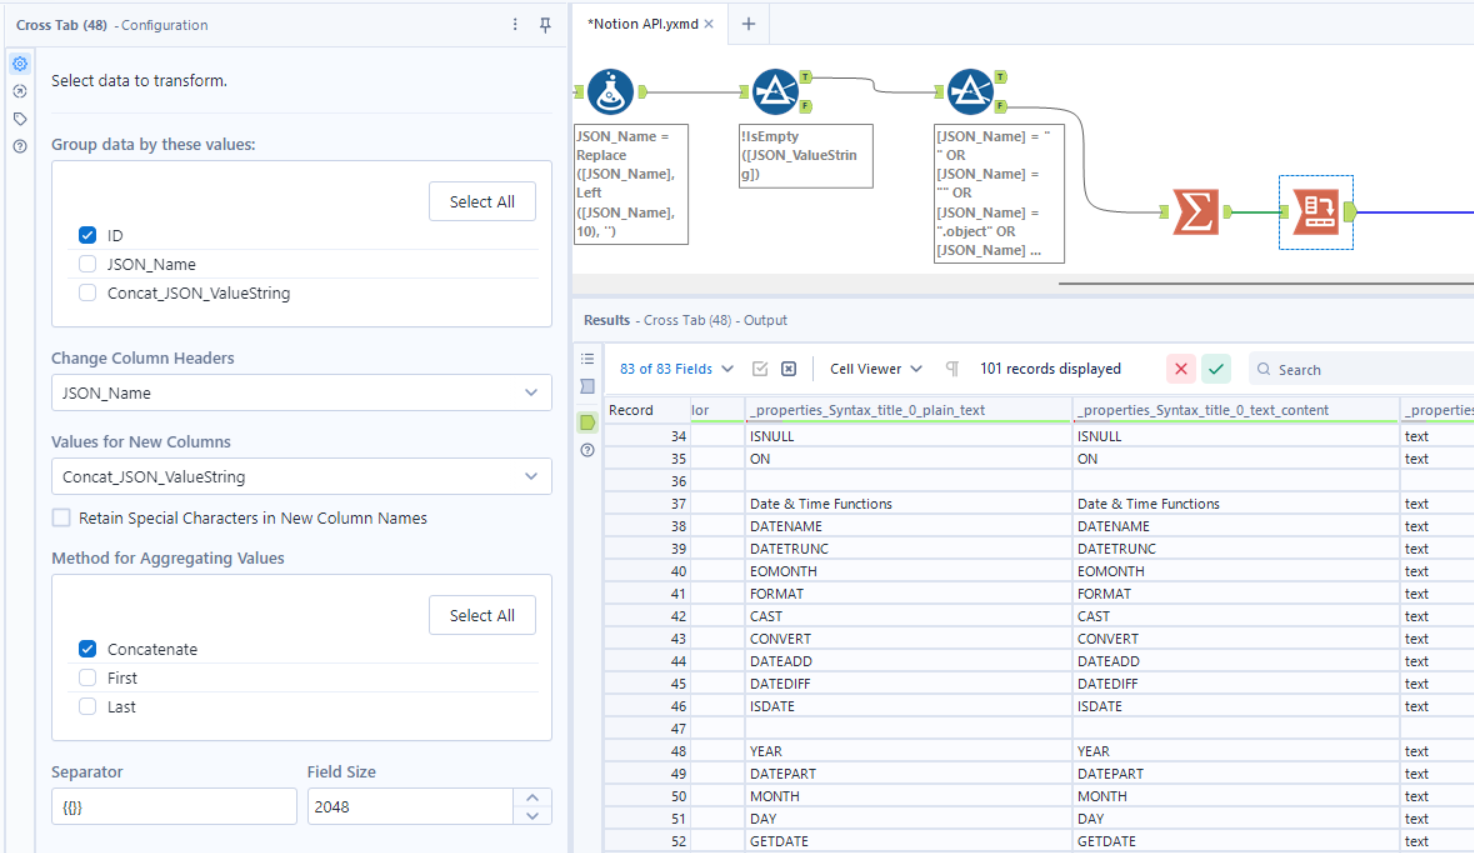
Cross Tab
Finally, I use a Cross Tab Tool to pivot the data into the format I need.
Data cleansing and transformation will always depend on what you want to extract. This example covers the core workflow, but your setup might vary depending on your goals.
Notion Database vs. Page (and calling a Page via the API)
Earlier, we worked with a database, but Notion also has Pages. Here’s the difference in simple terms:
- Database: A structured table with rows and columns. Each row is like a record, and you can filter, sort, and query it via the API.
- Page: A single document or note in Notion. It can contain text, headings, checklists, embedded media, and even sub-databases. Unlike a database, it doesn’t have rows you can query directly; instead, it contains blocks of content. Example below:
Fetching a Page via the API
If you want to get the actual content of a Notion page (not just metadata), you need to call the blocks endpoint for that page.
- Take your standard Notion page URL:
https://www.notion.so/workspace-name/Page-Title-1234567890abcdef1234567890abcdef
- Extract the page ID (the long string at the end) and format the API URL like this:
https://api.notion.com/v1/blocks/1234567890abcdef1234567890abcdef/children
Notice the differences from a database call:
/v1/databases/becomes/v1/blocks/- Add
/childrenat the end to fetch all child blocks - You don’t use
/queryhere
HTTP Method and Download Tool Configuration in Alteryx
When calling a page for its content:
- HTTP Method: Use GET, since you’re just fetching blocks
- Authorization: Still use
Bearer YOUR_TOKEN_HEREin the headers - Download Tool setup:
- Connect it to a Text Input with your formatted blocks URL
- Set HTTP Action to GET
- Add the Authorization header
- JSON Parse Tool: Connect to the Download tool to parse the JSON response containing the page’s blocks
After that, you can clean and transform the blocks just like we did with database rows. You can extract text, remove unwanted properties, or even pivot nested blocks depending on your needs.
This approach lets you pull all the content of a Notion page into Alteryx, not just the page metadata, so you can work with it like a dataset.