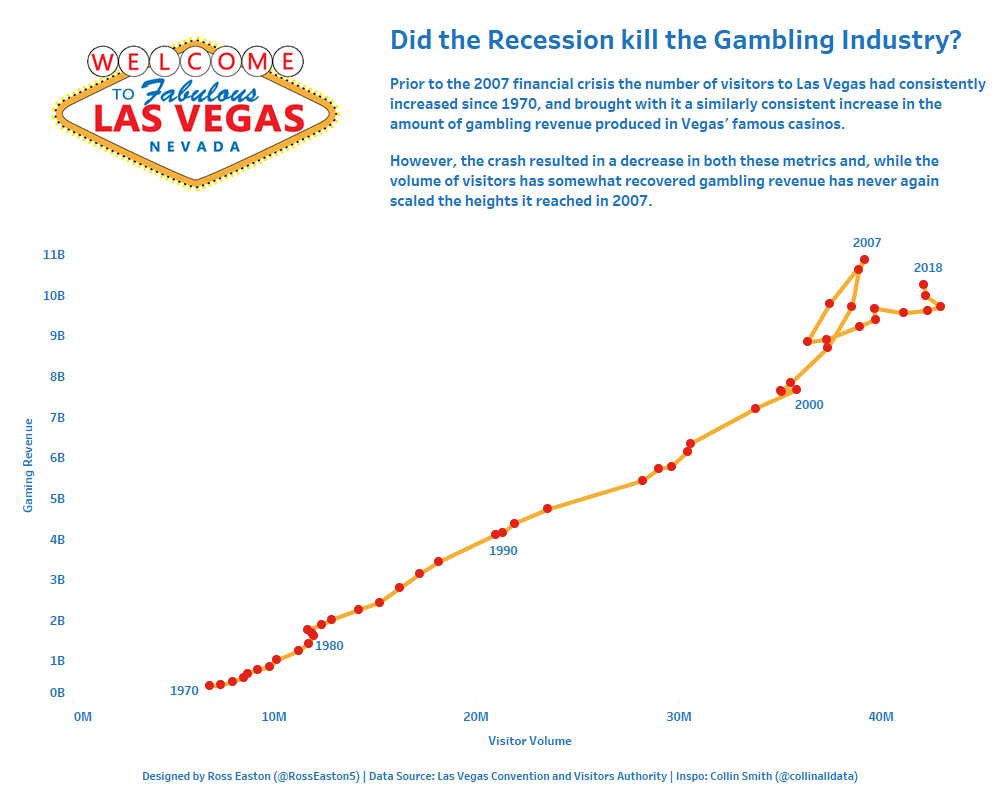
A scatterplot is an excellent way of analysing the relationship between two variables across a period of time, and also has the bonus of looking quite cool and being a bit more unusual than a simple line chart. They are comprised of two measures on the x and y axes (producing a scatterplot) with the individual points being connected by a line, the sequence of which is determind by a time field.
They also have the benefit of being quite easy to make in tableau – simply follow these steps.
For this example I will be using the Makeover Monday Week 45 dataset of Las Vegas Visitor Traffic and Gambling Revenue as it is a perfect example of a situation in which such a graph is useful and relevant.
First, drag your first measure (Gaming Revenue) onto rows.

Then drag your second measure (Visitor Volume) onto columns – this produces a scatterplot populated by a single point.

Next drag your time field (year) onto detail. This populates your scatterplot with a point for each year of data available.

Change your mark type to a line, and then drag your time field (year) onto the ‘line’ marks card. As you can see we now have a simple connected scatterplot. However we can take more steps to make this look even more effective.

Duplicate both of your first and second measures by holding down control, click and dragging them next the previously existing pill. Make sure to keep the duplicate of the first measure in the rows and the duplicate of the second measure in the columns.
EDIT: I am reliably informed that you can achieve the same result by only duplicating one of the fields! So that should save you all a few clicks.

Select the duplicated fields and then click ‘Dual Axis’ to display the duplicates on the same axes as the originals. Remember to also right click on each new axis and select ‘synchronize axis’ to ensure marks are shown at the same precise point on the graph.

Now select the one of the two tabs in the marks card, and change the mark type to circle. Now we have a circle for each point in our data connected by a line in the correct time sequence. You can also change the colour of the circles at this point to make them stand out better.

Right click and select format to remove any unecessary lines, and right click on each of the extra axes and uncheck ‘Show Header’.
And there you have it, a beautiful connected scatterplot!

