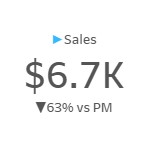
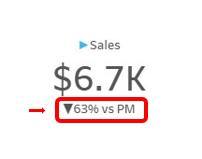
When building Tableau Dashboards, a Sales BAN (or KPI) may be considered one of the more basic elements to build. Though this may be the case, you can enhance even simple BANs by adding additional information like a time comparison (previous month comparison in the red box below).
Step 1: Create a Current Month Calculated Field:
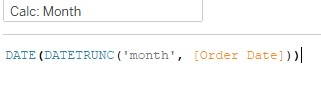
- What it means: Roll up the order date to the month level, and preserve the output as a date. For more information about date functions, you can read my blog here: https://www.thedataschool.co.uk/samantha-fitzsimmons/dates/
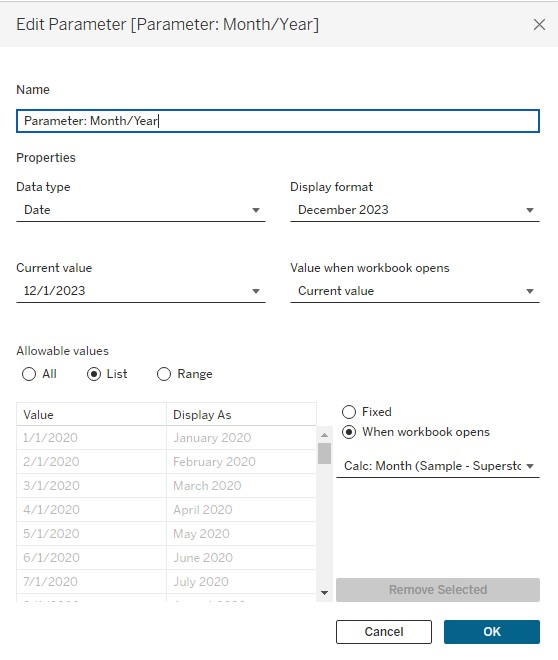
Step 2: Create a Month Parameter
- Date Type: Since the parameter allows you choose a month/year combination, choose a "Date" Data Type.
- Display Format: The full month name and year is displayed in the parameter. When making a selection from Display Format I chose "Custom" and indicated the format as: "mmmm yyyy" (no quotations).
- Allowable Values: Choose "List" so that all dates are listed below, click "When workbook opens," and select your Month/Year Calculation.
Step 3: Create a Previous Month Calculated Field
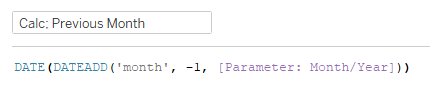
- What it means: Subtract 1 month from the date selected in the parameter.
Step 4: Created a Selected Month (Sales) Calculated Field

- What it means: If the truncated month and year matches the selection made on the parameter, then show me the Sales.
Step 5: Created a Previous Month (Sales) Calculated Field

- What it means: If the truncated month and year matches the selection made on the parameter, then display the Sales (or any chosen measure).
Step 6: Create a % Difference Calculation (Sales)

- What it means: Find the difference between current and previous month sales and divide it by previous month sales.
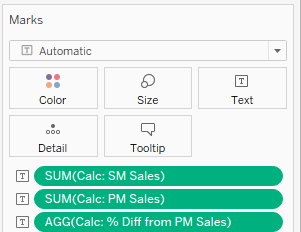
Step 7: Bring the calculations created in steps 4, 5 and 6 on to text in the marks card
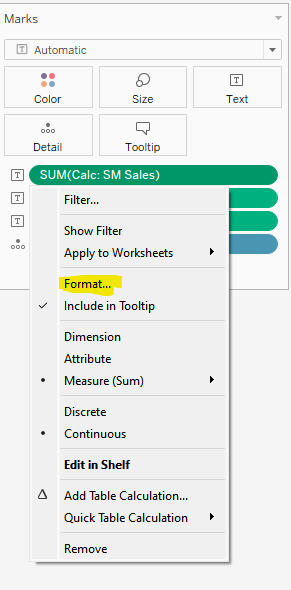
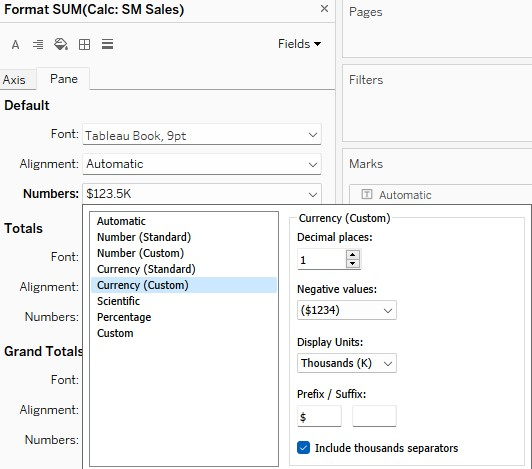
Step 8: Format the selected month and previous month calculations by clicking on the white triangle on the right side of each pill and choosing "Format."

- Choose "Currency (Custom) to include the "$" and "K" with the measure.
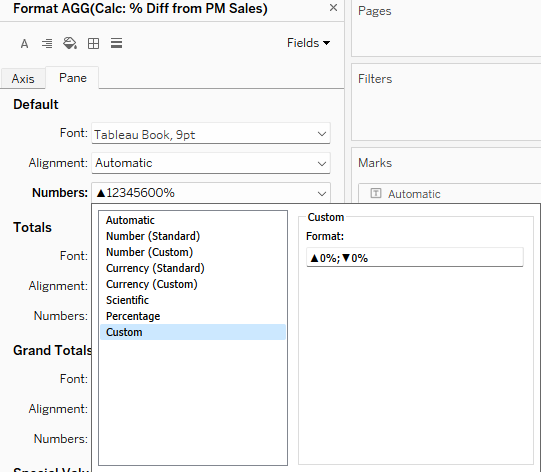
Step 9: Format the % Difference calculation by clicking on the white triangle on the right side of each pill and by choosing "Format."
- Choose "Custom" to include these triangles: ▲ ▼. These can be found in the "Character Map" of your PC.
- You can also copy and paste the following into the "Format" box: ▲0%;▼0%
Step 10: Format the Text Marks Card
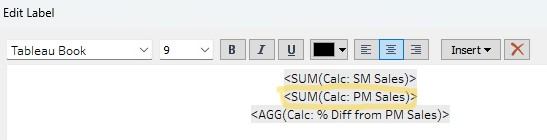
- When the Text Marks Card is opened, you'll find all 3 calculations displayed, with the default text and font size.
- Delete the Previous Month Sales calculation (circled in yellow)
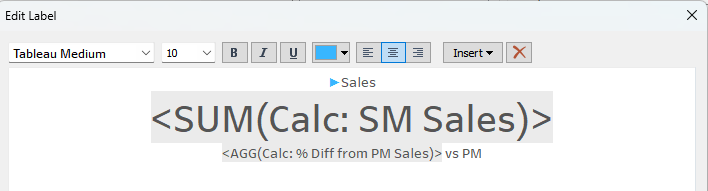
- Add a label (e.g., "Sales"), and adjust the font type and size. For this BAN, I made selected month sales calculation more prominent.
- When you're finished formatting, make sure your changes are shown in the BAN's sheet.