


The project of this week at the Data School was to create an App with Alteryx and, until Monday, we did not know what an app look like.
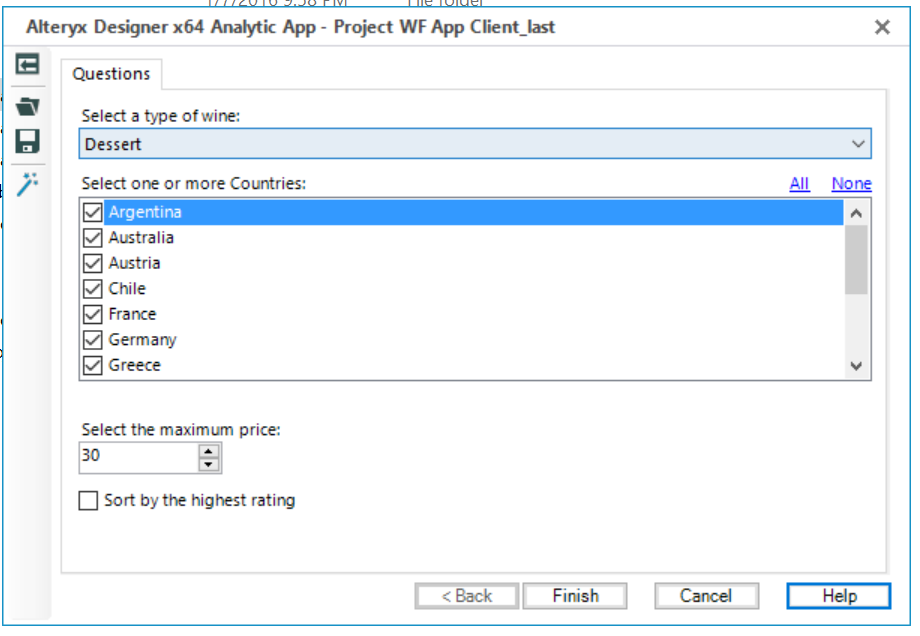
Below an image of the interface of my final work, just to show how an app in Alteryx looks like.
 So, after discovering that an app is an interactive interface that allows to visualize things and after having decided our own “topic” and found the dataset to work on, we have faced the challenge: how to build an app with Alteryx?
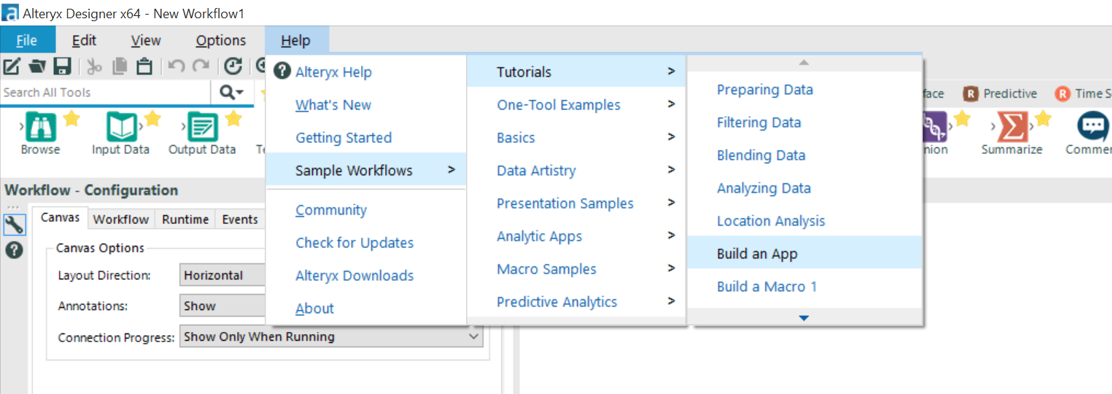
I have found useful the Tutorials in the Help section of Alteryx on how to build an app, just they have made easier for me to acquire a bit of confidence with the interface tools.
The interface tools are not difficult to use at the end, when you understand how to configure them and how to combine them with other tools.
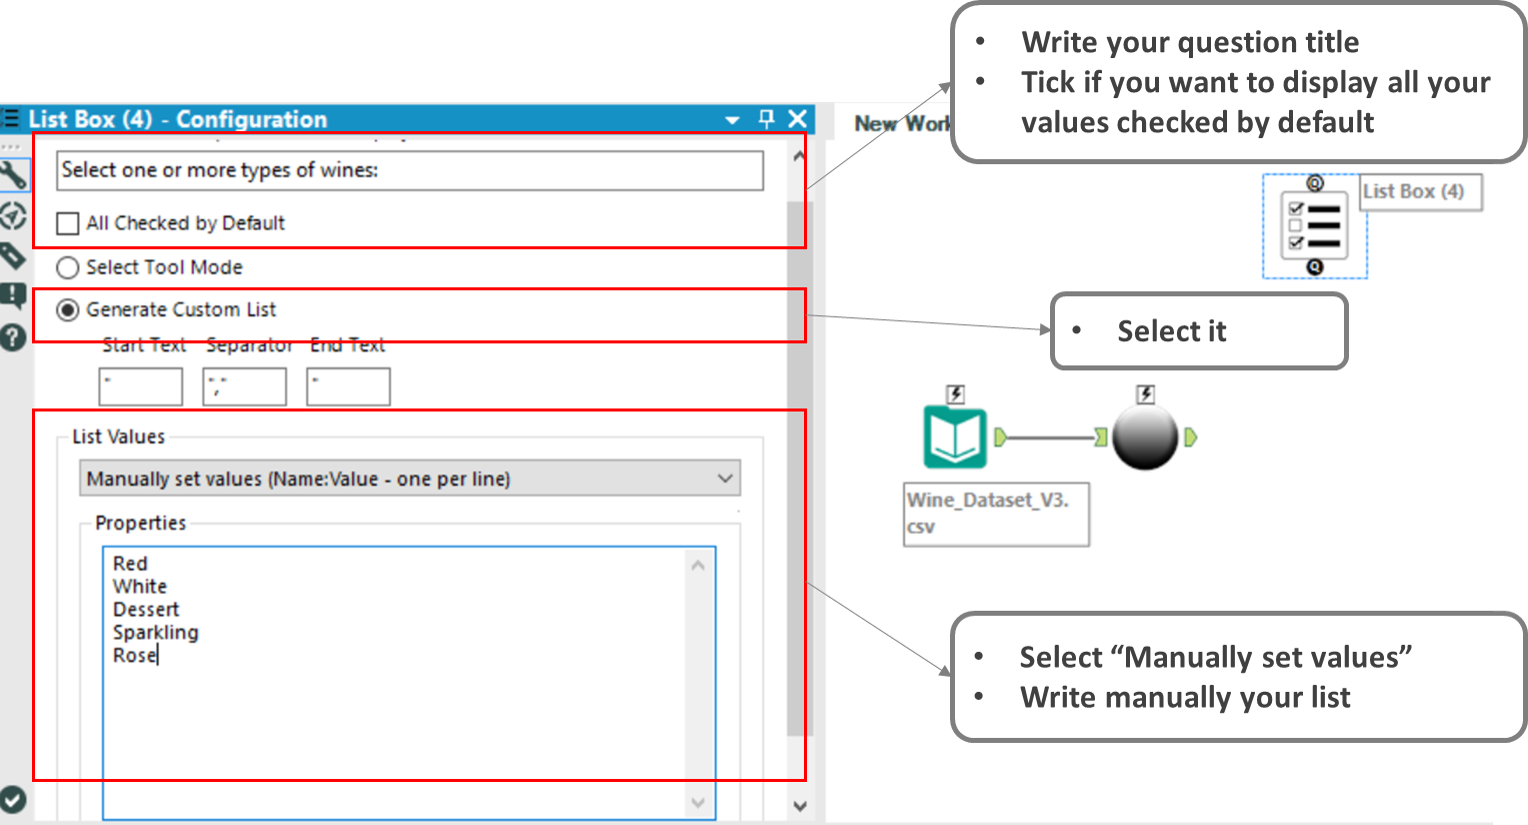
However, I strongly believe that some of them are tricky. For example, almost EVERYONE at the DS has struggled with the “List Box” tool in order to create a custom list of values. This interface tool allows to build a multiple select list of values.
So, then, how to configure it?
FIRST STEP
Here a quick look at the configuration of the tool in order to create a custom list:
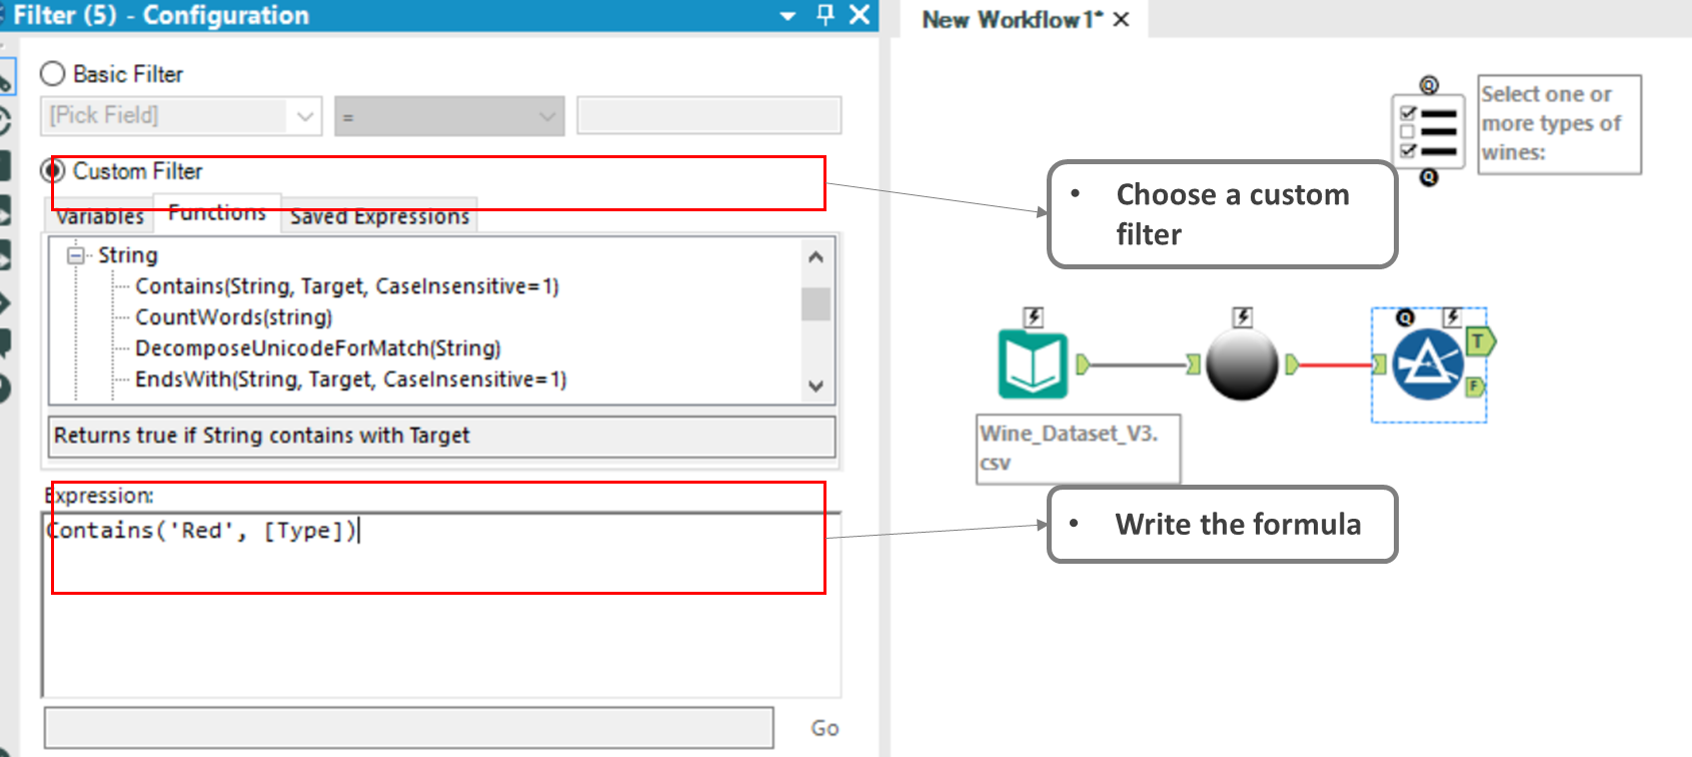
SECOND STEP
Set up the filter: remember, it is a multiple selection tool, so it is important to use the right function.
Contains(string, target) is our guy!
THIRD STEP
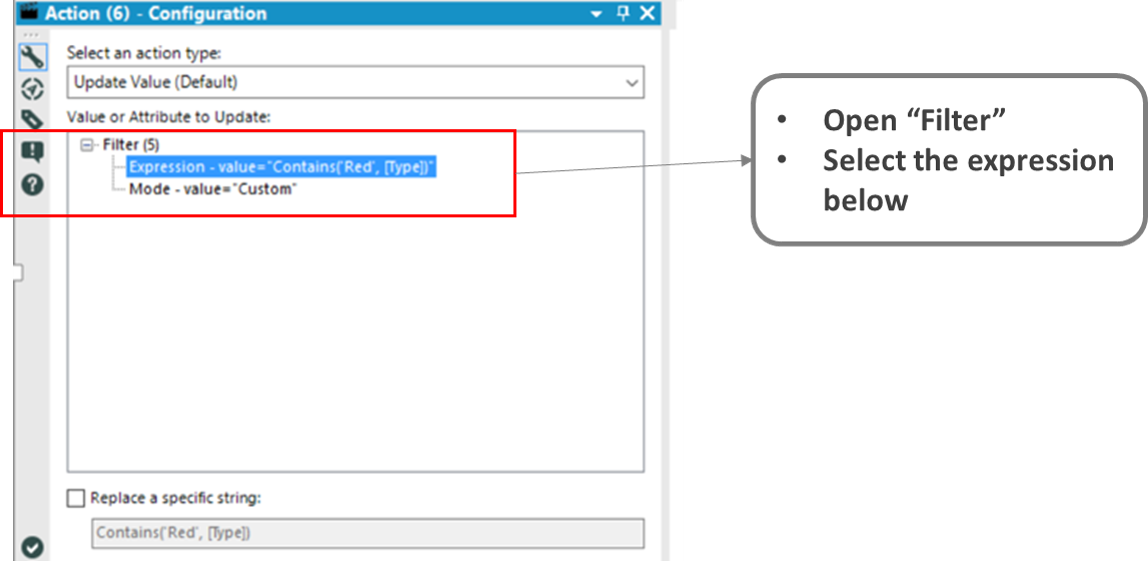
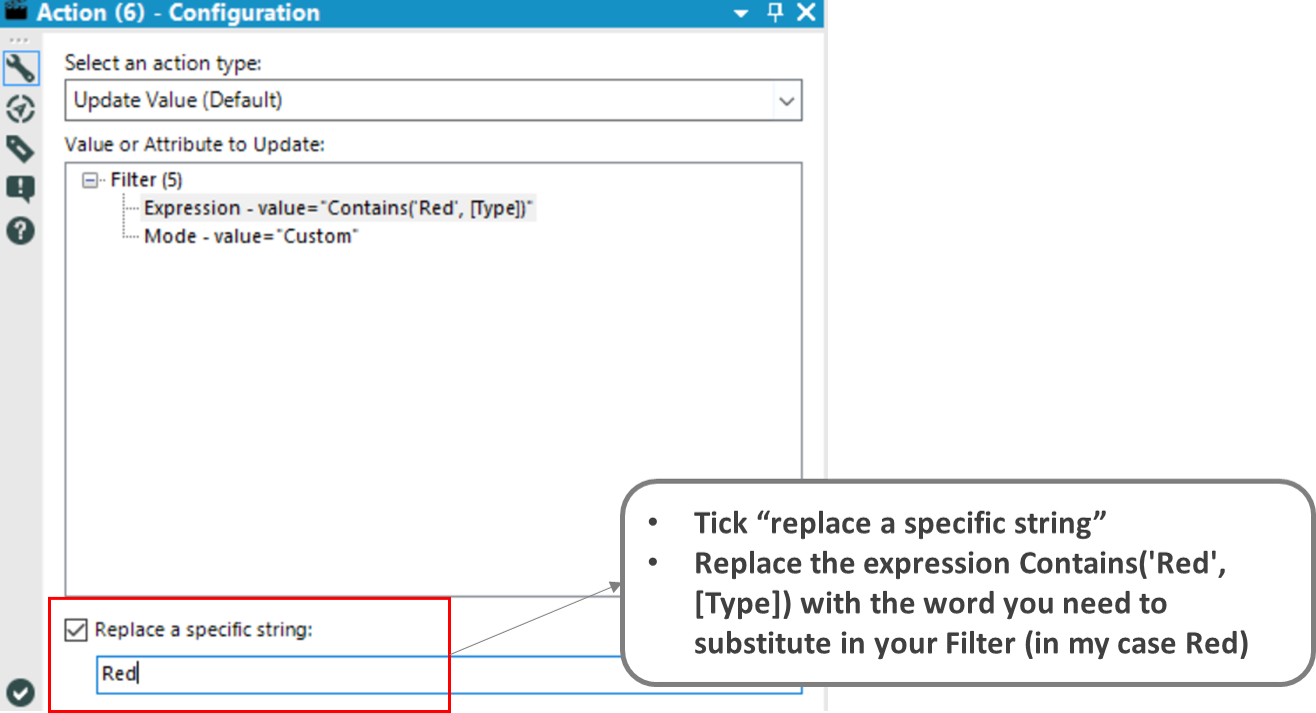
Now, it is time to connect our filter and our list box tools together and you will see that after connecting them an Action tool will automatically appear between the two of them.
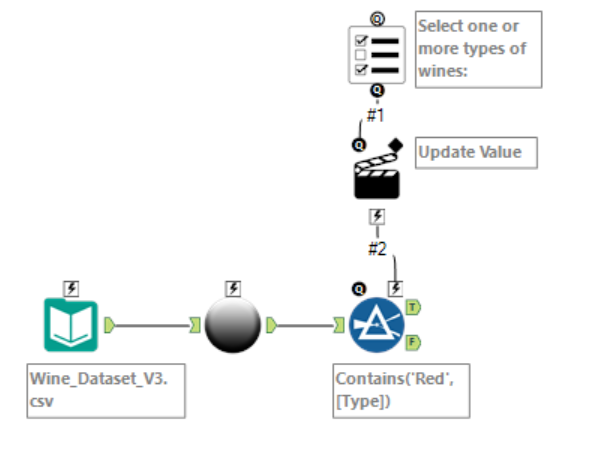
The Action tool has to be configured as following:
Then, make sure to close your workflow with an Output tool, run it and then, to test your App, run it as an analytic app. Here is the interface!
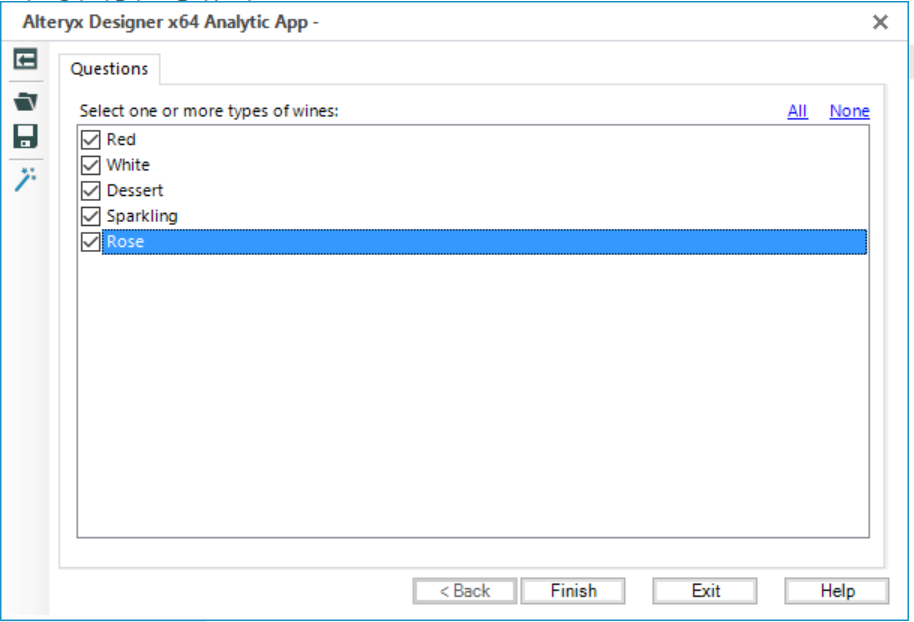
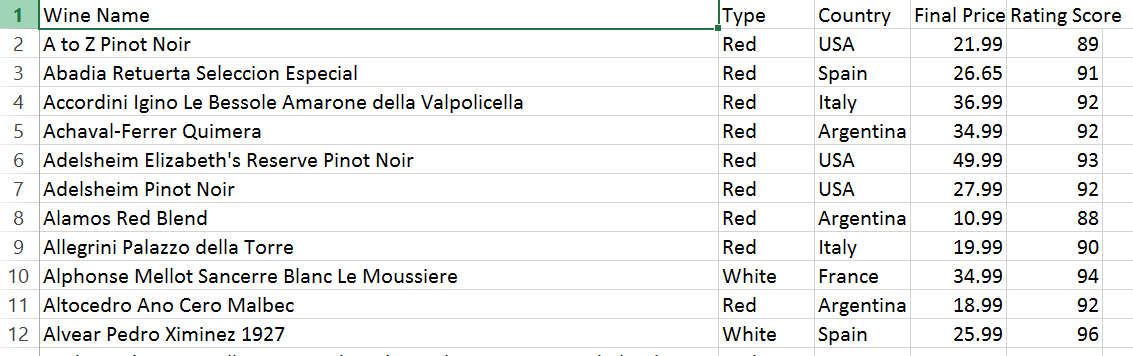
And it works (select for example red and white wines)…
Hope you find it useful!