


A common roadblock for Tableau builders is learning how to give end-users the ability to increase the level of detail in a dashboard based on what they're interested in. Let's say we're building a sales dashboard for a national company, but I know my end-user will ultimately want to see the breakdown by city. It would be clunky to build a visualization that lists the name and sales of every city in the country. Instead of committing one of the 7 Deadly Dashboard Design Sins, we can drill down.
A drill down is any instance where we raise the level of detail in the view. Think of it as putting a microscope on your analysis. The big-picture view tells you there's a problem, but drilling into its subcomponents can reveal what caused it. This framing takes your dashboard from describing a trend to identifying its root cause. Lucky for us, Tableau has a few native ways to drill down.
For this blog, we'll refer to the two fields within a drill down as the Bigger Field and the Subset Field.
Hierarchy
A hierarchy is when Tableau recognizes a field as a subsection of another field. This structure lets Tableau call on it to change the level of detail in the view. You'll know a field is part of a hierarchy when you drag it onto a pill and one of these symbols pops up:
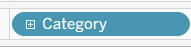
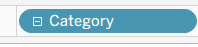
On the Tables sidebar, you’ll recognize hierarchies by the drop down arrow:
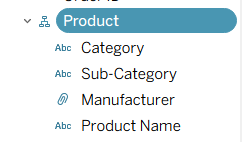
How to use hierarchies:
- Create the hierarchy by dragging the subsection field over the bigger field
- Drag in the bigger field onto one of your pills & use the +/- signs:
The biggest advantage of hierarchy drill downs is that it's a native Tableau feature and very easy to use. Once the hierarchy is created in your data source, it applies to any workbook using that source.
The biggest limitation is that there's no way to limit what the user sees. In the Superstore example above, if the user is the Product Manager for Chairs and only cares about Furniture sales, they'd still have to look past everything under Technology and Office Supplies to find it. That's information overload for the end user, which is exactly what we're trying to avoid.
(Additional Hierarchy Documentation)
Parameter and Set Actions
Parameters and sets solve the hierarchy's inability to filter information. Both let the user choose what they want to see. The biggest difference is how much they can choose at once.
A parameter is an end-user-visible variable that replaces a constant value in a calculation. For more on what parameters can do, I recommend this blog. For our purposes, a parameter allows the user one selection at a time for the drill down.
A set is a subset of a field in your data, created based on conditions. For more on sets, I recommend this blog. For our purposes, a set allows the user multiple selections for the drill down.
Parameter Actions for Drill Downs
- Create a Parameter.
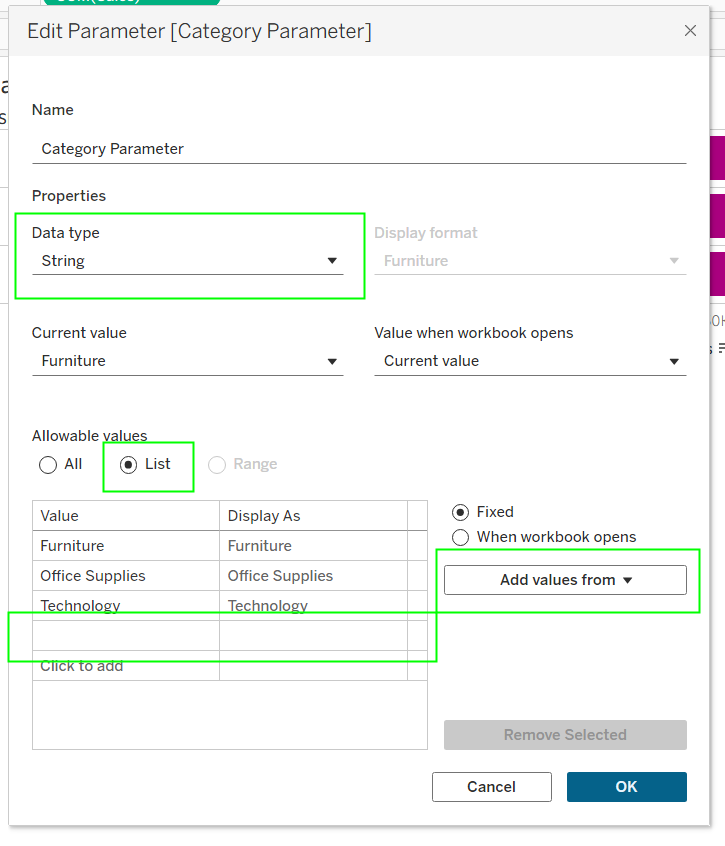
- Set data type to the same as the Bigger Field (which in our case will be string). Select list for values. ‘Add Values From’ -> select the Bigger Field. After you’ve transported all the values, add ONE more value: a blank (in order to do that, type in one space). Note: adding the blank to the list is important: without it, your parameter will always keep one selection.
- Create a calculated field about your Subset Field that will link your parameter with your sheet. Place the calculated field on the same axis as the Bigger Field
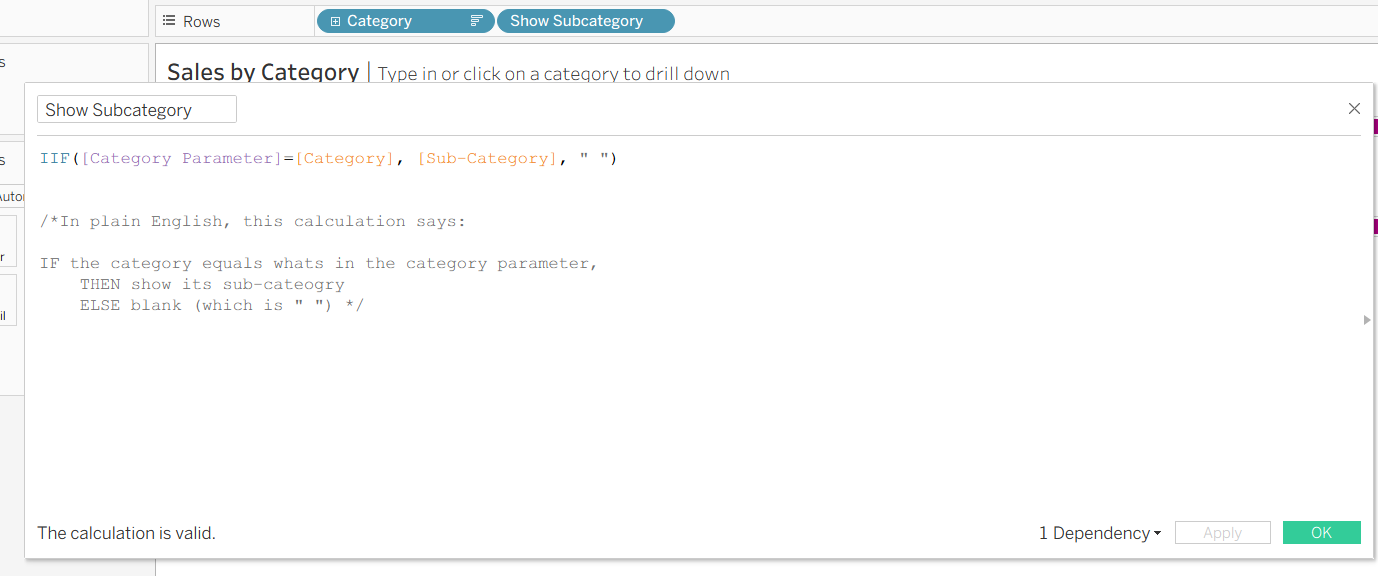
At this point the view is already filtered to whatever value you set as the parameter's default, since we gave it a "current value." But we want end-users to change that value by clicking, not by opening the parameter control. That's what the action is for.
- Create the action: Worksheet > Actions > Add Parameter Action.
- Run the action On Select.
- Set the target to your parameter.
- Set the source field to the Bigger Field.
- Important: set "Clearing the selection will" to set the parameter to a blank value (the single space from step 1). This is what lets users deselect and return to the overview.
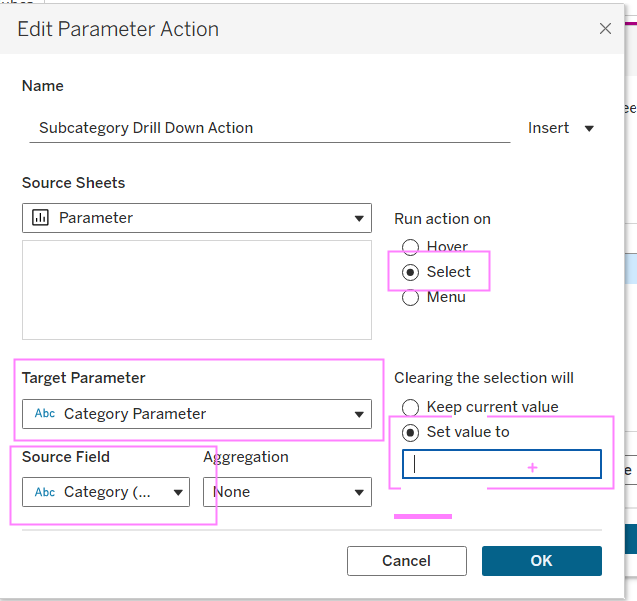
- Run your worksheet!
Set Actions for Drill Downs
Set actions will follow a similar process to parameter actions, except for the beginning. We’ll start by creating a set on the Bigger Field.
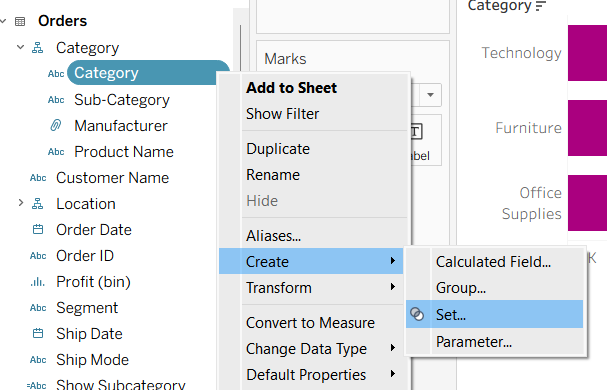
- In the "Create Set" dialog, select OK without choosing any values. This gives you an empty set to start from.
- Right-click your new set and choose "Show Set" (not "Show Filter"). Tableau sometimes won't let you find this option if the set isn't already on your sheet. If that happens, drag the set onto something inconsequential, like Detail on the Marks Card, then right-click it.
- Create a calculated field similar to the one from the parameter method, but this time put the set inside the IF clause directly (no "equals to" needed). Place this field on the same shelf as your Bigger Field. At this point the view will already respond to values selected in the set's side filter, but we want users to select directly on the visual instead.
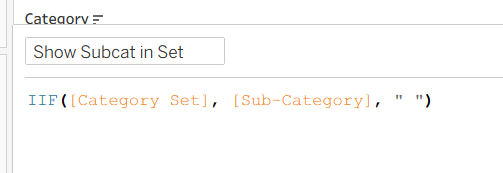
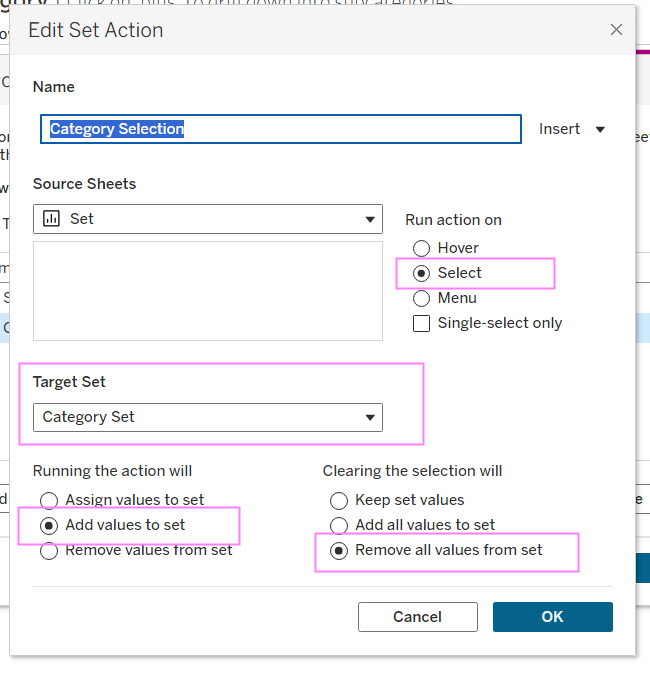
4. Create the action: Worksheet > Actions > Change Set Values.
- Run the action On Select.
- Set the target set to the one you created.
- Set "Running the action will" to add values to the set (this allows multiple selections).
- Set "Clearing the selection will" to remove all values from the set (this lets the drill down clear).
- Run it!
Conclusion
Ultimately, all three methods solve the same problem: giving end-users control over detail without building a separate view for every level. Hierarchies are the easiest to set up but all-or-nothing. Parameter actions add real filtering, capped at one selection at a time. Set actions trade that simplicity for flexibility, letting users build their own custom subset.
The right choice comes down to how much control your end-user actually needs, and how much complexity you're willing to build to give it to them.