


A macro is a workflow or group of tools built into a single tool. There are three main macro types: these are Standard, Batch and Iterative. This blog is part of a mini series where I will break down each macro and show examples as well for each. Starting with standard Macros.
Before I start I will cover a general background why we use macros?
What is a Standard Macro?
When you have a repetitive task to complete for processing data across different columns, data sources, and/or workflows, a Standard Macro may help automate that task.
To start a macro
You need two sheets open so that you can edit the macro and test that the macro opens.
Rule number 1: Always save your macro so it will update in your workflow.
Example of Standard Macro
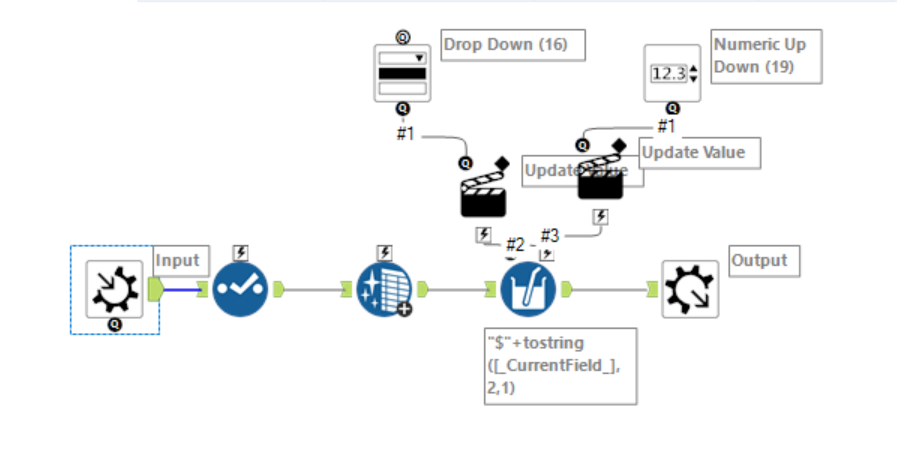
Below shows what we will be trying to recreate this is a currency converter which will not only change the currency but will allow you to change the number of decimal places there are. As I go through this example I will go through these different interface tools.
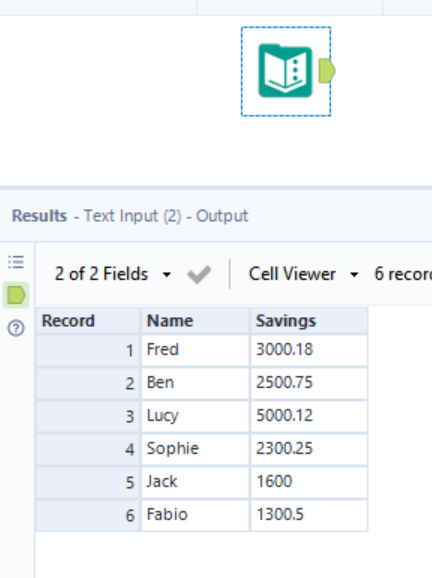
So first lets start with the original input, I duplicated this so that one will as my macro and the other a standard macro:
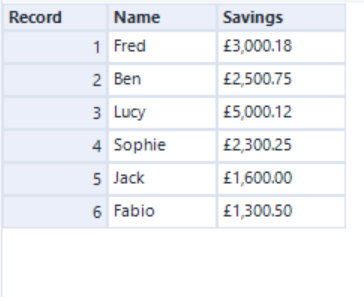
I tried to keep this a simple input for now which was some peoples names and there savings.
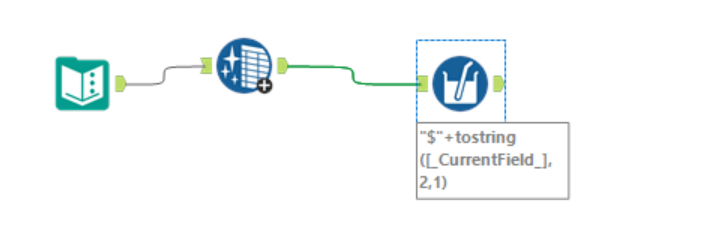
So first thing I did was copy this into a new workflow. I then added a data clense tool to make sure there was no trailing space.
Next I added a multi-field formula so that I could add an expression which will add $ as a placement (this will be one of the things we change) and the number of decimals needed (shown by the 2 in the formula below). This is show by the following expression.

Now to start converting this into a macro. So macros need either a macro input or a macro output minimum - this will allow for it to have one anchor. However we can use both if we want an input anchor and an output anchor.
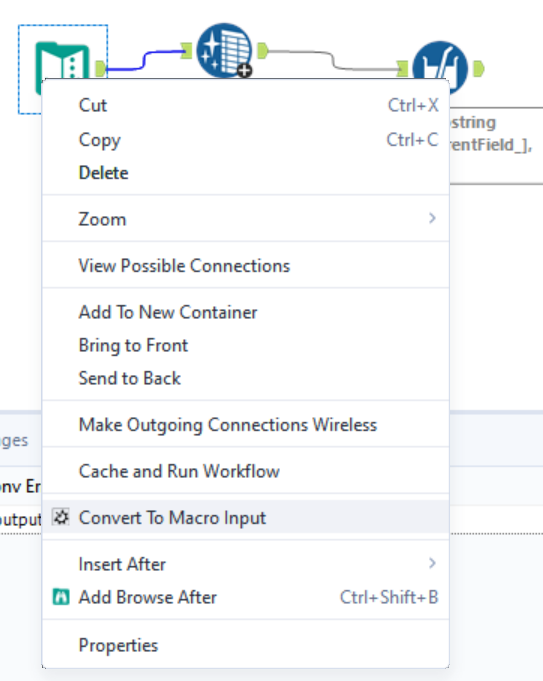
So to start if you right click on the text input and then you can convert straight to a macro input. For this example this what we are going to do.
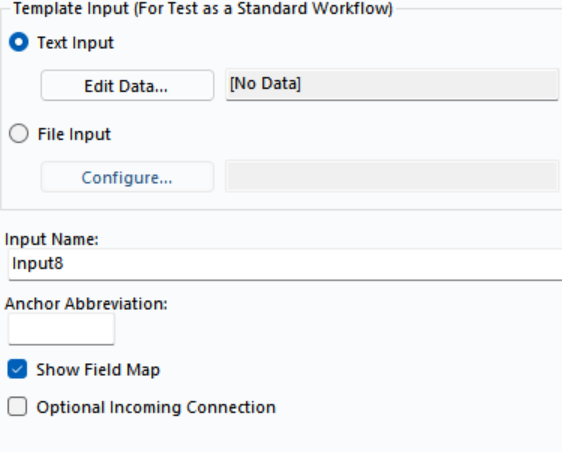
The other way if you go to the interface tools you can drag Input macros onto the screen and you can either type a text input straight away or you can insert a file. Below shows the configuration window if you dragged and drop the macro in. ( You can also changed the input name and have an abbreviation on anchor.
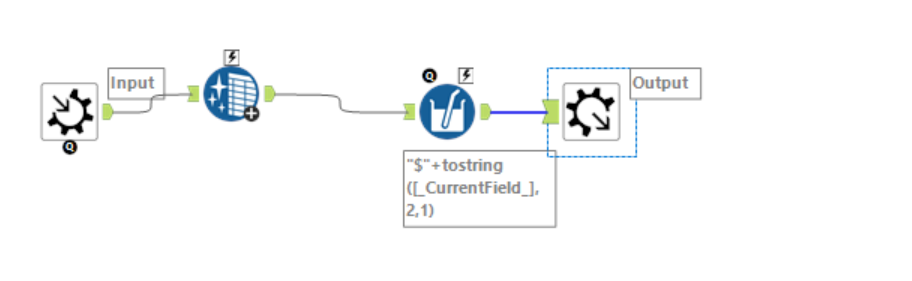
Then I just added a macro output. Now technically we have a basic standard macro which has an input and an output.
Back to rule number 1: save it.
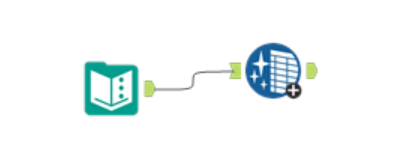
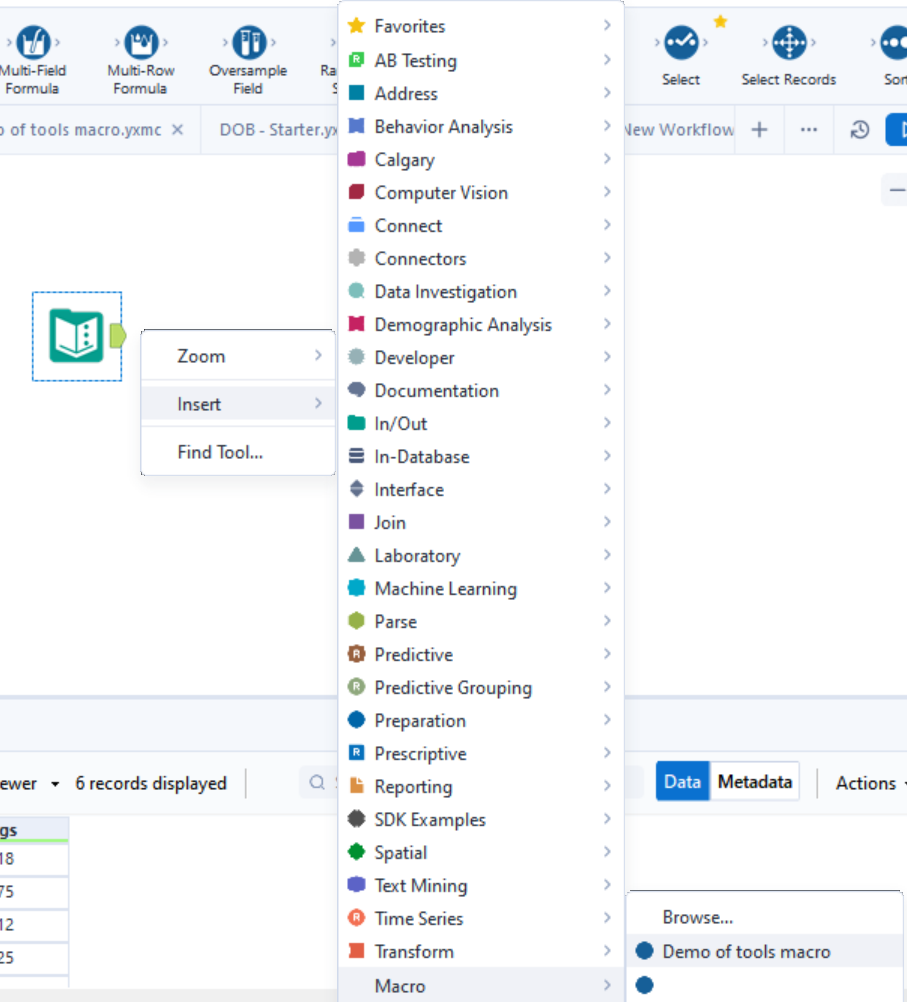
Now if we go back to the first workflow with just the text input we can see if our macro has worked. So to add your macro if you right click the canvas and go on insert, at the bottom there should be an option for a macro. For my case I saved mine as a demo of tools macro.
Then if you join this to the input it will look like the following.

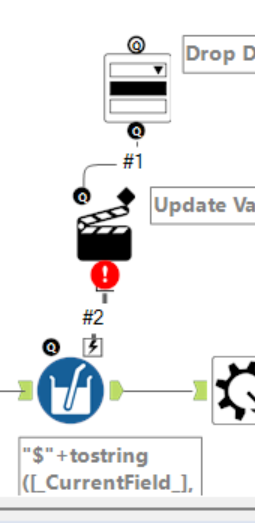
Now to add the actions onto my macro so that we can change the currency and the decimal. Lets start with the currency converter. For this I am going to use a drop down.

This is in the interface pallet which allows you to make a single selection from a drop down list. So if we drag this onto the canvas. Now if we click this and configure this before connecting we will see. So we can rename the drop down itself. We can also select how the list of values come through so in this case we are just going to maually input this.
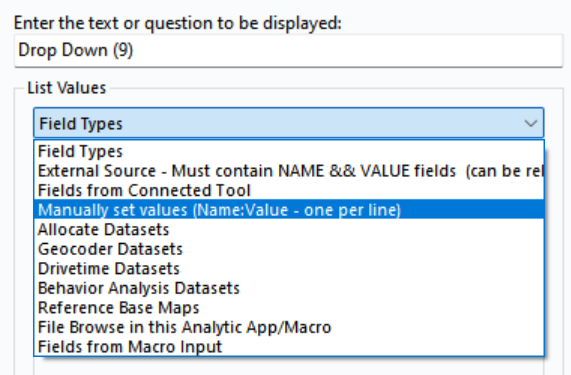
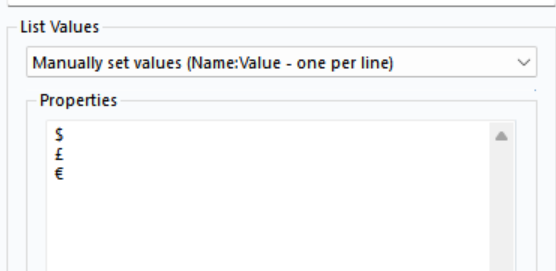
As shown below we want different currencies. ( However if you plan to use the euro sign you need to change the data type to a v-wstring as a normal string will not be able to take these characters.)
Now to connect this up. When we dragged the drop down tool into the canvas a little q appears and on some other tools there is a little lightning bolt. Essentially the q and the lightning bolt are connectors which when you join them together the values that the user configures om the macro with the part that you want to change. When you drag the q to the lightning bolt an action tool is configured and this is where we change this configuration.
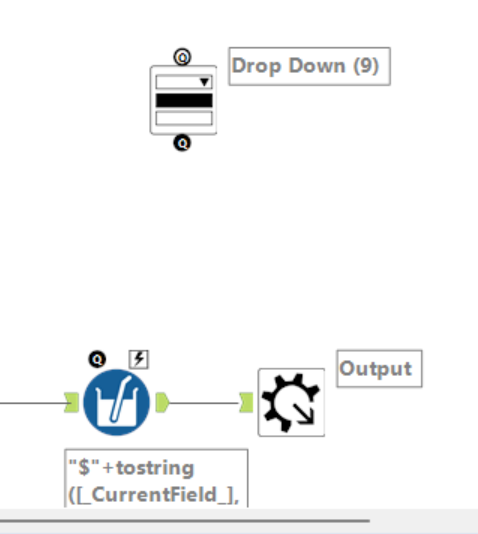
when connected the following will appear:
In the configuration window the following comes up:
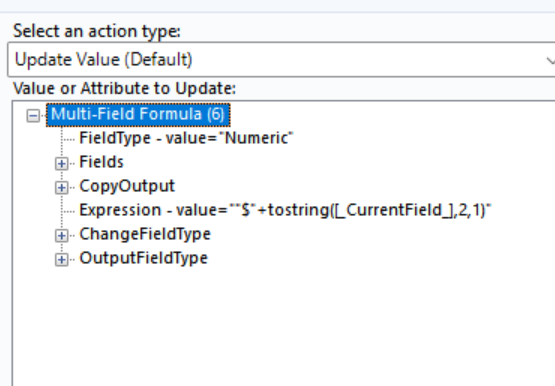
We can see in this view after we have dropped down all the values and attributes our expression. Thus is what we want to edit as we want to swap out the $ sign with other currencies.
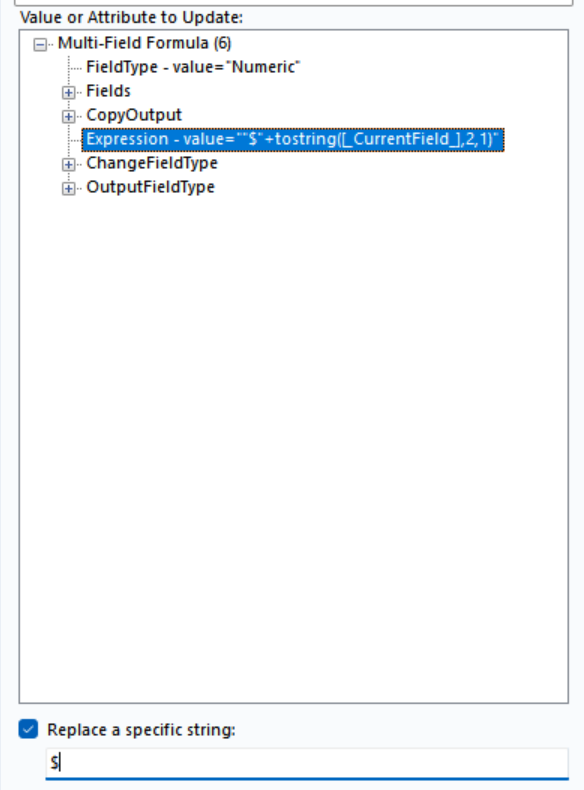
So how do we do this. First we click on the expression, then at the bottom of the configuration window we can see replace a specific string, we tick this then we remove everything in this field but the $ sign. This is basically saying this action will change the $ dollar sign with whatever has been selected in the drop down.
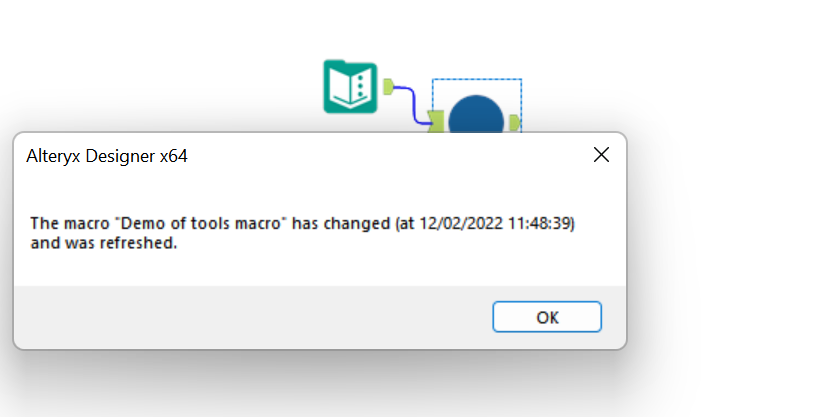
Once again save this. And check this has worked. When we go back to our workflow we can see that it has been updated- this will only show if you save your macro.
Now if we click on the macro we can see the following come up in the configuration window:

If we were to select the pound sign for example and run the workflow we will see in the results pane our results have been updated, so we know that this has worked.
Now to add a numeric up down tool in. ( You can use a range of the interface tools to do these features but I have just selected these two.)
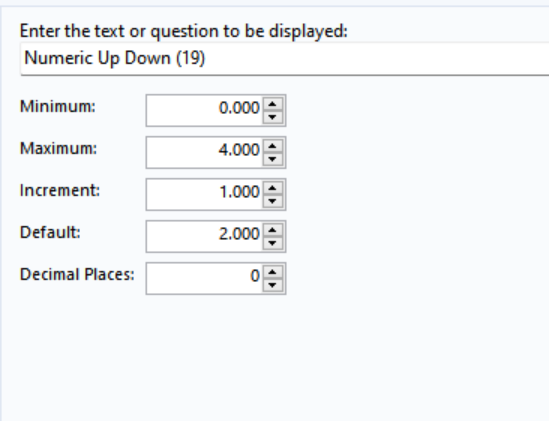
This tool allows users to choose a number from a predefined range. Doing a similar step to the previous one, we drop this in and lets configure first. For mine I want the maximum number of decimal places to be 4, to change by 1 decimal at a time so you can only go up 1 or down 1 on first click. Finally I set the default to start with 2 decimal places.
Now once again we want to drag the q to the lightning bolt and go back to our expression, this time we want to change the 2 within this equation as that was our placeholder for decimals.

Once again save and now we can go check out the final results. I always add a browse tool after the macro for my results just incase all can't be seen. So if we want 1 decimal place and a euro we can see the following once we run.
