In the case that the fiscal date of your dataset doesn't begin on January, Tableau Prep has the functionality to change that date to whenever you want. The options don't just include months, there is the option to choose between a year, quarter and a week number. This tutorial will showcase how simple it is to create a new date in Tableau Prep.
Step 1:
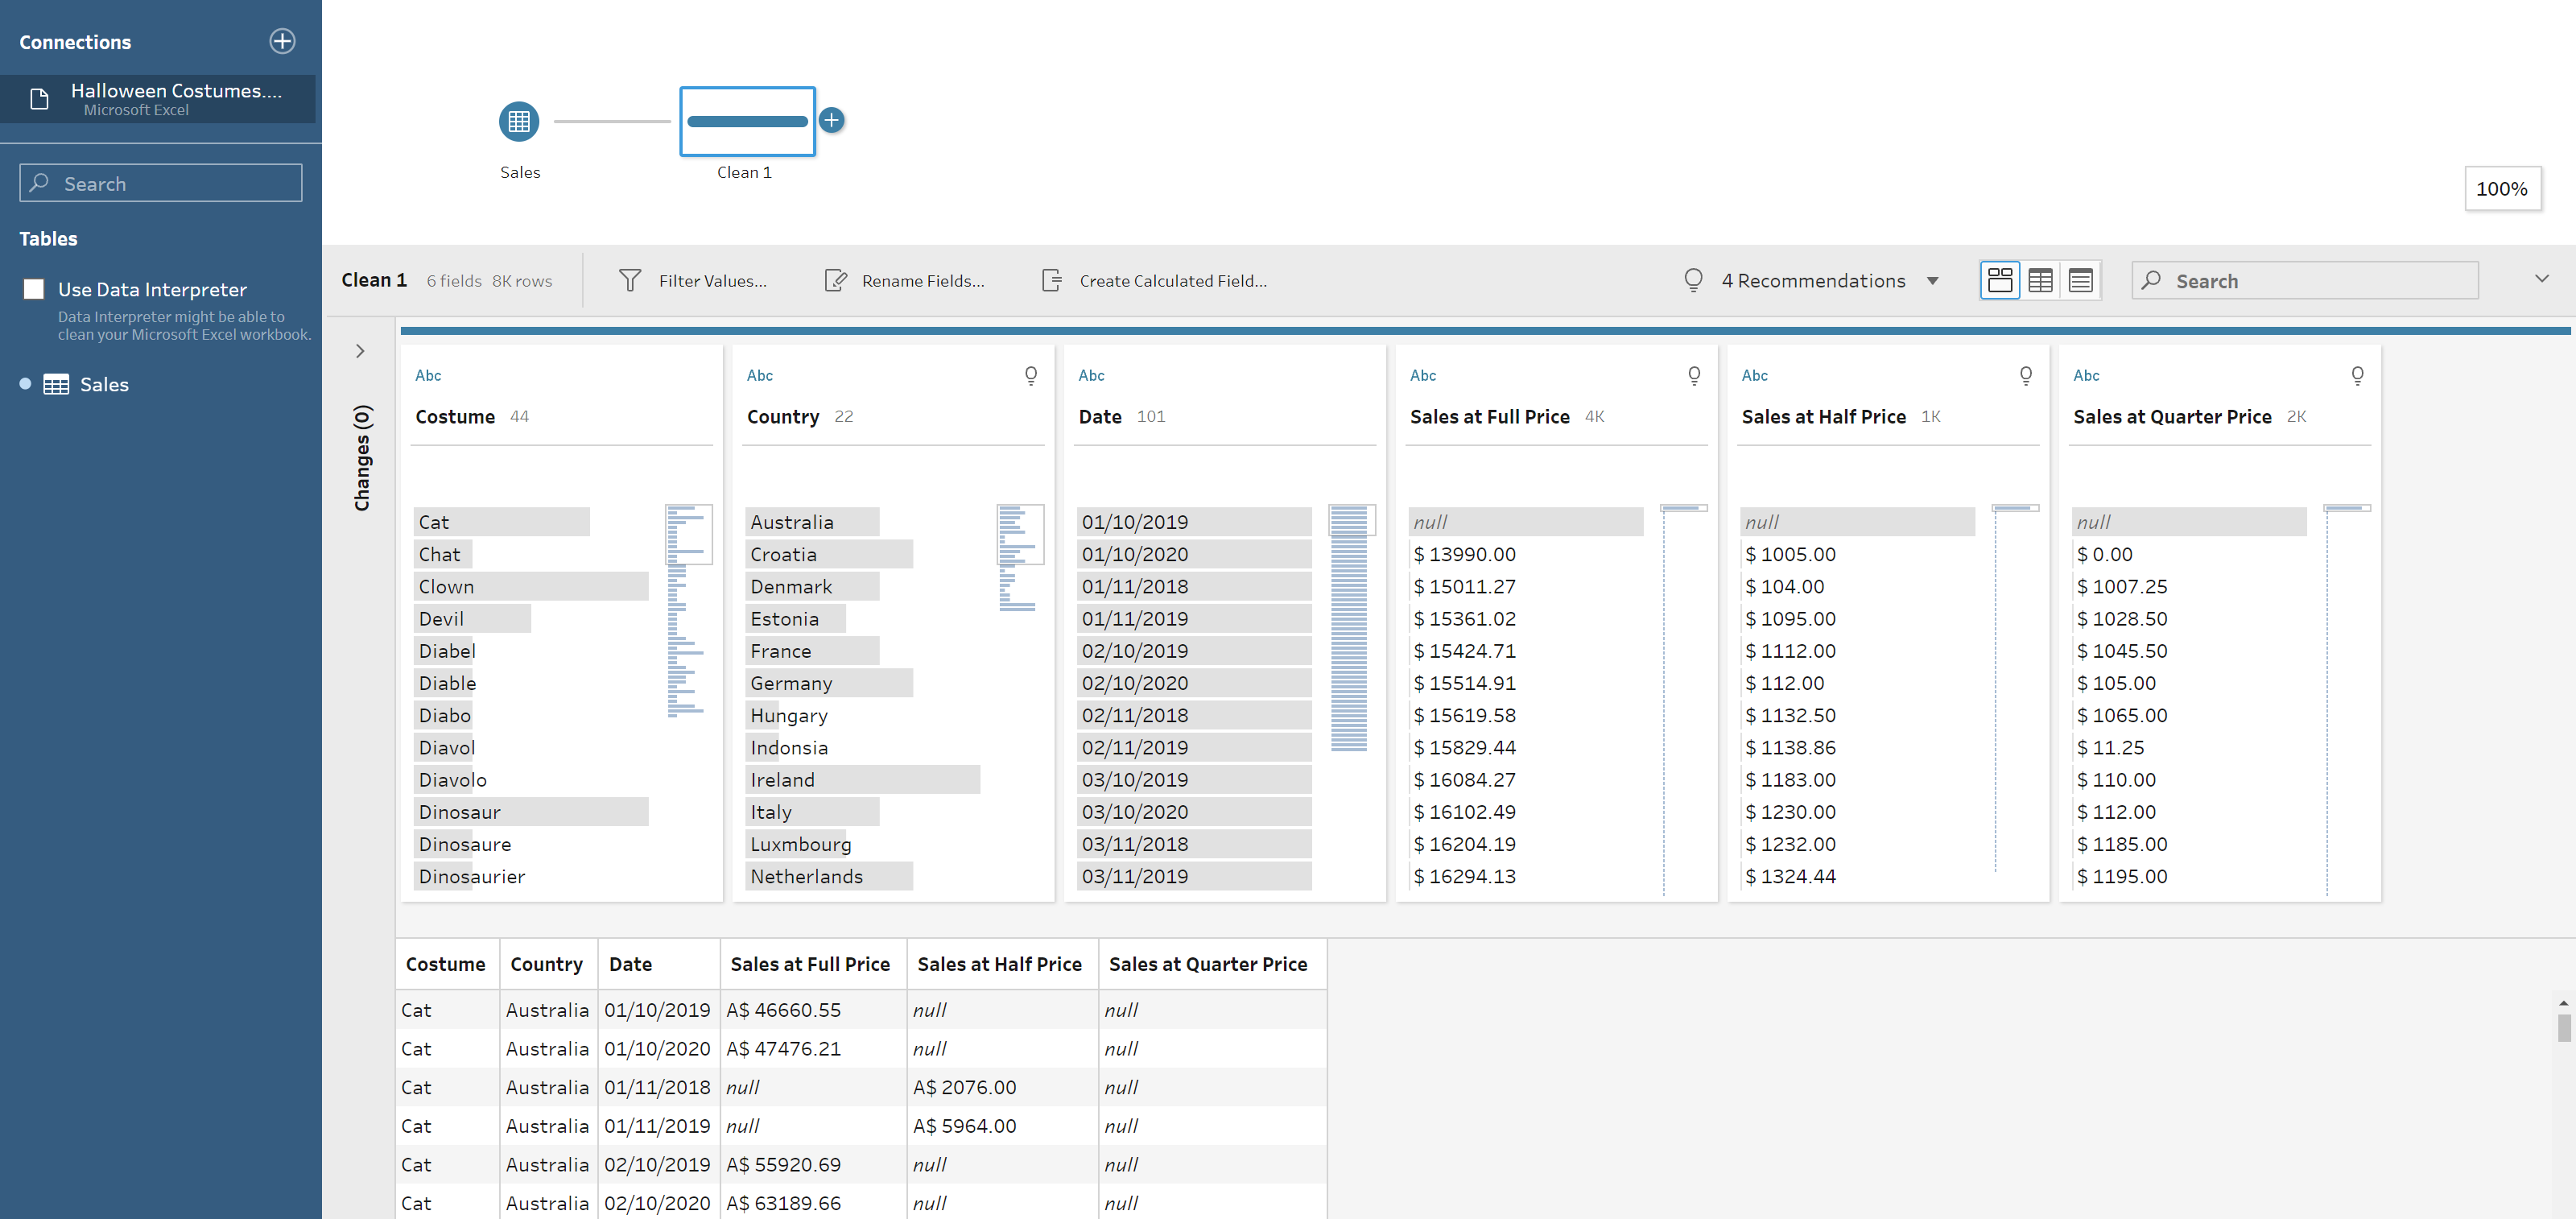
Insert the data source into Tableau Prep. For this example, I am using the dataset used in the Preppin' Data challenge from 2020 Week 44, which looks at Halloween Costumes. Once the data set has been loaded up and put into the view, add a clean step to showcase the data in an accessible and user-friendly way.
Step 2:
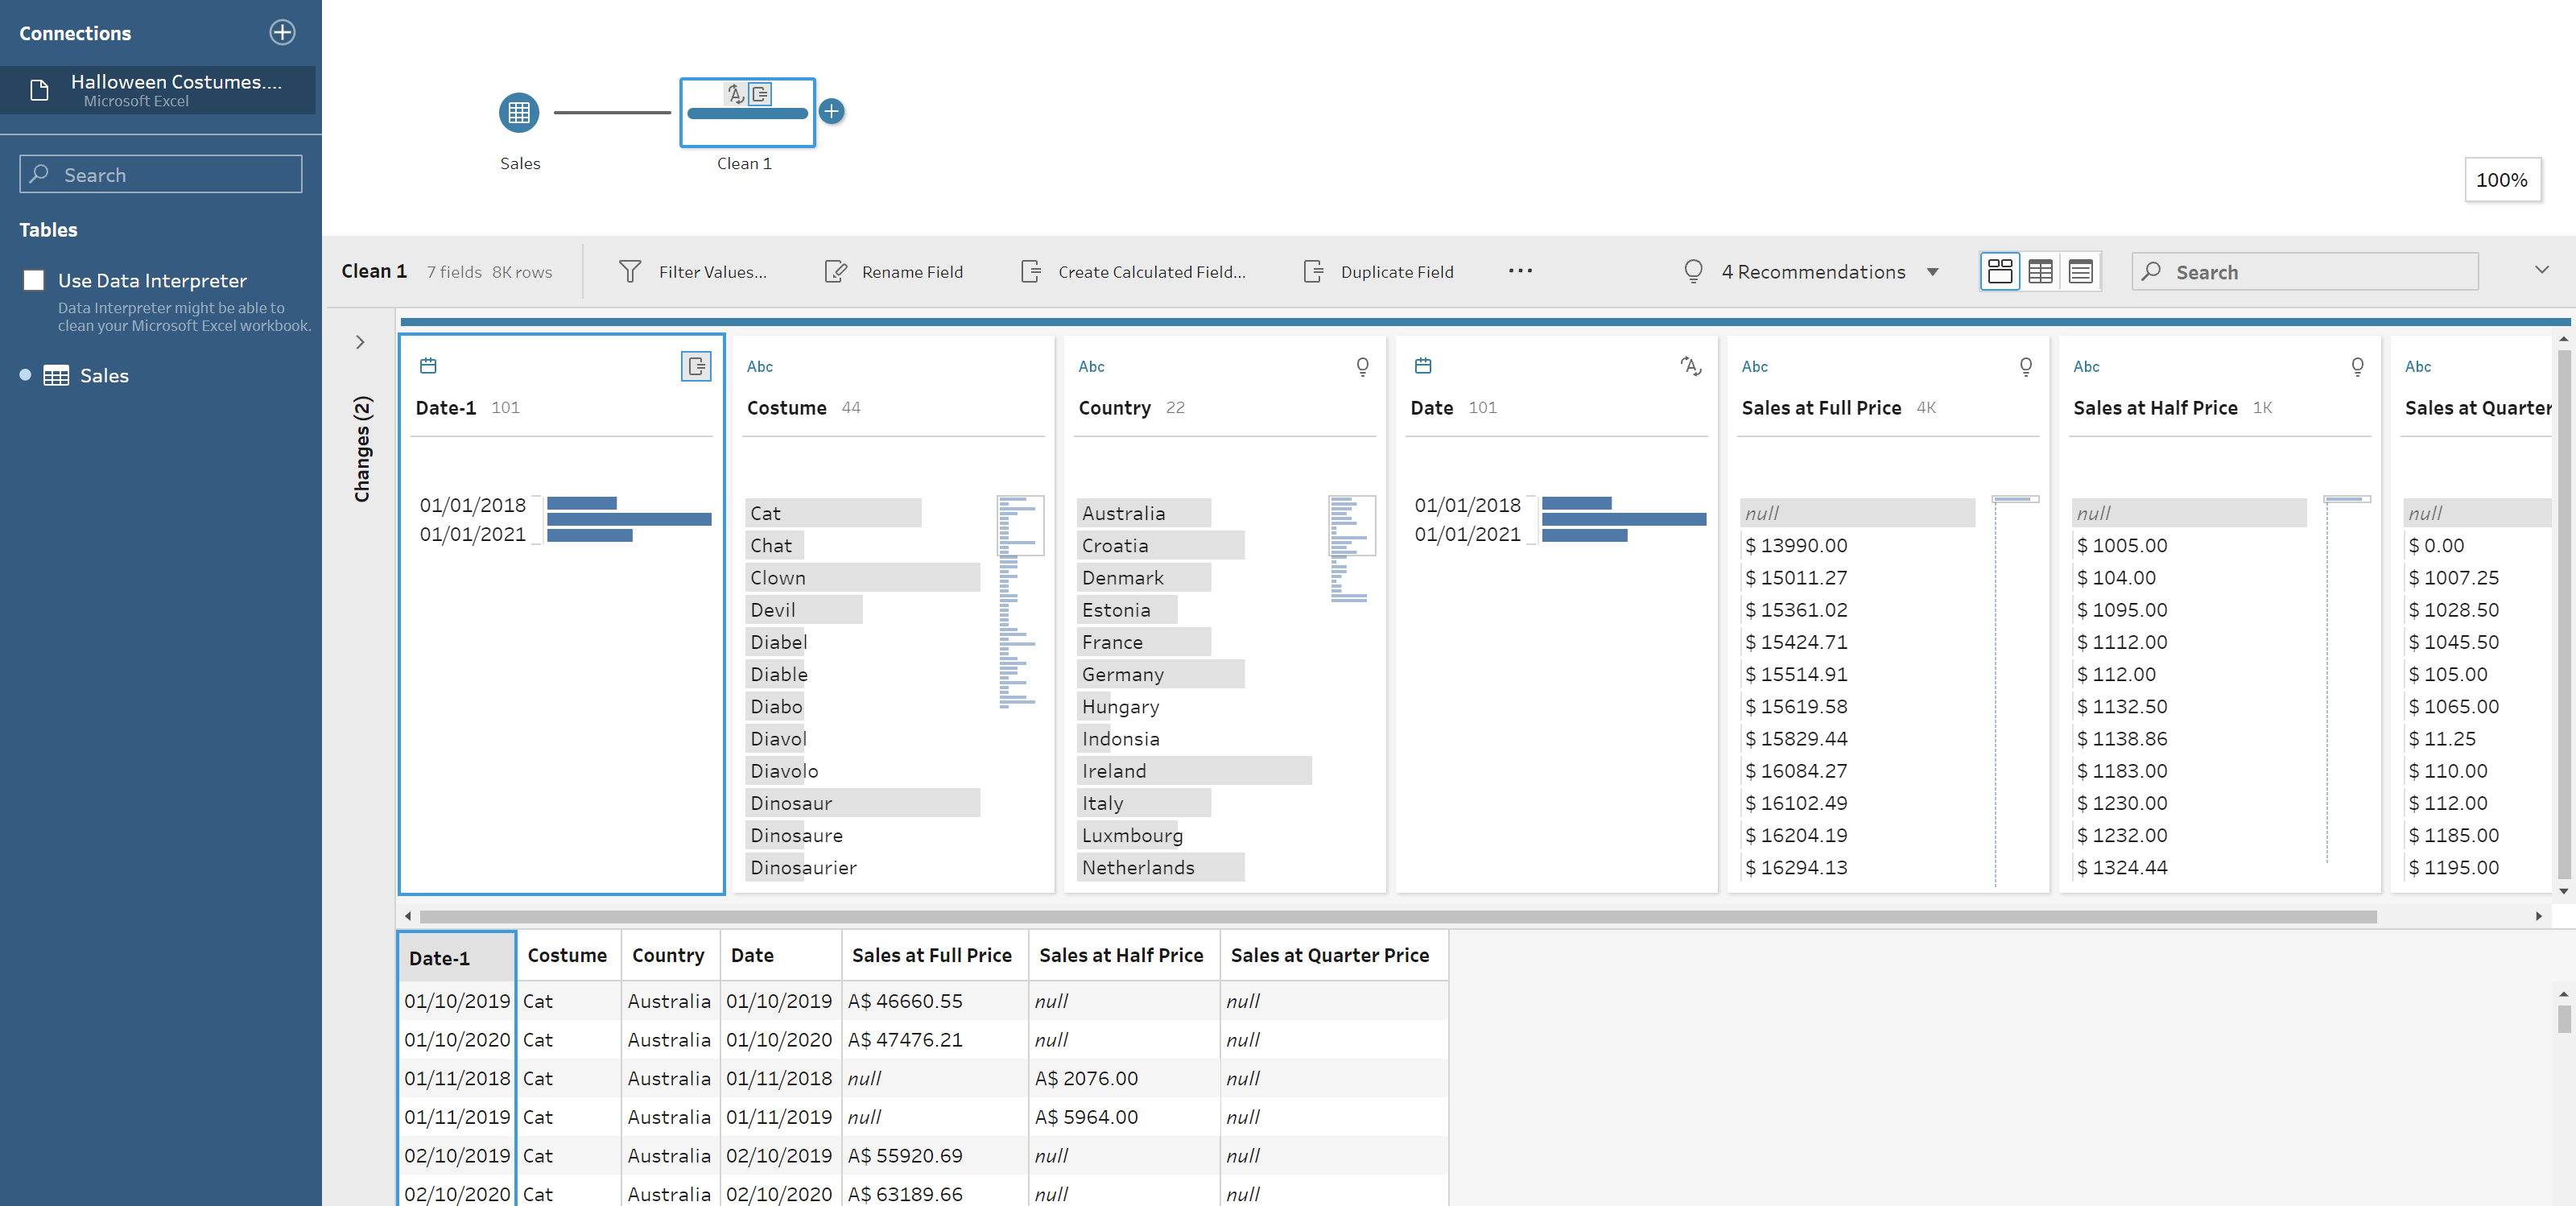
As seen in the picture above, the Date field is a string so the first thing to do is change that into a Date type by clicking the Abc above the name of the field. Once that is done, duplicate the Date field so you now have two of them.
Step 3:
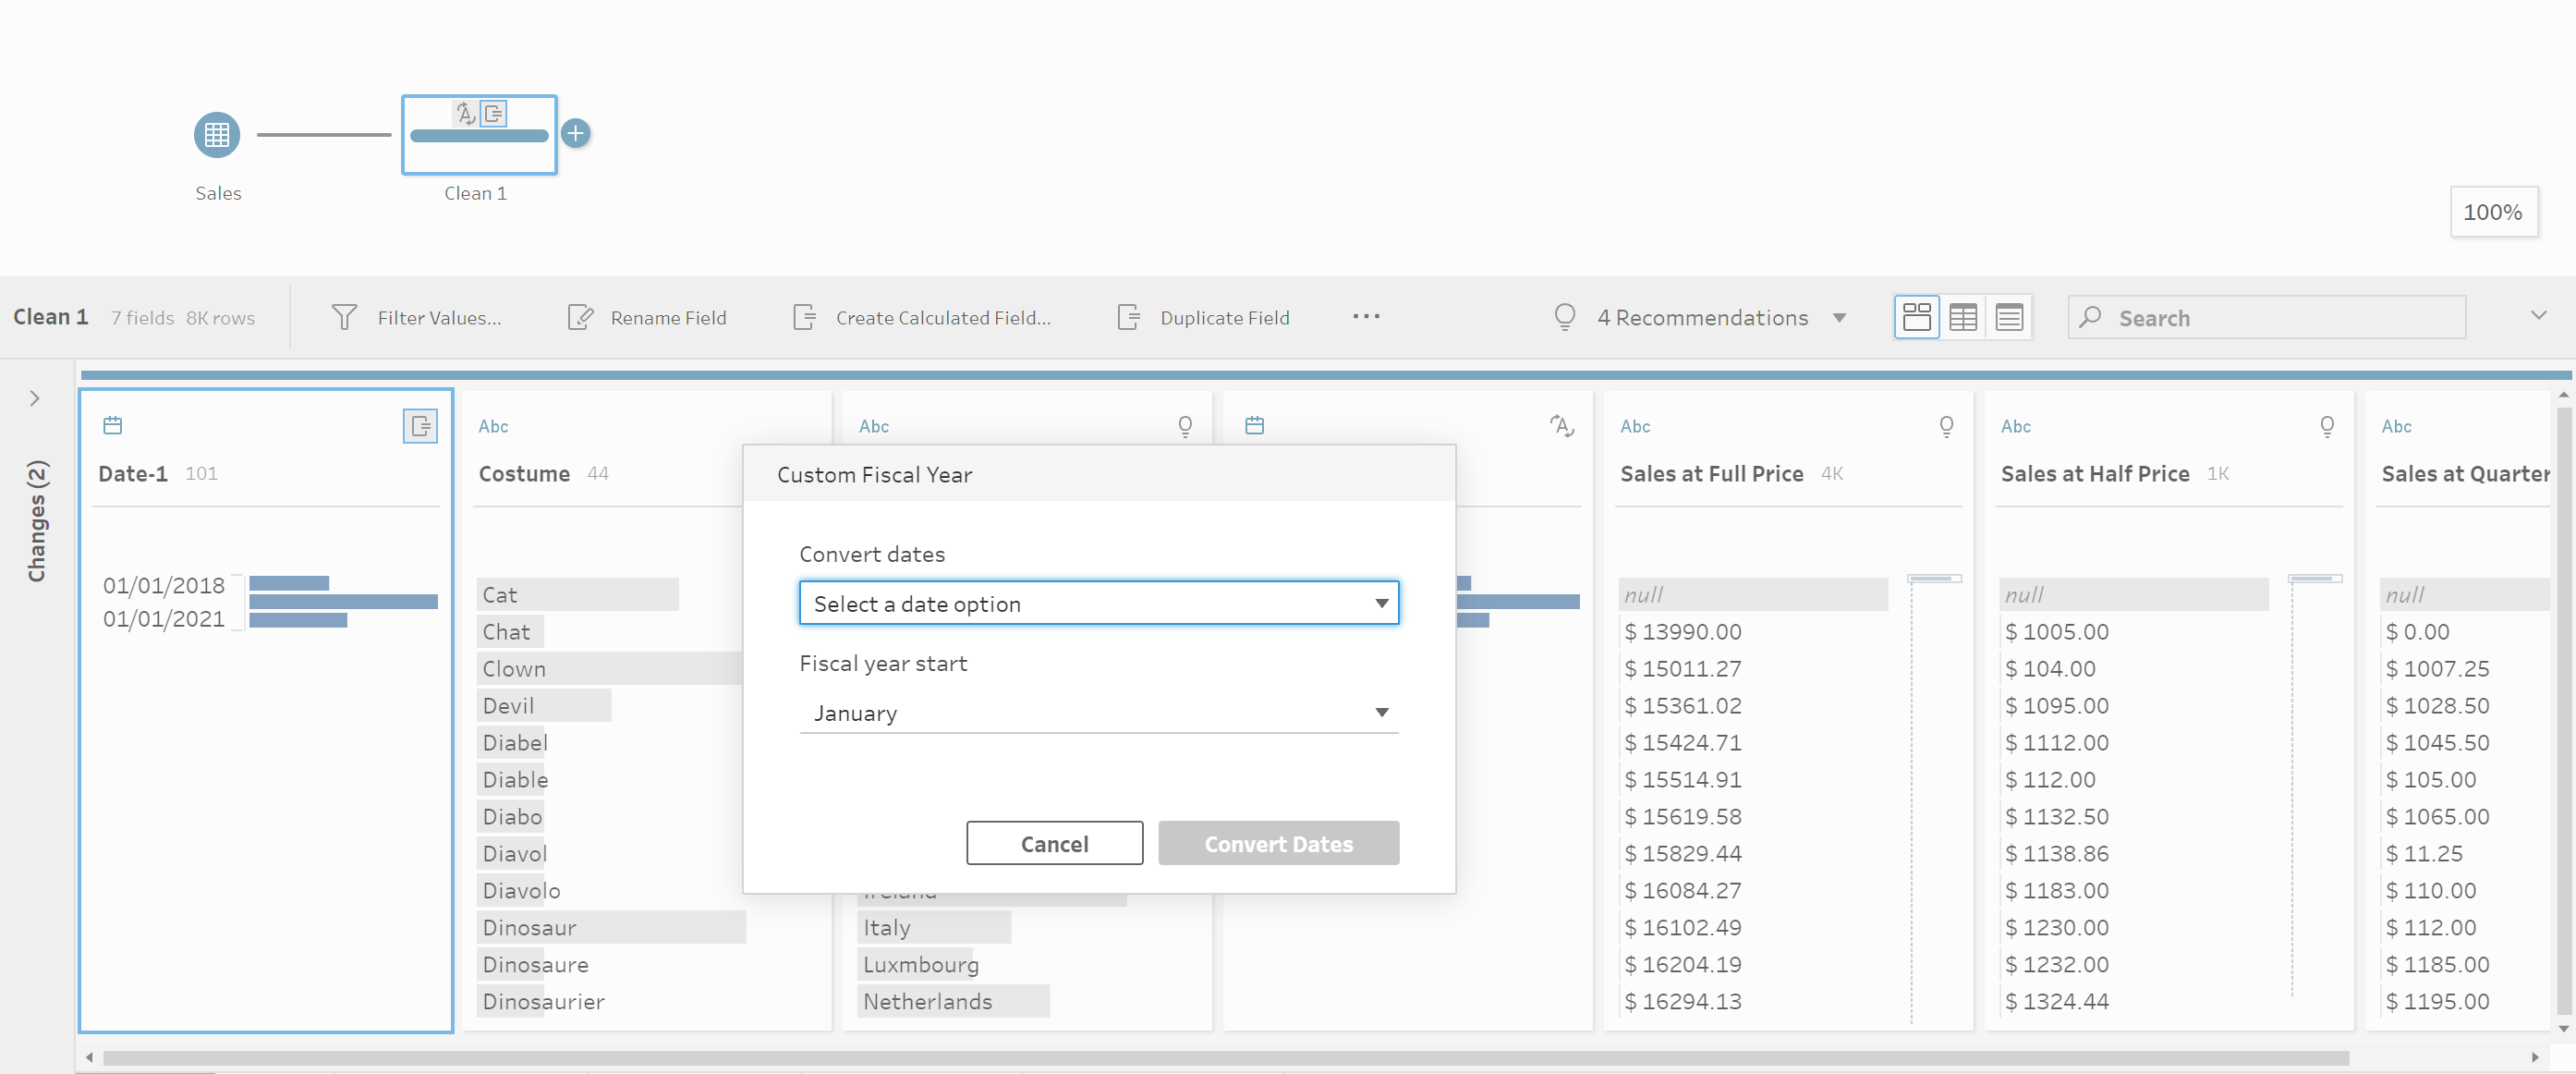
Now that there is a new Date field called Date-1, use that to create the new fiscal date by hovering over the field and clicking the ellipses. The option of convert dates should show up and then click on Custom Financial Year to have a pop-up as shown below.
Step 4:
In this example, we will be using the Year Number dropdown in the first selection and then choosing November in the Fiscal year start dropdown as per the request in the Preppin' Data challenge. This means that the fiscal year starts on November from every year so the first month of the year will be November rather than January,
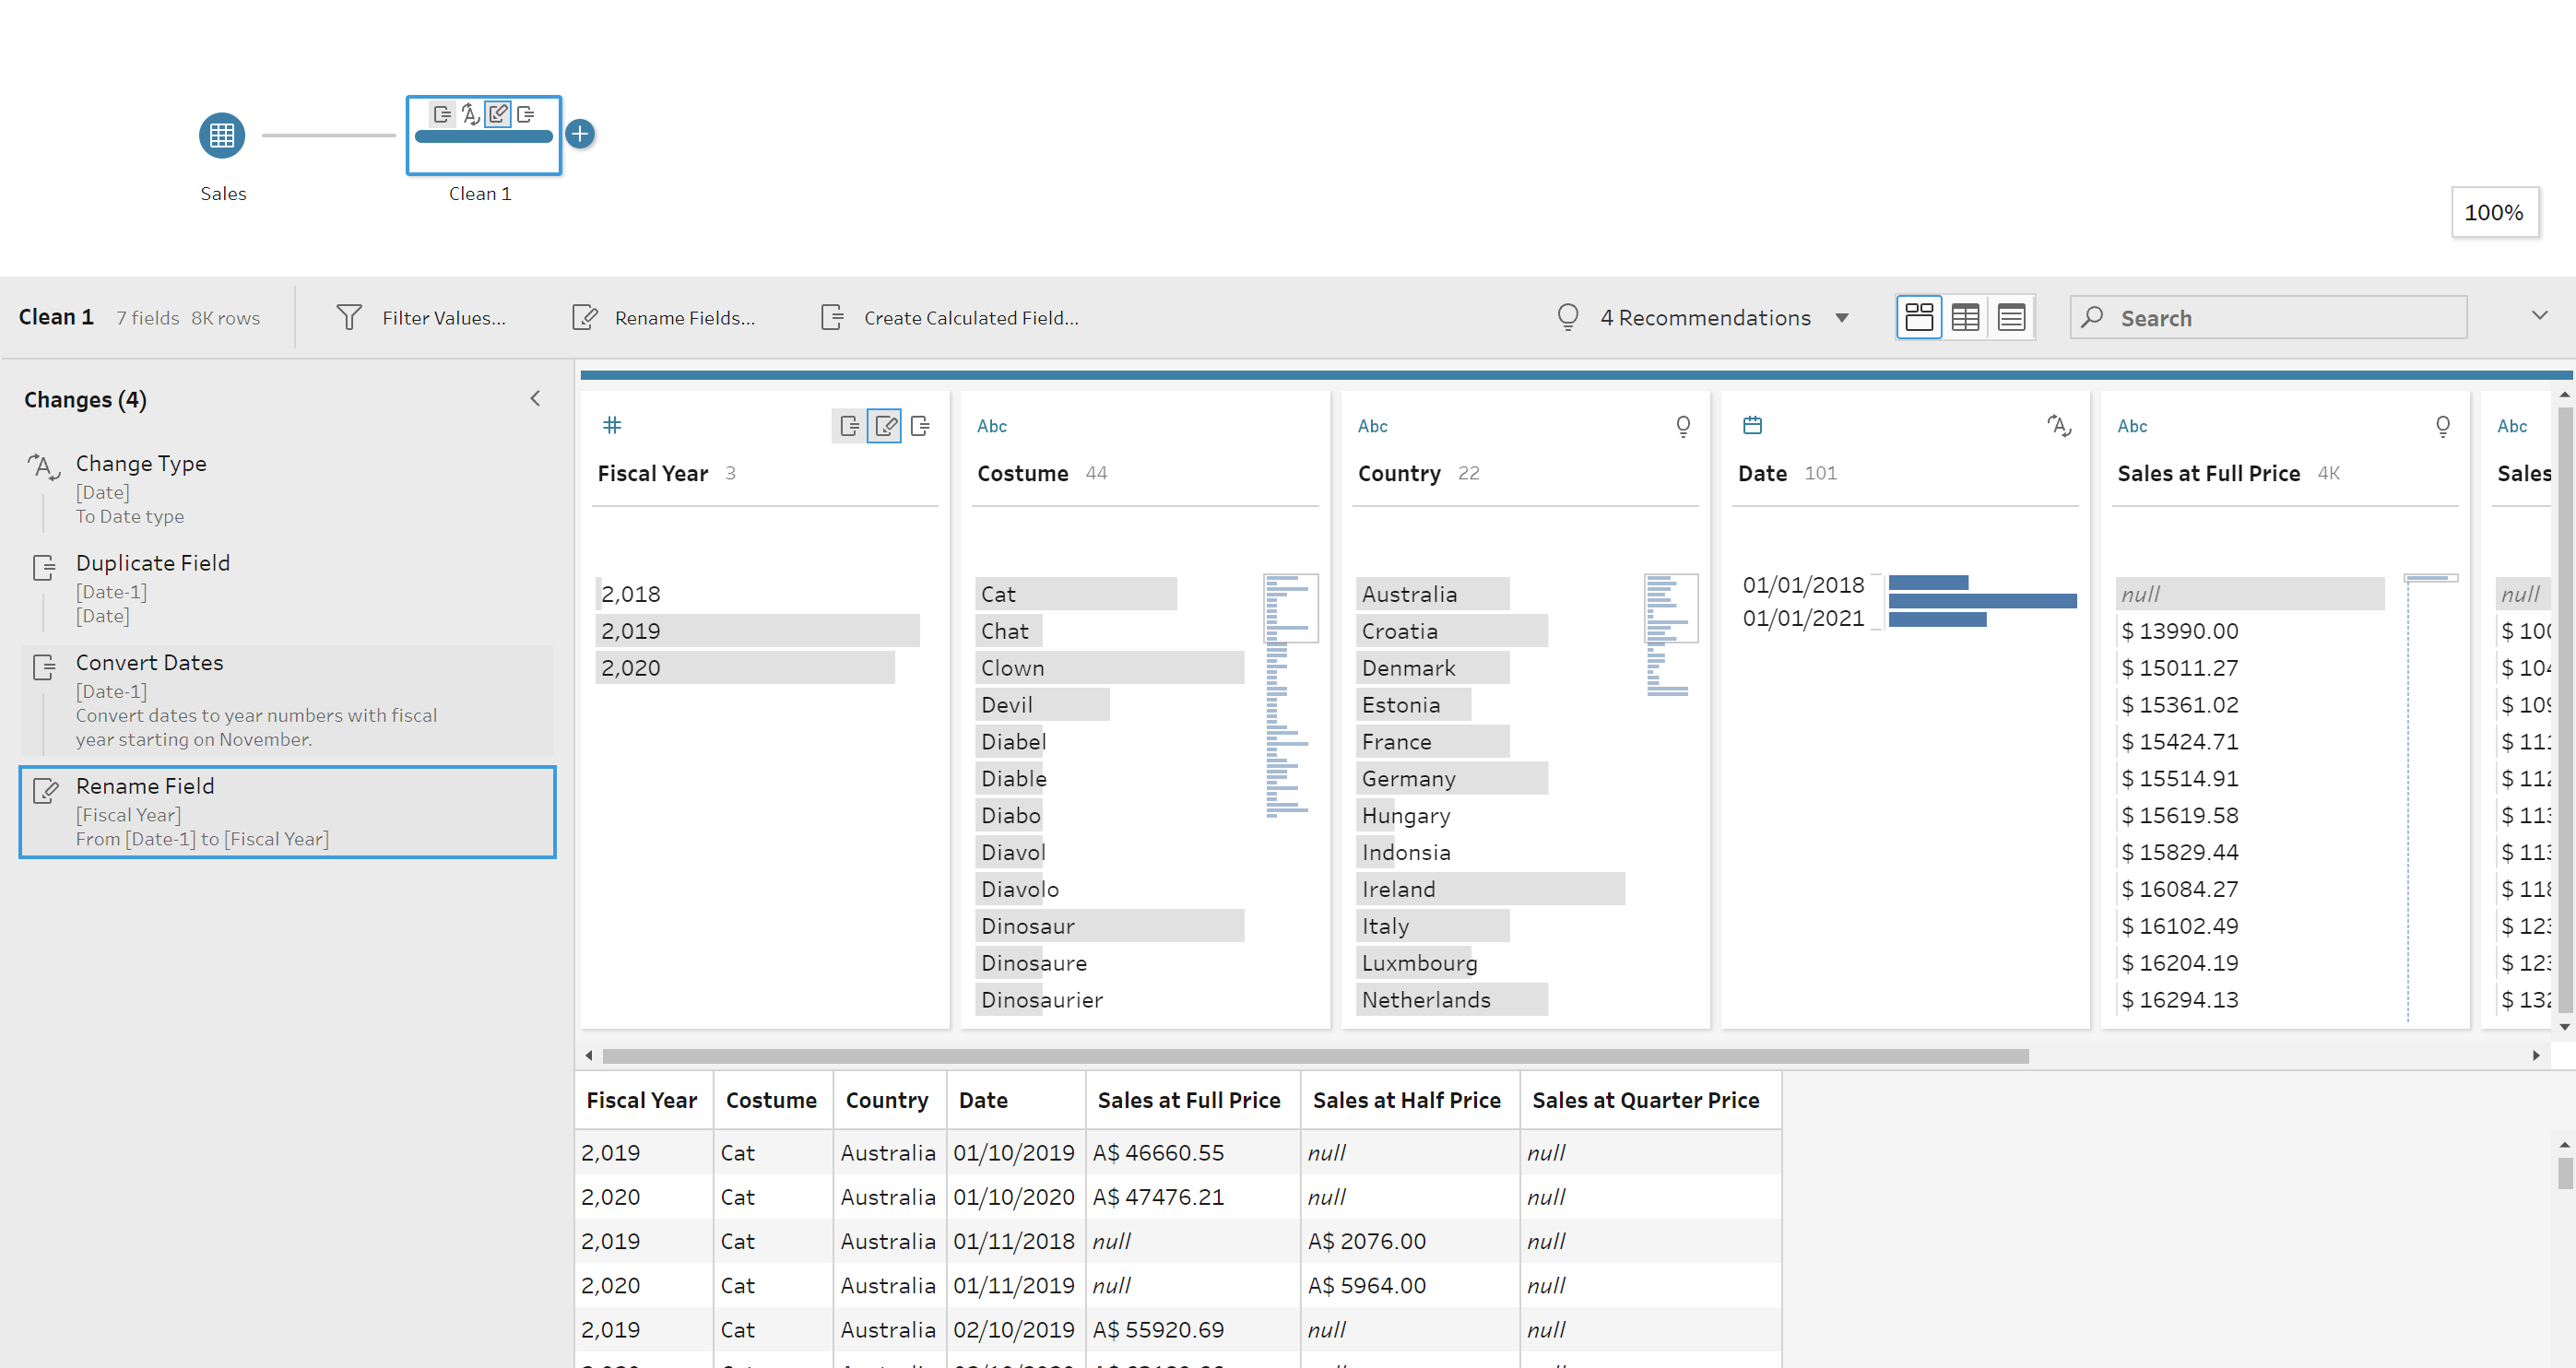
Step 5:
Once that is done, the data should look like the image below once you have renamed the new date field.