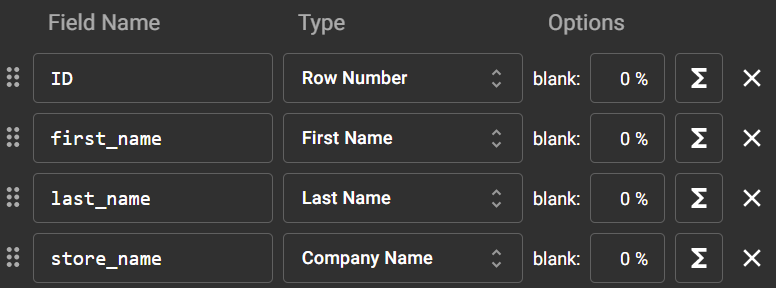
Mockaroo is a tool for creating realistic datasets. In this blog, we'll use this tool to create mock data based on Tableau's Superstore. To get started let's select 'Add Another Field'. A field name can then be specified, as well as the type of data required by selecting 'Type'. There are many types of data we can choose from including animal names, cars and cryptocurrencies. In this example, we'll create fields for first name, last name, store name, and row ID. To the right of these fields, we can specify the frequency of null values as a percentage and apply formulas by selecting 'Σ'.
We can then click preview to see what we've generated so far. Note, whenever you select preview results are regenerated leading to a different output each time. You can click download to retrieve the dataset in your preferred format.
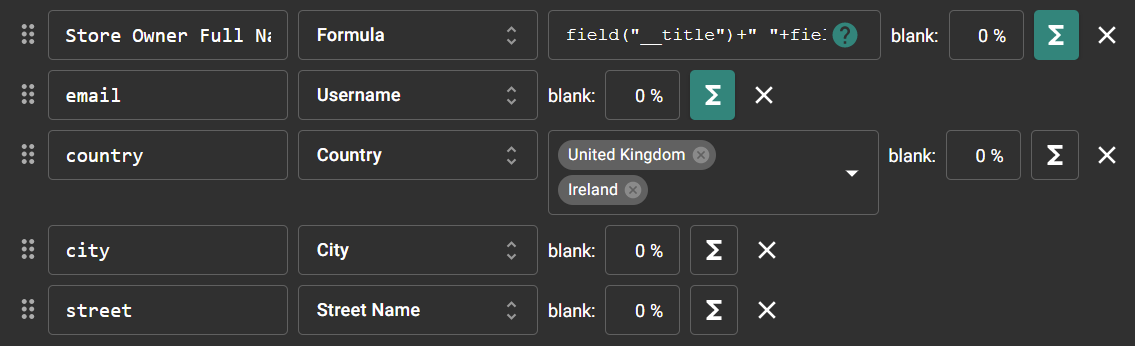
We next want to assign each person a title e.g. Mr, Mrs, Dr etc. We can do this by creating a new field of the type 'Title'. We can add '__' before 'title' in the field name. This informs Mockaroo that this field is only for use in calculations. Next, let's create a 'store_owner_full_name' field and assign it the type 'Formula'. Then select the formula button. The syntax for formulae differs somewhat from Tableau and Alteryx. We can concatenate our titles, first names and last names into a single field using the following expression:
field("__title")+" "+field("first_name")+" "+field("last_name")The output of this formula can then be checked by clicking preview. Next, we'll create an email field of the type username. This field can be used to create emails by selecting formula and inputting the following code:
lower(this+"@"+field("store_name")+".co.uk")Next, let's add country, city and street fields. For country, we will add 'United Kingdom' and 'Ireland' to the options box. This will ensure that country, city and street names are within these countries.
Finally, at the bottom of the page, we can specify the number of rows and our desired format. Here we will request 40 rows as CSV and download.

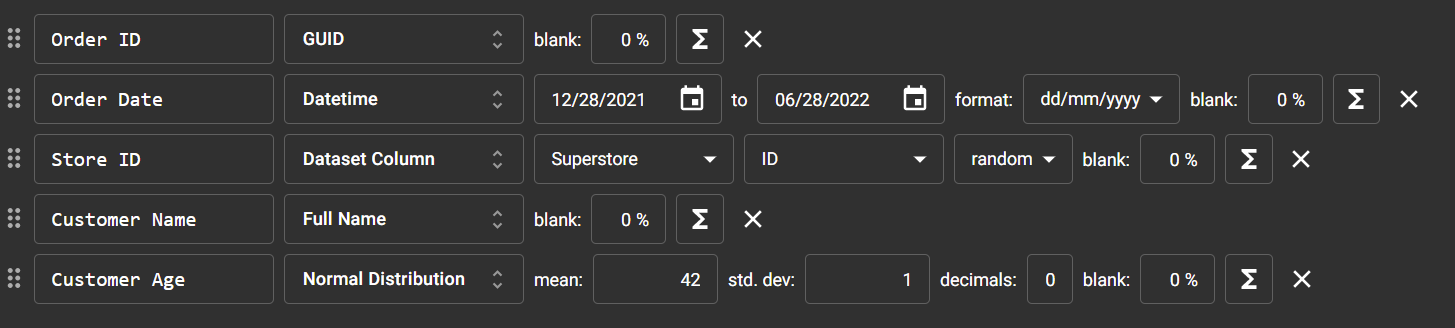
Next, let's upload this schema and open a new schema. We will join this to the first one that we created. In our new schema, add the field 'Store ID' of the type 'dataset column'. We can join this to our original schema by selecting superstore and the ID field under options. We can also create a field for customer age, enforcing a normal distribution by choosing this type and specifying an arbitrary mean of 42 years.
Next, we can add a product category field with a custom distribution. This is done by choosing a custom list and inputting our desired values separated by commas. A custom distribution should be selected under options. This can be adjusted by selecting the bar chart icon. In this view, we can change the ratio of each value.

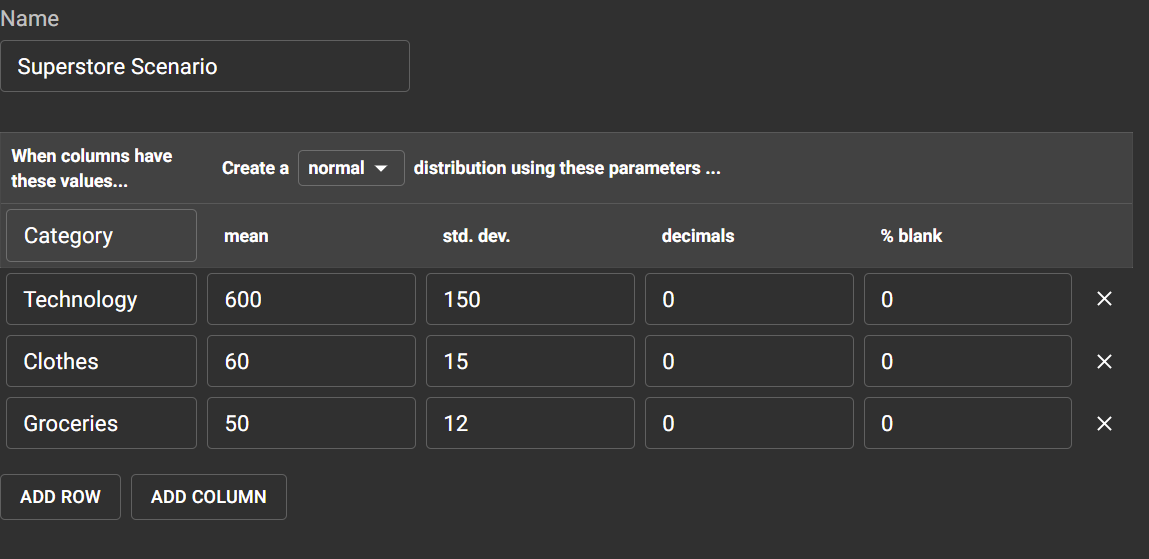
Finally, we can add a sales field with another custom distribution. This can be done by creating a new scenario under the scenarios tab. Here, custom values can be specified along with means and standard deviations. Scenario can then be selected under type, and our custom scenario can be selected under options.