Tables in Snowflake are schema-level objects, which means they are created within a schema. To create a table, you first need to identify the schema where it will reside. Since schemas exist within databases, you must also specify the database that contains your chosen schema.
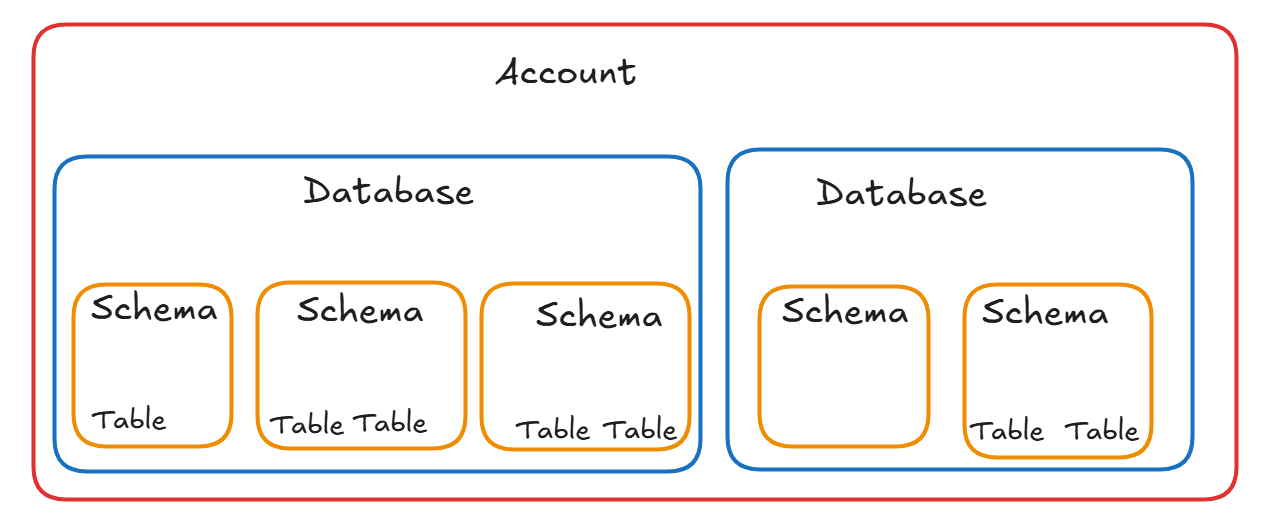
In short, creating a table requires you to define both the database and the schema. If that feels like a lot to track, the diagram below will help illustrate Snowflake’s object hierarchy and clarify what needs to be specified when creating a table.

As shown above, Snowflake objects follow a clear hierarchy. At the top is the Snowflake account, which can be thought of as your company’s dedicated, isolated environment within the cloud where all your data and Snowflake resources are stored and managed. A Snowflake account can have many user accounts, each of which can access the environment and, depending on their assigned roles, manage databases and other resources. Within a single Snowflake account, you can have multiple databases. Each database can contain multiple schemas, and each schema can contain multiple tables. Tables are the objects where your data is actually stored. The sketch below also illustrates this structure. Notice that some schemas do not contain any tables (which is completely valid), and this is another reason why you might choose to create a table within them.
Now, back to what we need to define before creating a table. A database and a schema together form what is known as a namespace in Snowflake. When you create a table in Snowflake, it is created in the namespace you are currently working in. Therefore, before creating a table, you need to make sure you are in the correct namespace.
You can define the namespace you are creating the table into by:

Just make sure to replace DATABASE_NAME and SCHEMA_NAME with the actual name of your database and schema.
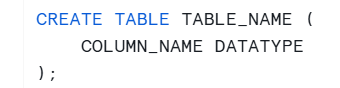
Now you are ready to create the table! The syntax for this is as follows:
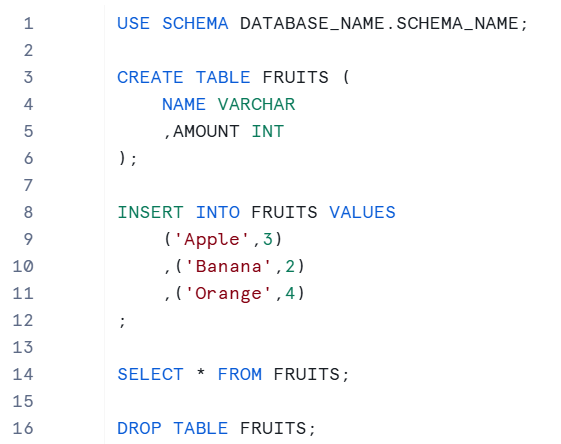
Below, I created a table named FRUITS with a column called NAME, which stores a string representing the fruit name (for example, 'Apple'), and a column called AMOUNT, which stores an integer representing how many of each fruit are in stock.

You should now see the new table inside your schema (hit the refresh on the right of Database Explorer), and if you look into the table you can see that the table and columns exists without data.

Let's now insert some data into the new table! This can be done using the syntax:
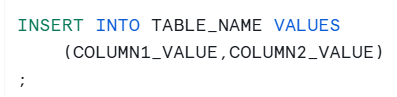
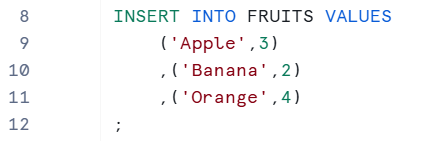
Here, the COLUMN1_VALUE and COLUMN2_VALUE must match the datatype of the columns. You can see below that we inserted three rows of data into the FRUITS table. The fruit names 'Apple', 'Banana', and 'Orange' are stored in the NAME column, which accepts string values, while the numbers 3, 2, and 4 are stored in the AMOUNT column, which accepts integer values.
Great, now you have values in your table!

Now that the table exists, you can perform many other operations to modify its structure or data. However, since this is a blog on creating a table in Snowflake, let’s also quickly go over how to delete the table you just created.
The syntax for this is:

Similar to CREATE TABLE, you must be in the same namespace from which you want to drop the table.

The code above will drop the FRUITS table we just created, effectively removing it and almost resetting our footprint within the database and schema.
I say “almost” because the DROP command does not delete the table from Snowflake immediately. Instead, Snowflake retains it for a period of time, during which it can be recovered using the UNDROP TABLE command.
This is helpful in case you accidentally drop a table, but it’s important to understand that the DROP command does not permanently delete the table right away.
This was a quick tutorial on how to create and drop tables. I’ve provided the full code below for reference. This approach is also a great way to practice and test ideas in Snowflake without worrying too much about cluttering your database.