


We'd heard about macros in our first few Alteryx sessions so we roughly knew what they were but learning how to make them was so fun!
The Basics
A macro is a workflow or group of tools built into a single tool that can be reused in another workflow. Instead of rebuilding the same workflow, you can reuse the macro saving you lots of effort. Some of the tools we already know and love are actually macros such as Data Cleansing and Count Records!
Before diving into the instructions, have two canvases open so that you can create and edit the macro in one and test out the macro in a workflow in another.
General Macros
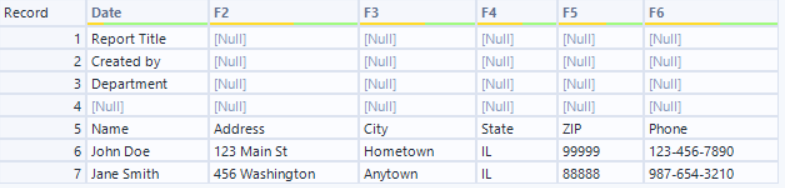
One of the first macros we built was a "promoting headers" macro. We started with our main workflow and we inputted data where the headers started on the 5th row:
In the macro building workflow we copied in this data to create the macro off of.
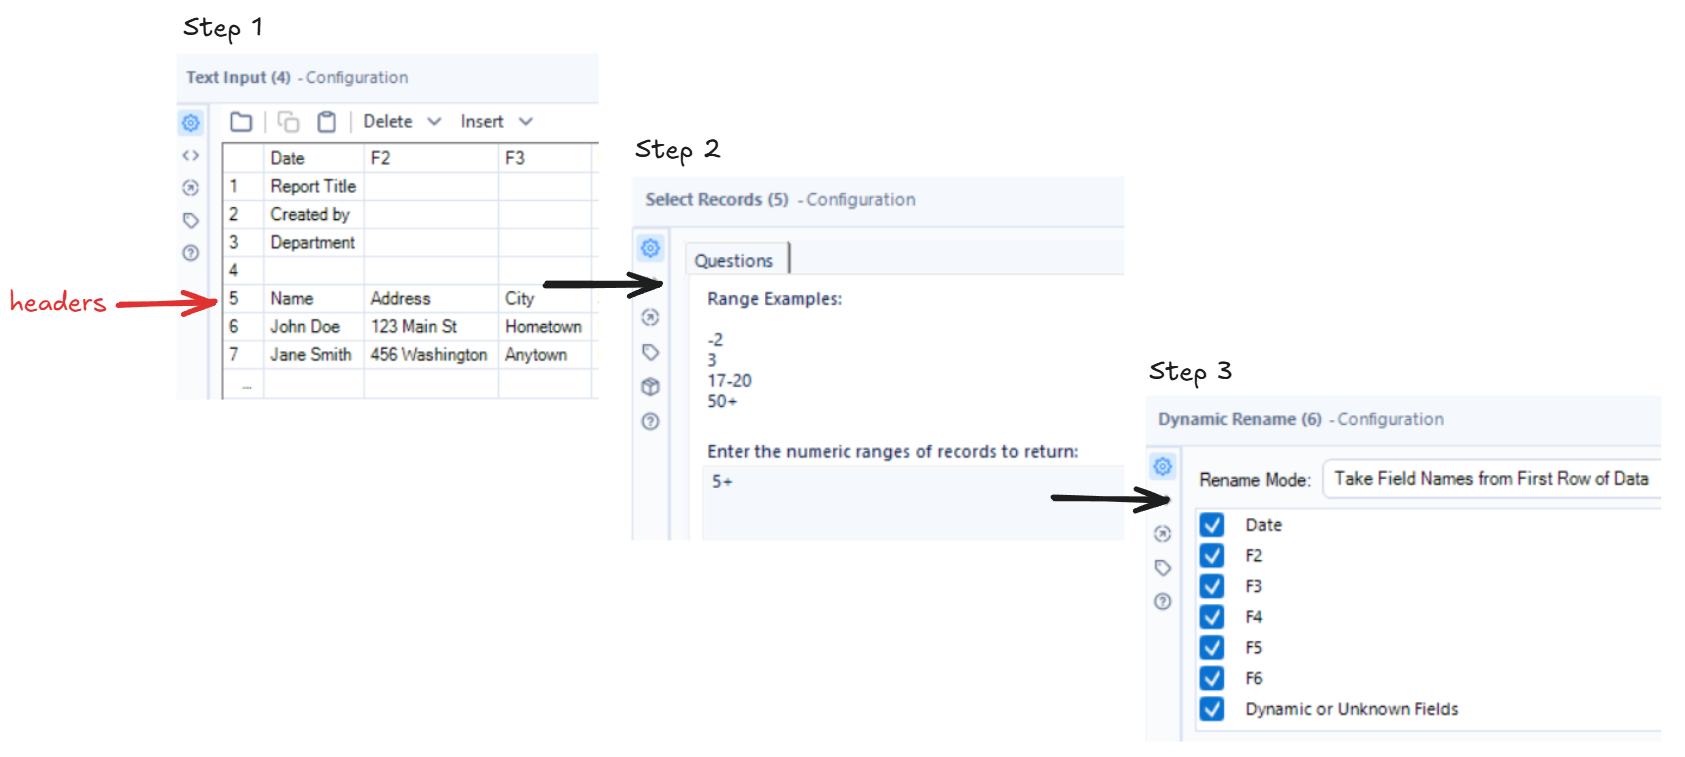
- Use the Text Input tool to paste in data (where the headers started on the 5th row).
- Then Select Records can be used to select rows based on their position in the dataset. In this case we put 5+ to return everything from the 5th row onwards.
- Dynamic Rename - to promote the headers to the 1st row.
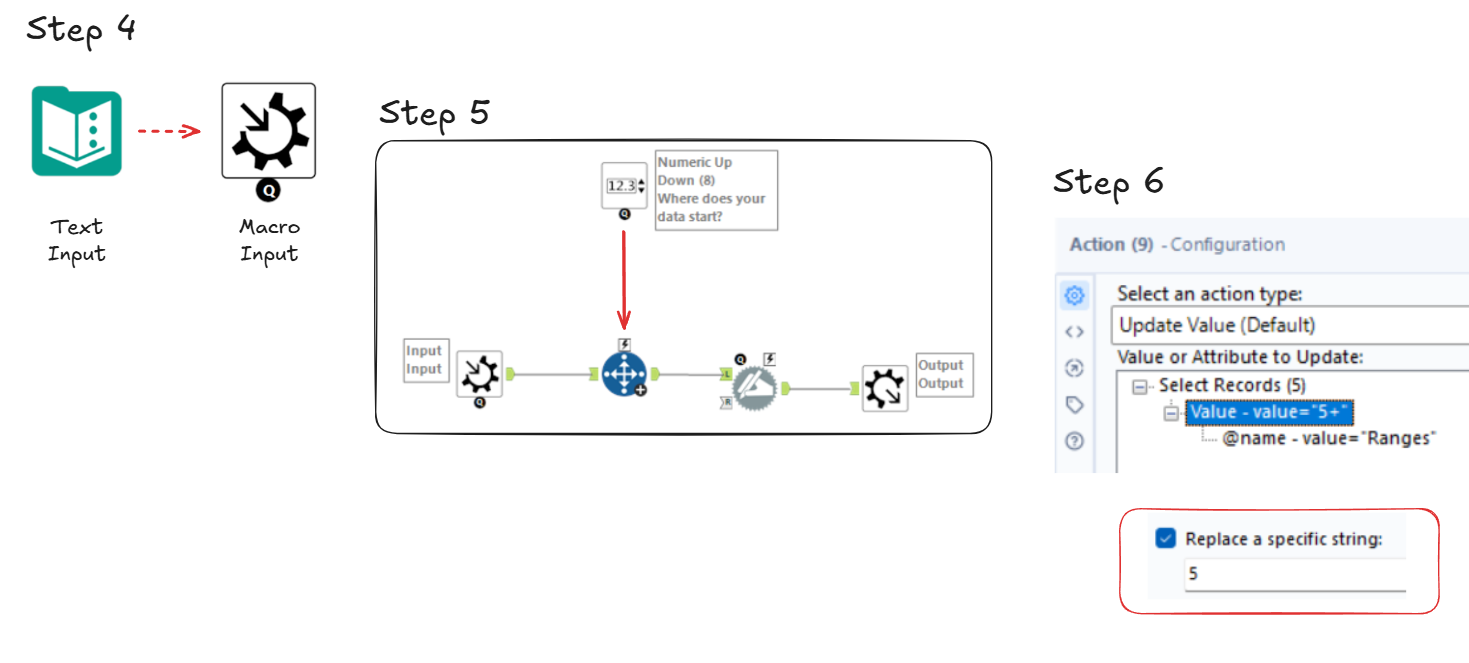
- Convert the Text Input tool to Macro Input and add a Macro Output at the end of the flow.
- Use the Numeric Up Down tool and enter a question for the user e.g. "Where does your data start?" and connect it to the Select Records tool.
- Set the action to update value and select the value (we used 5+ earlier) and tick "replace a specific string" and just put 5 so that it keeps the + sign.
- Save the macro and go back to the other workflow.
Once the macro has been added back in it will now ask the user the question we inputted earlier when the workflow is run. The user can then say what row the data starts on and we can see in the output that the headers have now been promoted and the data has been cleaned!
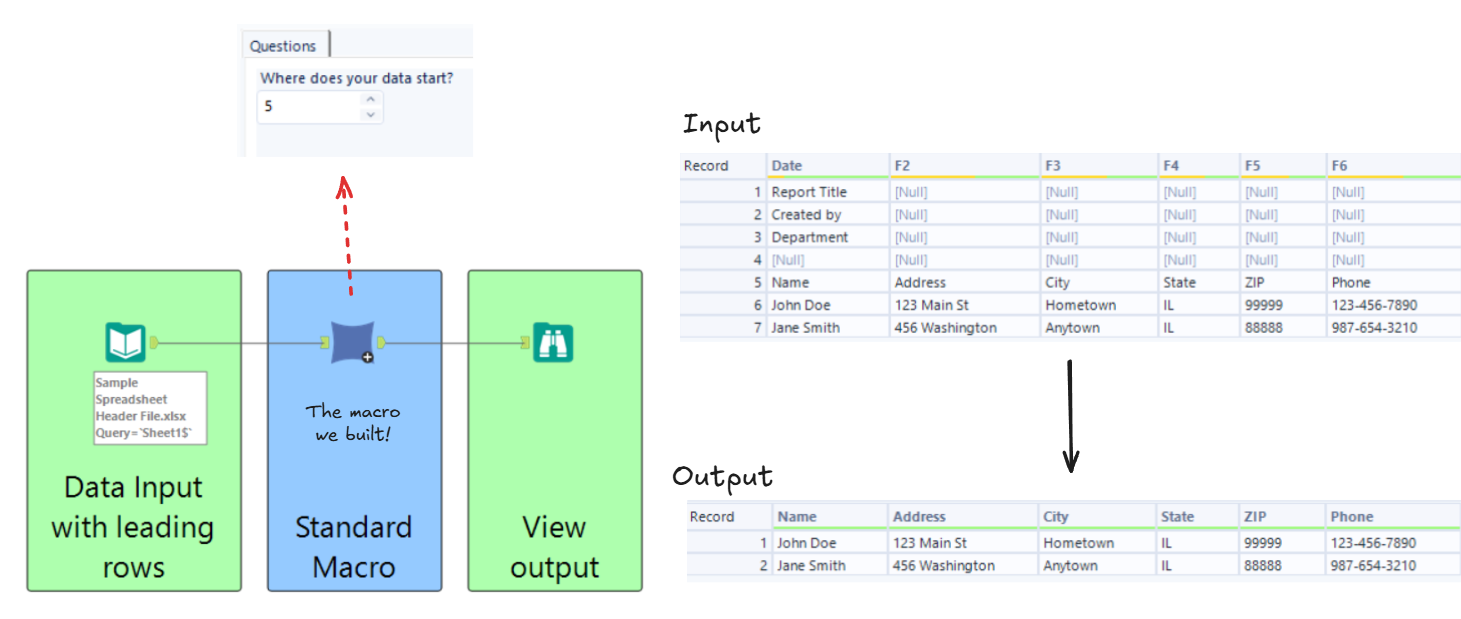
This macro is only made up of a few tools but even so it demonstrates what we can use macros for. Now you can reuse this macro and promote the headers for lots of datasets very easily!
Iterative Macros
An iterative macro is going to take the data through the workflow where there will be two outputs. If the record meets a condition it will flow to the final output, otherwise it will go to our iterative output which is connected to the input and that data goes through the workflow again.
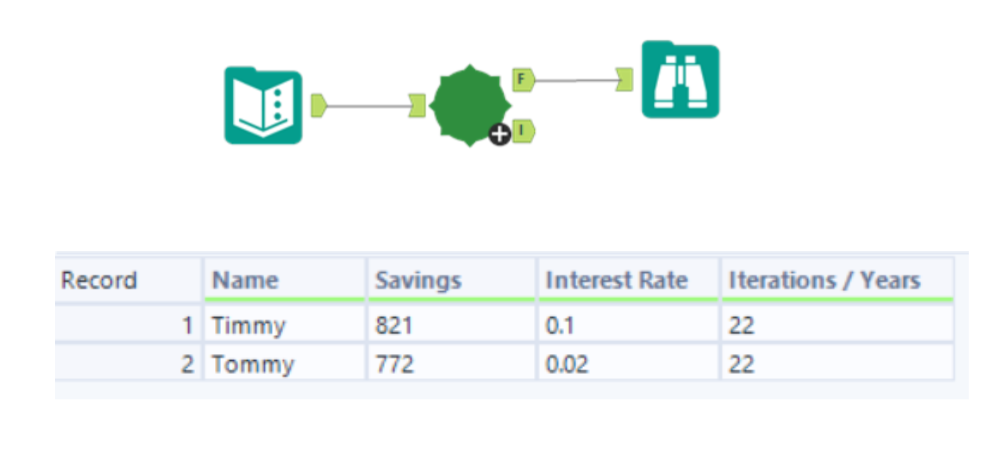
This macro exercise is about savings! Person A starts with £100 with a 10% interest rate and Person B starts with £500 with a 2% interest rate and we're trying to work out how many years will it take for Person A's savings to surpass Person B's savings (assuming they don't touch the money). This is the input:

So what will the first iteration look like? We want to work out how much they each have after the first year of interest rates is applied, and then will work out if that matches our conditions. If not it needs to be fed back into the input or sent to the final output.
- Just like before we open a separate macro building workflow and input our text and convert the Text Input tool into a Macro Input.
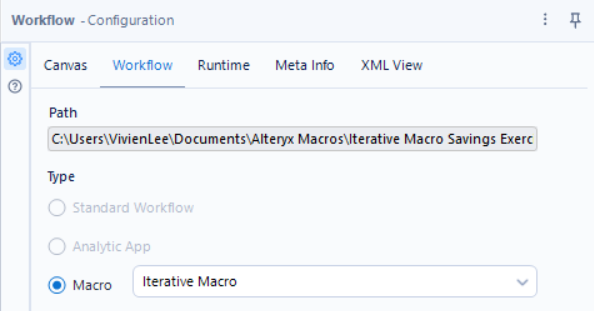
- Make sure in the Workflow configuration pane you select "iterative macro".
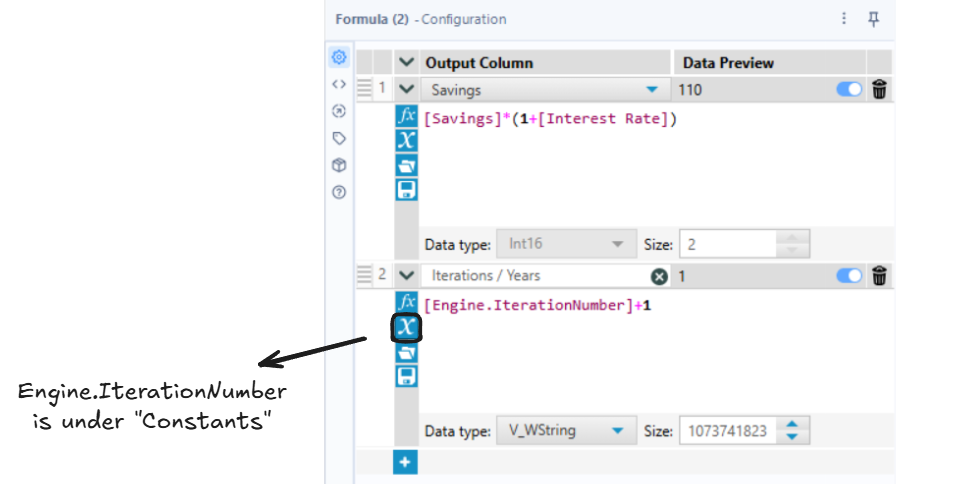
- Now we want to work out how much they have after the first year of interest. We can use the Formula tool to calculate the new amount, and also add a new column to count the iterations.
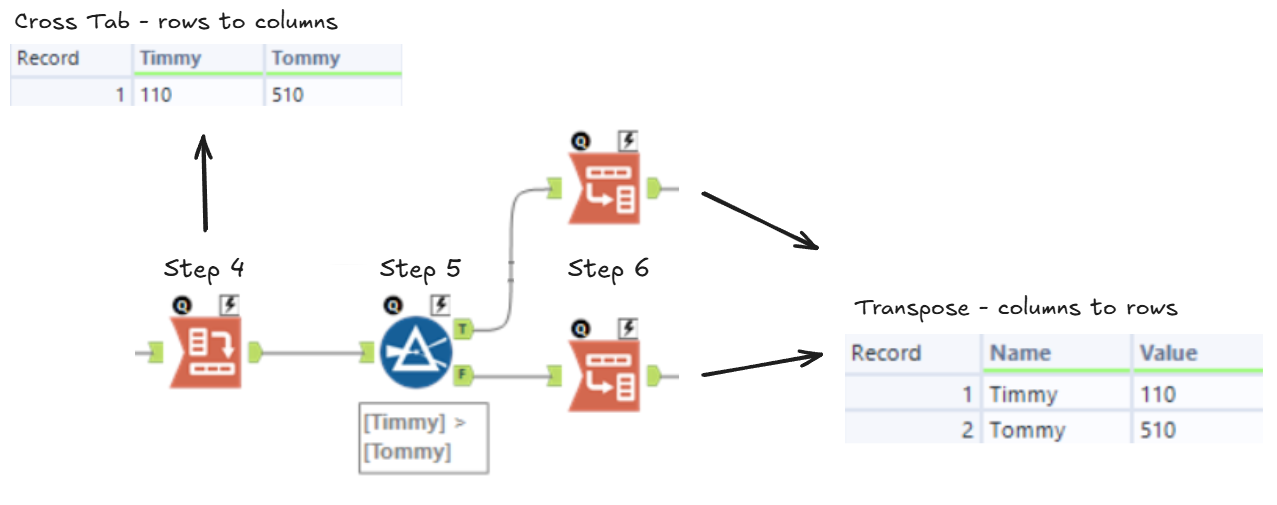
- Using Cross-Tab we can pivot from rows to columns to get one column for each person and their savings.
- We can check if it meets our condition by using a Filter. Is Person A > Person B?
- We want to pivot back again using the Transpose tool to get the Name and the Value (which is our new savings amount). This needs to be done for both the true and the false output for the joins in the next step.
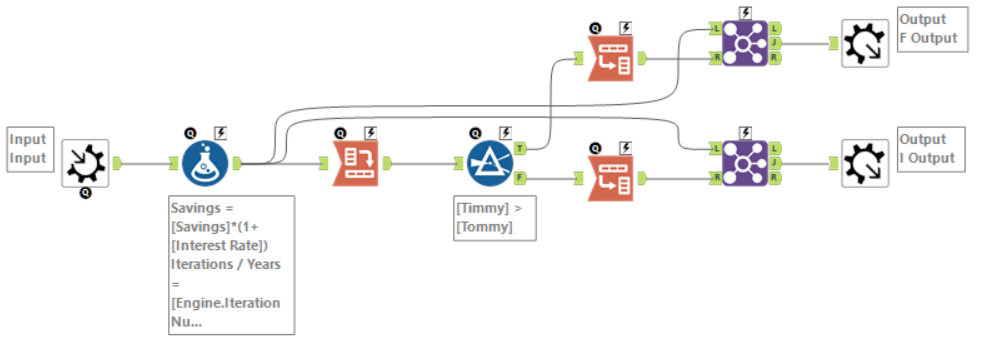
- Now we can join each of these results back to the formula tool on Name and connect them to Macro Outputs.
- The false output needs to replicate the format of the input (which was Name, Savings, and Interest Rate) so we can tick Name, Interest Rate, and tick Value and rename it as Savings.
- The true output leads to our final macro output so it needs Name, Value (optionally rename as Savings), Interest Rate, and the Iteration / Years fields.
- We can add on our Macro Outputs and name them. I've called the first output where the conditions are met "Final Output" or "F" and the output that loops back around to the beginning is "Iterative Output" or "I".
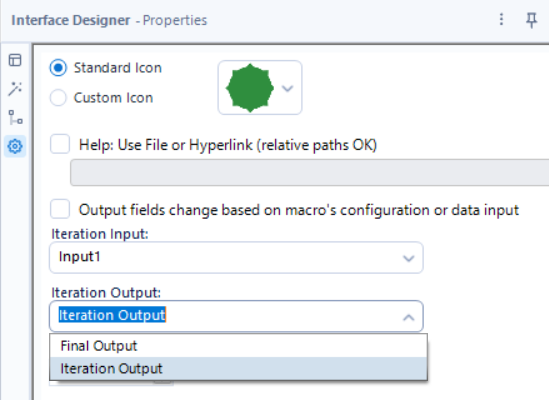
- Then we can go to the View menu > go to Interface Designer > and then in Properties (the cog symbol on the left) go to the "Iteration Output" and make sure you select the iterative macro output (hopefully you changed the name for this part). You can also change the macro icon and set the maximum number of iterations in this pane.
We can now go back to the original workflow and use our macro! As we can see, in this situation it would take 22 years for Timmy to surpass Tommy in savings!
Batch Macros
The last type of macro is a batch macro which runs through the workflow with unique instructions for different groups (or batches) of data.
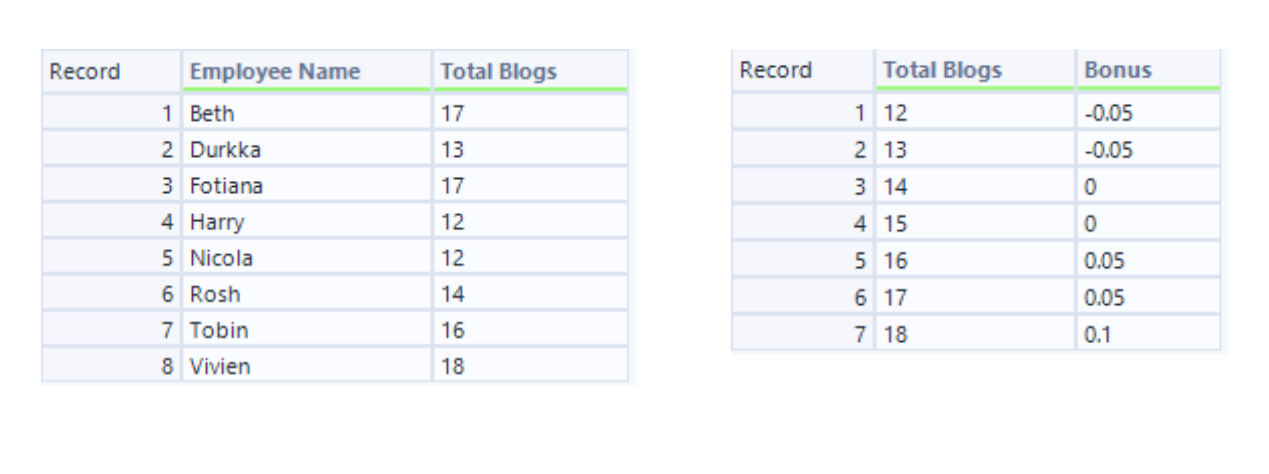
In the following example we will be looking at employee salaries and the bonuses they've earned from the number of blogs they've written. We have two tables, one with the Employee Name and the Total Blogs they've written, and another one with Total Blogs and the corresponding Bonus.
- In our macro workflow we input the employee data either using a regular input and then changing it to a Macro Input or by using a Macro Input and connecting to the data.
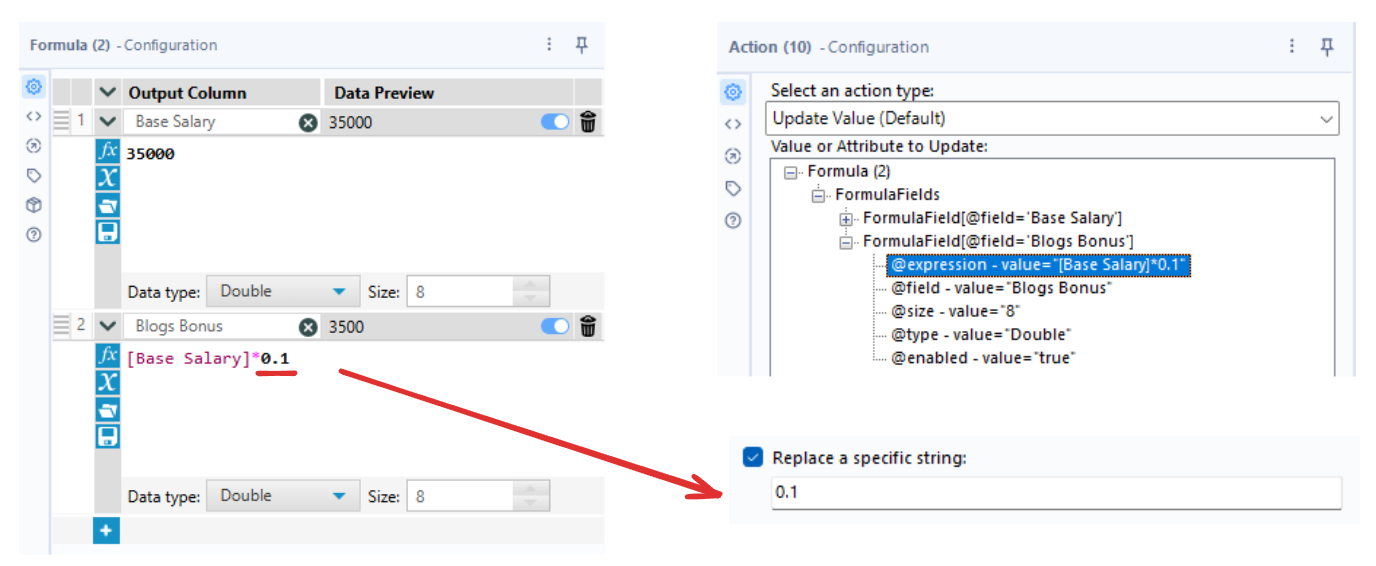
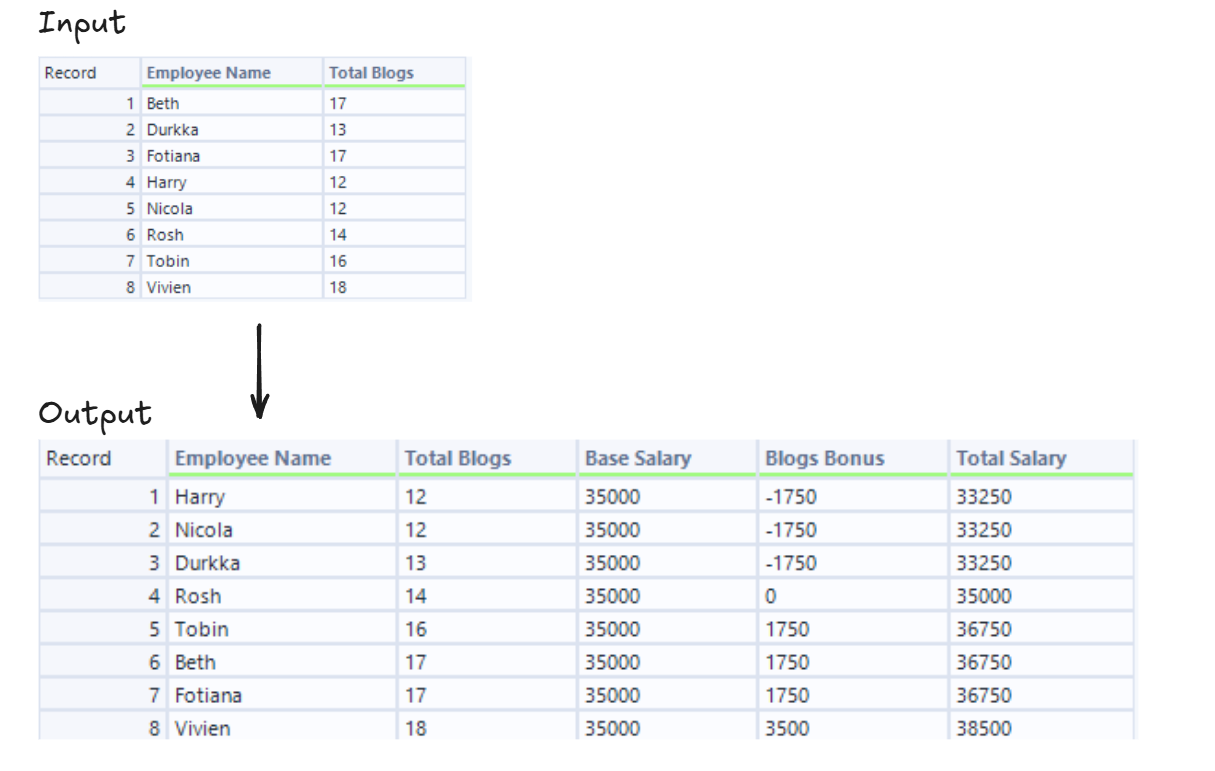
- Using a Formula tool we can create a column for Base Salary, and a column for Blogs Bonus = [Base Salary] * 0.1 (this number acts as our placeholder and will be replaced by the Bonus column).
- Add a Control Parameter and connect it to the Formula tool.
- In the action, we're going to "Update Value" and select the Blogs Bonus field we created. We want to replace the placeholder so under "Replace a specific string" we'll type 0.1 and the values in the Bonus column will be inputted instead.
- We can then create a Total Salary column using the Base Salary and the Blogs Bonus. This can either be in the same Formula tool or a new one but I split it up in mine.
- Add a Macro Output.
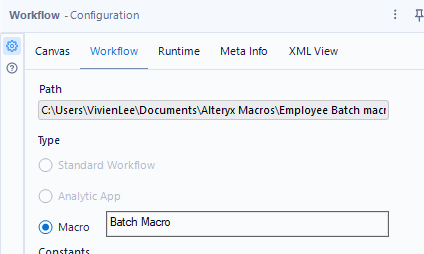
- Check the Workflow configuration pane and see if it says "Batch Macro".
Back in our original workflow we can now connect our employee and bonus data to the macro. Batch macros have two inputs, the top one has an upside down question mark and correlates to the control parameter. So our bonus data will connect to the ¿ so that it can replace the bonus percentage applied to each person.
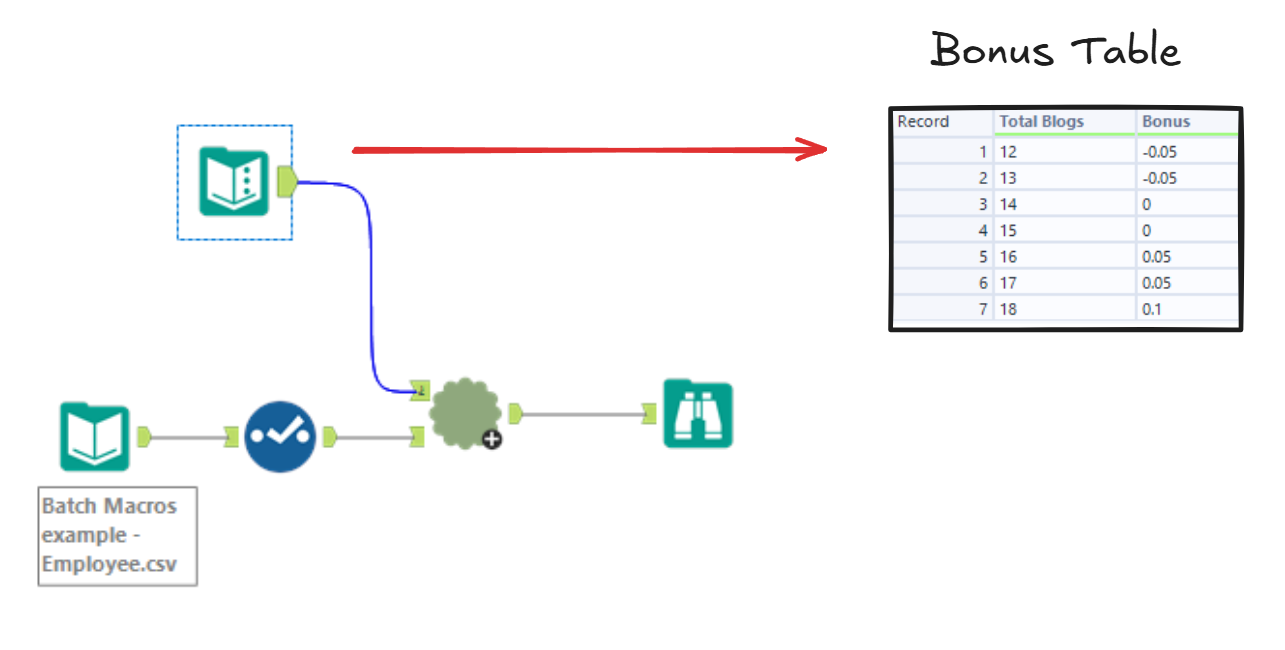
When we click on the parameter we want to make sure the fields are grouped by "Total Blogs" because that's the field that links the two tables. Once that's done we can see the new Total Salary for each employee!
Batch macros are really useful for cases like these when you need to dynamically change data like bonus percentages or delivery costs for lots of orders. All of these examples show how great macros are especially for repetitive processes like the iterative one. Standard macros can be reused for workflows with the same logic, iterative macros can loop many times until a certain condition is met, and batch macros are great for running batches of data. The macros session was such a fun one I hope there'll be at least some opportunities to make them on placement.