Duplicated data entries are one of the most frequently encountered issues in the data preparation process, whether a data set is produced by an automated system or manually. Let’s see how we can eliminate duplicates from our data using Tableau Prep or Alteryx.
For this example we are going to use an extract of Sample – Superstore data with duplicate entries that I manually created for this example. Each row in this data set represents a product in an order.
In Tableau Prep
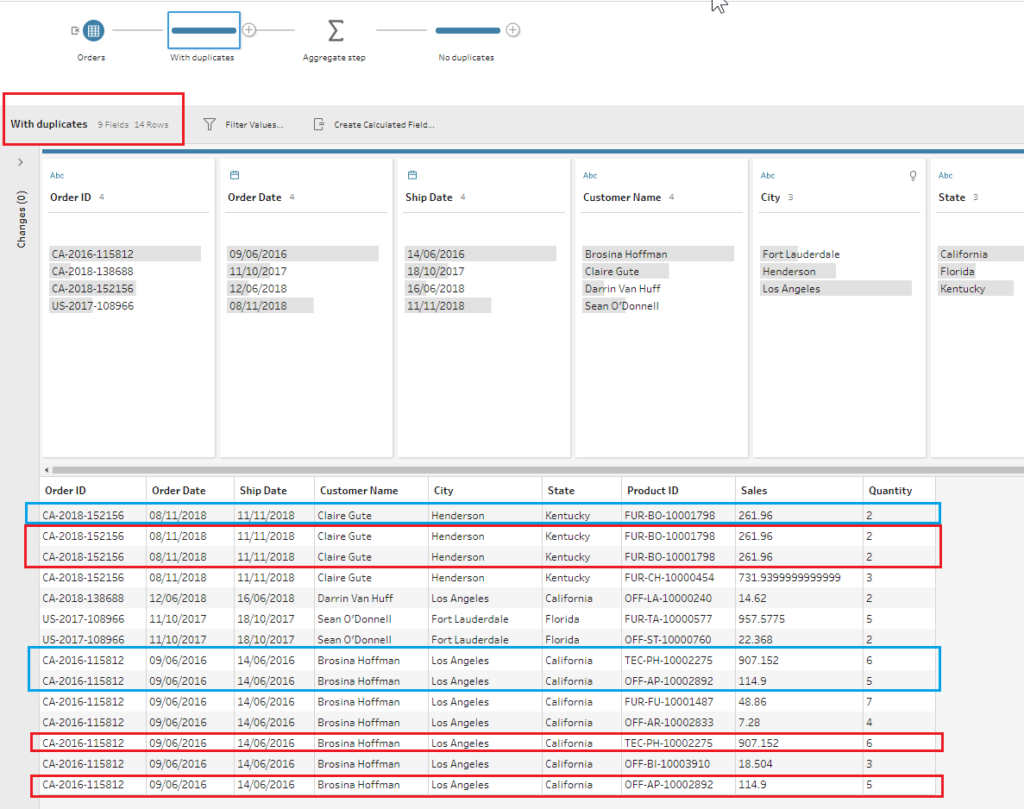
1 – After connecting to the data in Tableau Prep, let’s add a Cleaning step by clicking on the plus sign next to the Input step and select the Add Step option. By doing that we can see that currently we have 14 rows in the data set, including 4 duplicate entries. I’ve highlighted the duplicated entries below in red and the unique entries that I intend to keep are highlighted in blue.
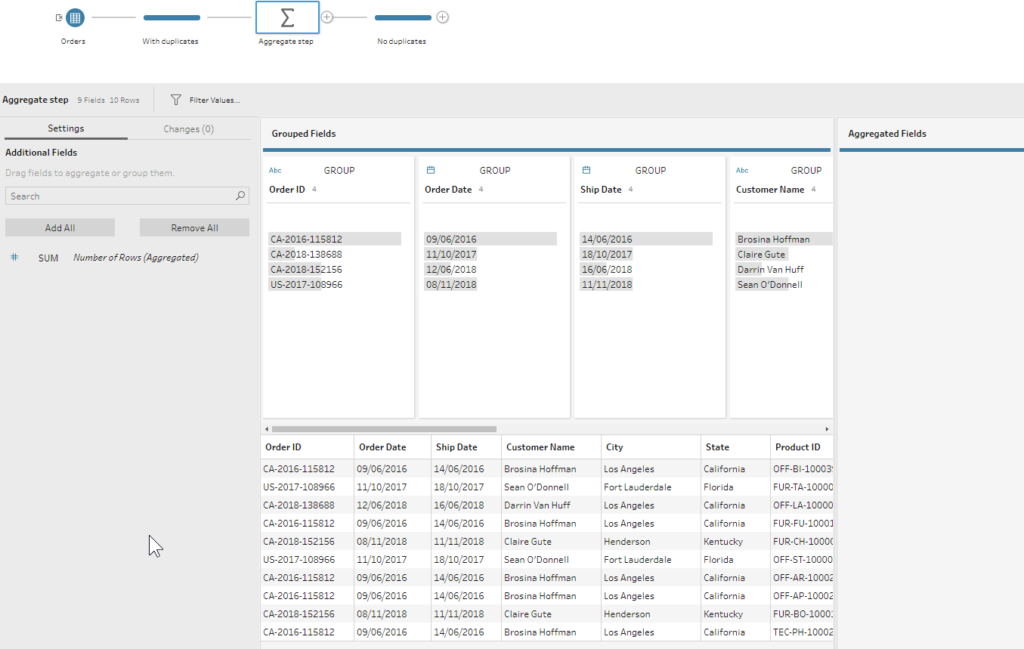
2 – To eliminate these duplicates, we simply need to add an Aggregate step by clicking on the plus sign on the right of the Cleaning step. In the Aggregate step properties menu in the lower pane, we need to select all fields in the data set (by clicking on them and holding the Ctrl key) except for the generated Number of Rows field. Then drag them to the Grouped Fields section on the right. Since duplicate rows have exactly the same data, they will be merged together here, and we will be left with only one entry per order.
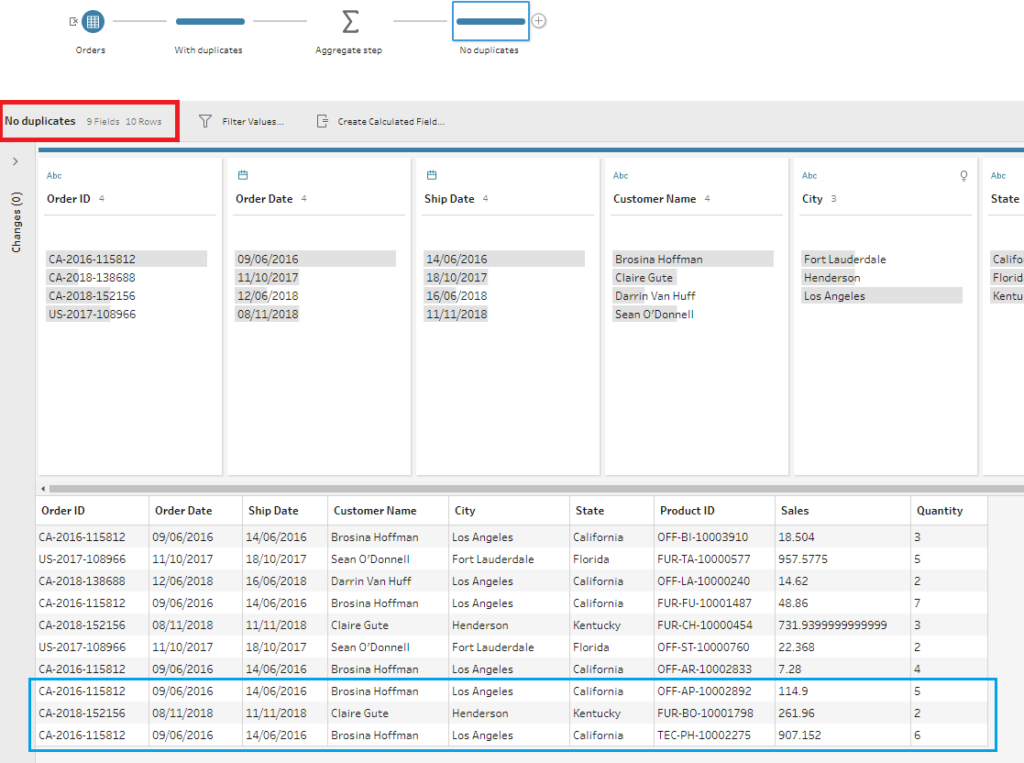
3 – To verify that this method worked, we can add a new Cleaning step after the Aggregate step and see that now we have 10 rows in the data set instead of 14. I’ve highlighted the now unique rows in blue below.
In Alteryx
1 – There is a dedicated tool in Alteryx that allows you to find unique values (in one or several fields). The tool is called Unique and can be found in the Preparation tab of the Tool menu at the top of the screen.

2 – Once you’ve brought the data set to Alteryx, connect the Input tool to the Unique tool. In the Unique tool’s configuration dialogue on the left select the fields you’d like to check for unique values. In our case, it should be ‘Order ID’, ‘Customer Name’, and ‘Product ID’. If you would like to check all fields, click the Select All button in the Column names section.
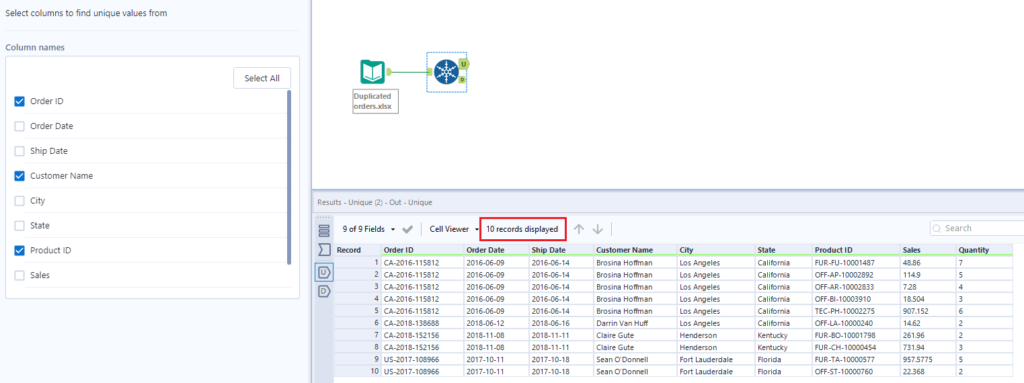
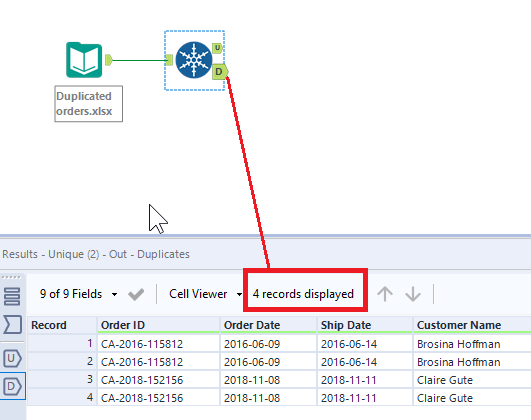
3 – Once the tool is configured, run the flow to see how many duplicates there were in the connected data set (if any). Note that the Unique tool has two output anchors: U for ‘unique’ and D for ‘duplicates’. The U output will show the first row containing the unique value in the selected field. All other rows with matching values will be displayed in the D output.
4 – We can see now that the U output anchor has 10 rows with unique order entries, and the D output anchor has 4 duplicated rows that we don’t need in this case. However, the data from the D output might be useful depending on your goals.