


When working on a project, one of the questions I had to answer was:
“Is it possible to set up a dashboard such that users can only see filter options they have permission for? E.g. only show suppliers data for their own brands.”
To be able to do this we will have to use user filter and row level security.
When you share workbooks with others using Tableau Server, by default they can access all the data shown in the views. If you wish to stablish ‘restrictions’ to the accessibility of the views you can create filters to limit the data that any given person can see. For example, in a distribution company where the dashboards get shared with different clients, you may want to allow that each client (supplier) only see its own brands.
Rather than create a separate view for each supplier, you can define a user filter or row-level security that allows each supplier to see only the data related to their products.
In Tableau there are two approaches to row level security:
- Manually: manually creating user filters that define the specific data each user can access – a convenient method, but not automated.
- Automatically: by creating a calculated field that automatically defines whether a user can access the data. This method requires that the underlying data source already has row-level security information.
SETTING THE FILTER MANUALLY
For this example
I – make sure you are connected to your server – In the Tableau Server Login dialog box, log in to Tableau Server.
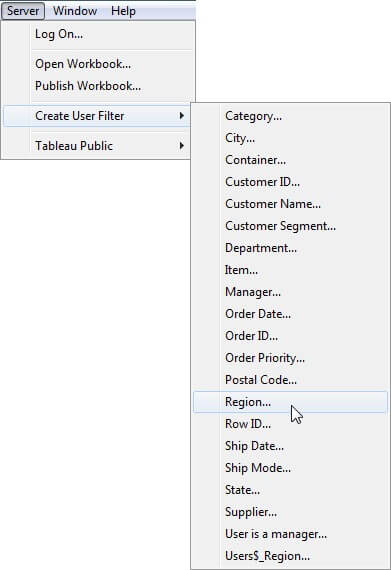
Select Server > Create User Filter > Country.
II – In the User Filter dialog box, do the following tasks:
- In the Name text box, type Managers.
- In the User/Group list, click on the name of the manager you wish (e.g. ‘Ravi’), and then in the Members list, select the ‘category’ for that manager (e.g. ‘Algeria’) check box.
- Repeat this step for the other managers and respective ‘categories’
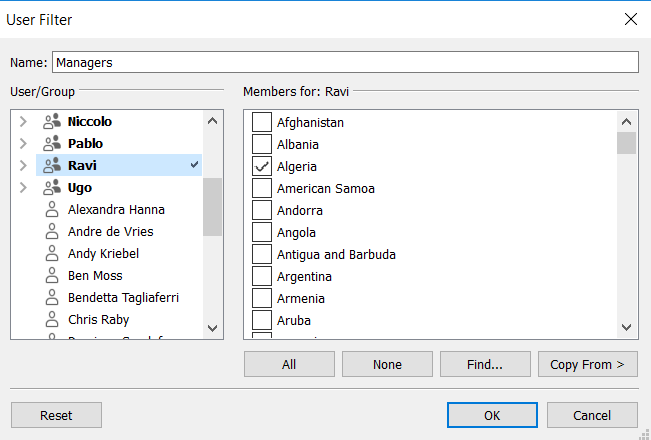
III – When finished, click OK. User filters appear at the bottom of the Data window in the Sets pane.
IV – Match the users on the left with the values on the right.
V – Drag the new Managers set to the Filters shelf.
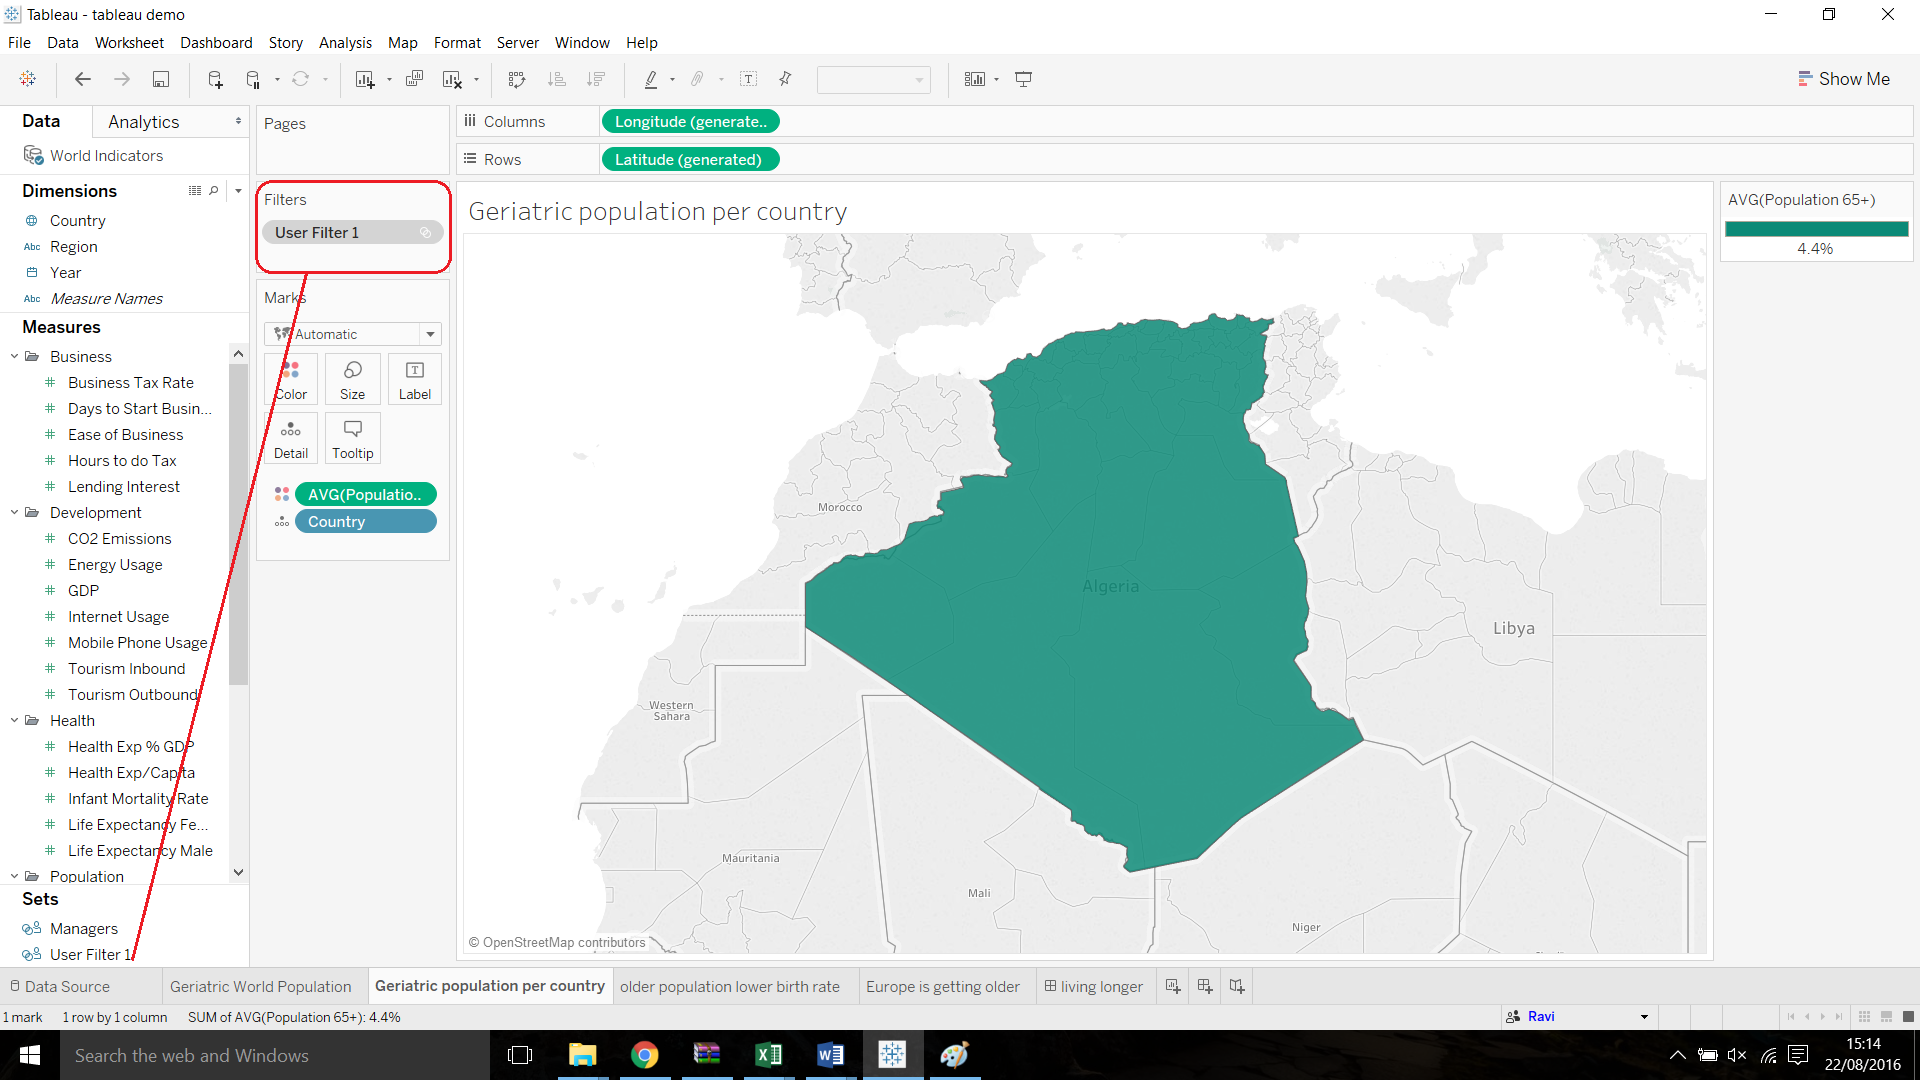
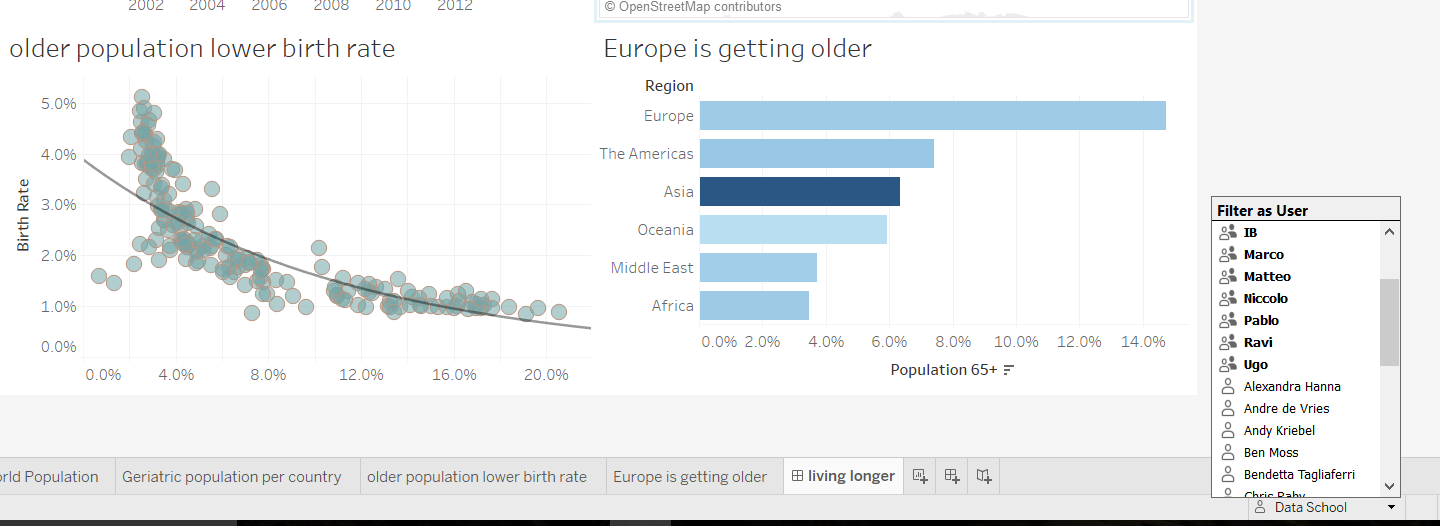
VI – When you add the user filter to the Filters shelf, the view becomes blank. To display the view for one of the managers, click the list arrow in the lower right area of the workbook window.
VII – You can display the name of the current user and country in the title to help the viewer understand that the view has been filtered. Select Worksheet > Show Title to display the name of the current user and region in the title to help the person accessing the view understand that the view has been filtered.
VIII – To set up the title, double-click the Title shelf
IX – In the Edit Title dialog box, do the following tasks:
- Select and delete the default tag title.
- Click the Insert drop-down arrow and select Full Name
X – When finished, click OK. When you publish the view to Tableau Server, each user sees only their own data.