Even though we might be finishing the training, it doesn’t mean the learning is finished. Earlier this week we had a Tableau Server Refresher with Ravi. We went over some topics we wanted clarified but also discussed user filters which we hadn’t had much experience with so far. As a way of solidifying and sharing the knowledge, here’s the intro to the topic.
What are user filters?
User filters are, lo and behold, filters that are using information about the Tableau user (eg, the username and the groups the user belongs to) to show only relevant data. You might want to use it for data security reasons or to improve the user experience.
What do you need?
User filters are only available with Tableau Server and Tableau Online. User groups on the server might also come in handy (especially if you want to follow this blog post).
User groups
On the server, got to Groups (we had an update recently so you can see what the new Tableau Server looks like):

In the new view, navigate to + New Group and type in the name of the group. I created three groups for this post: Hanna – Technology, Hanna – Furniture, Hanna – Office Supplies. If you’re familiar with Tableau’s data sources, you might know what’s coming: Sample – Superstore.
I prefixed the groups with my name so that it’s easier for me to find the groups and delete them afterwards.
Once the groups are created, you should see them in the list:

I have three groups with 0 users each. Let’s change that. Click on the group name and this is what you should see (if the group has no users):

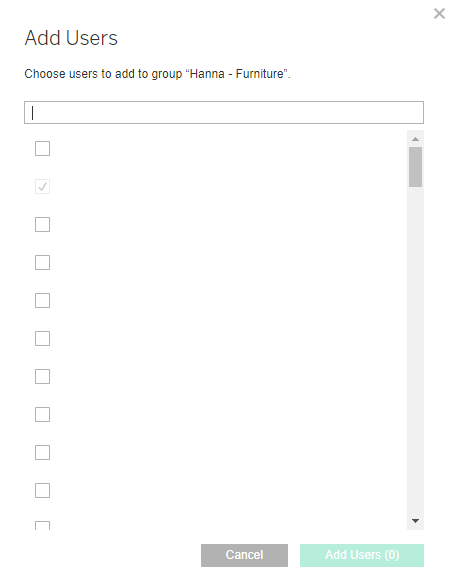
Add a user or two so that we can test the filters later on. Click on + Add Users and in the pop-up window select those you want to add (you should see names next to the tick boxes):
After adding users, the group page should look slightly differently:

I’ll do the same for my other two groups and will assign myself to both of them. Ok, now I have two users in each of my groups:

User Filters
1. Sign into the server
In Tableau Desktop, open Sample Superstore and log into the server: Server -> Sign In

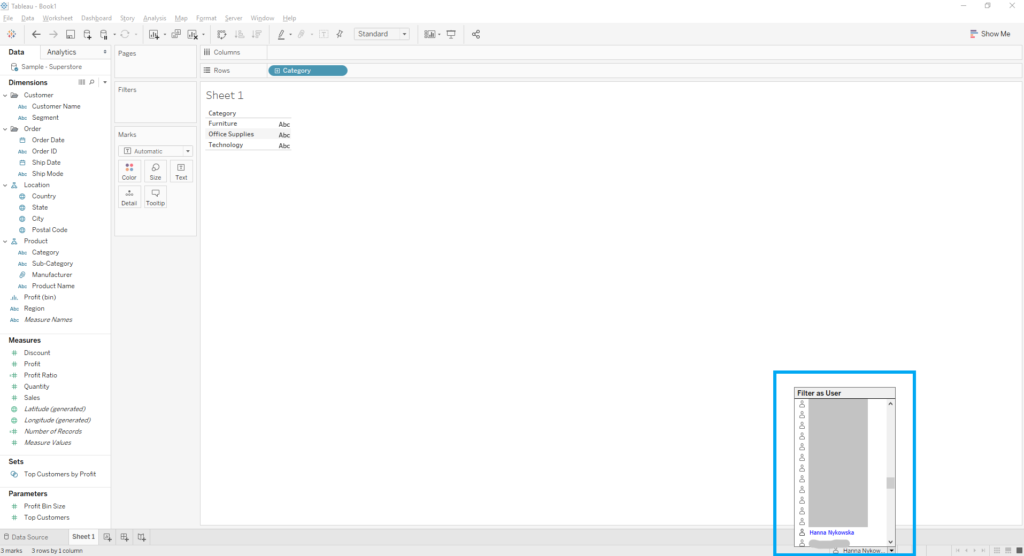
Now, at the bottom of the view, you’ll be able to ‘switch’ users. You can’t really switch user but it works as ‘view as’ function:
2. Create a calculation
Now that you can see the users, create a calculated field. I called mine User Filter. Make sure to open the functions popup and select User from the drop-down.

There are a few functions you can use, but let’s focus on ismemberof. This function will check whether the current user if a member of the specified group. One thing to mention is the group needs to be a literal string – something you literally type in as opposed to a string field.
In the calculated field write an expression that will return true only if the user is a member of a group associated with a specific Category:
(ISMEMBEROF('Hanna - Furniture') AND [Category] = 'Furniture')

OR

(ISMEMBEROF('Hanna - Technology') AND [Category] = 'Technology')

OR

(ISMEMBEROF('Hanna - Office Supplies') AND [Category] = 'Office Supplies')
Now let’s build the view and test the filter. Put Categories on the columns and Sales on rows. This will result in a bar chart:

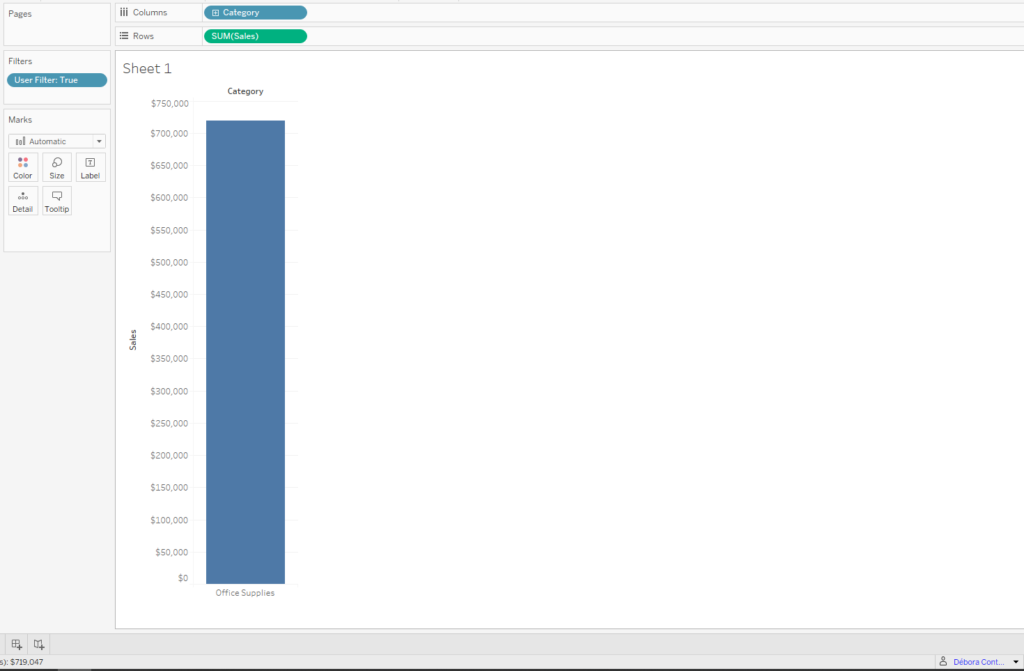
Now, if you put the User Filter field on the filters and select True, you should only see the category assigned to the group the user is a member of:
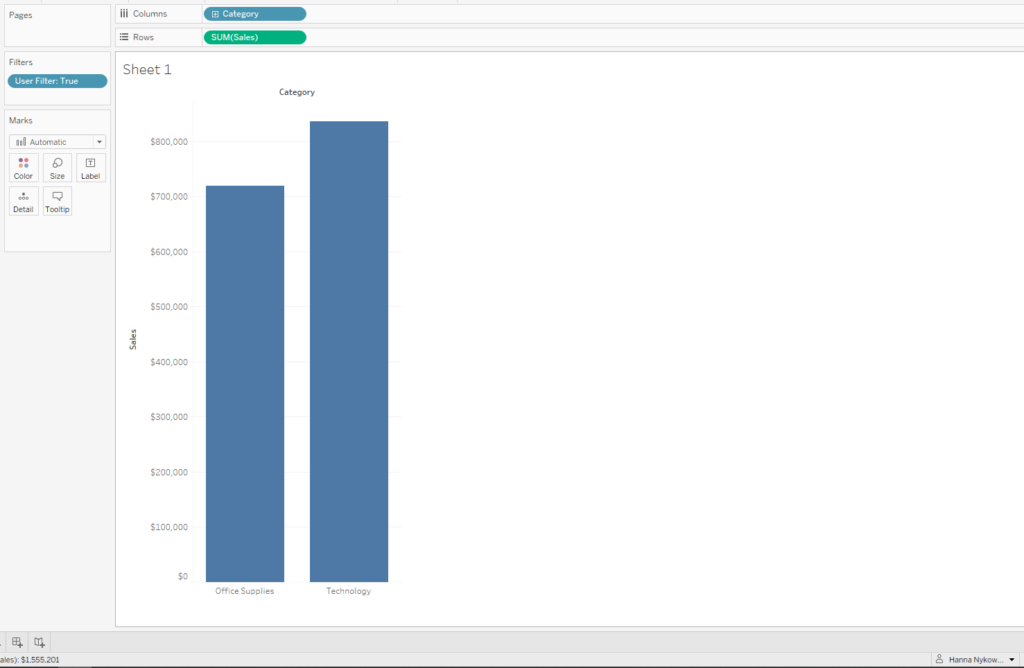
Because I’m a member of two groups, I can see two categories. But If I change the user to Jonathan Allenby, I can only see Furniture:
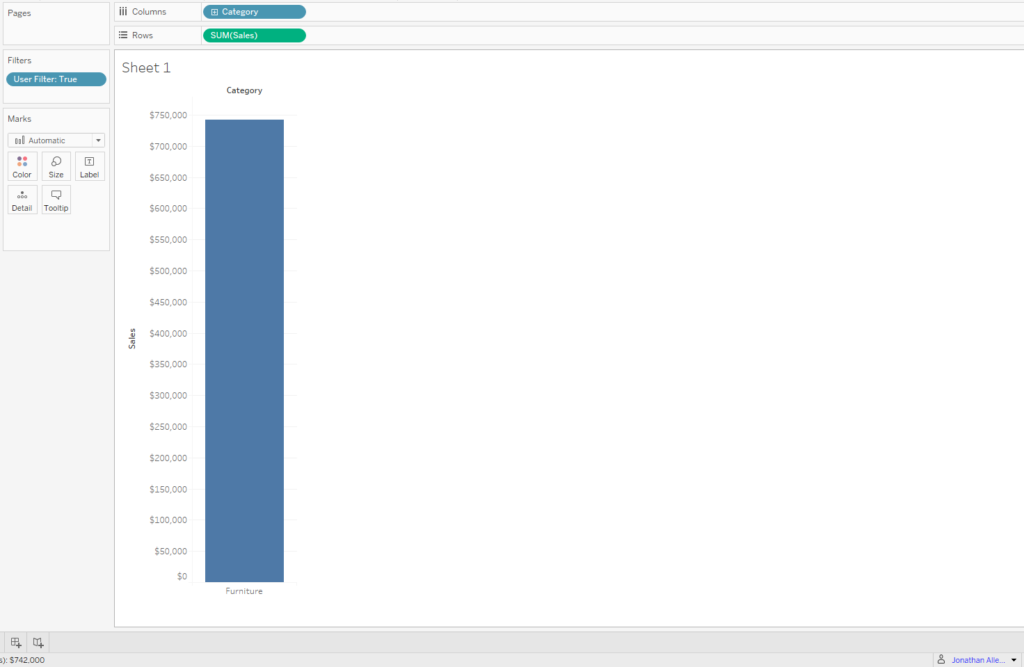
Or Office Supplies in case of Débora Contente:
The advantage of the proposed calculated field is that it’s independent of the measures you’re using. This means you can include the field in the Extract Filters or Data Source Filters.
Go to Data Source tab, and in the top right corner you can add these filters:
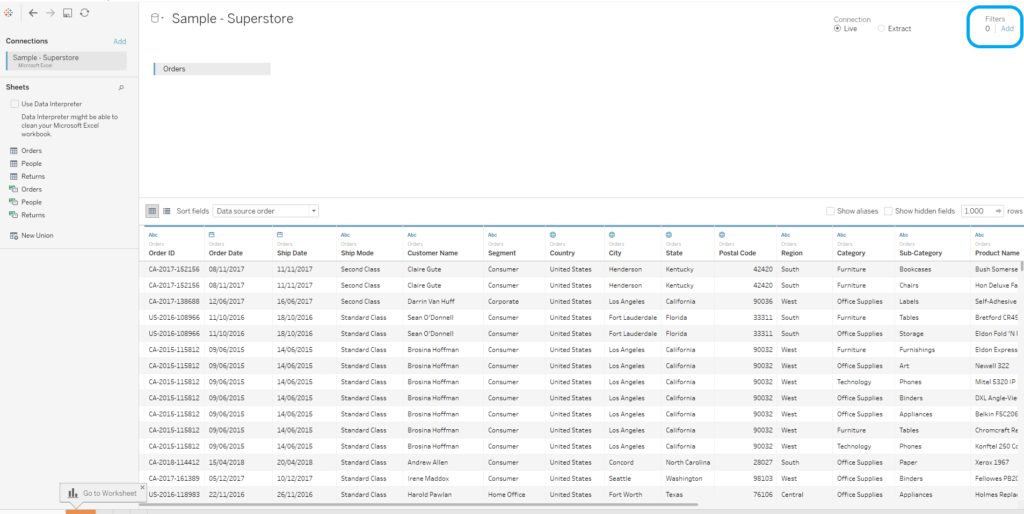
Find your User Filter field and set it to true:

This will apply the filter to all of the sheets.
A note on security
If you use user filters for data security reasons, keep in mind the permissions the users have. If someone is not supposed to have access to some data but they can web edit the workbook or download the workbook, they will be able get rid of the filter and therefore access the data. You might try to find a walkaround by applying an extract filter, but be cautious.
More on User Filters:
https://onlinehelp.tableau.com/current/pro/desktop/en-us/publish_userfilters_create.htm
