DS11’s first week at the Data School was focused on introducing us to Alteryx; a super useful software for prepping messy data before visualising in Tableau. Amongst data preparation, Alteryx is also capable of spatial and predictive uses. In this guide, we will navigate through the interface of Alteryx Designer and I will also give some helpful hints on how to get started. Now, download Alteryx Designer and let’s get acquainted.
Alteryx Designer Interface
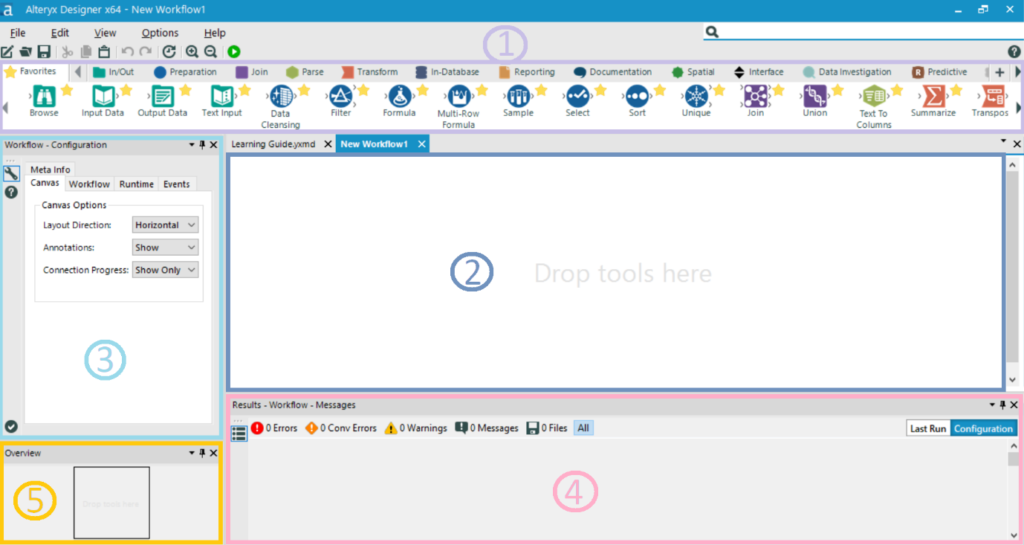
When opening Alteryx Designer, you will be met with an interface that looks like Figure 1. Matlab users out there will be very familiar with this layout!

Figure 1. Alteryx Designer interface
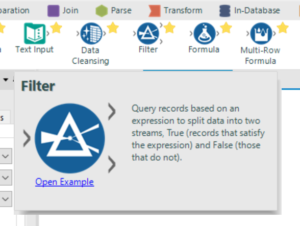
Box 1 (Figure 1): Towards the top of the interface are all the tools you’ll use to manipulate your data. Clicking on a tool will give you information on what that tool does (see Figure 2). For more detail on the tool, click “Open Example” to see some great examples of how to use the tool.

Figure 2. Click on any tool to learn more about the tool
Box 2 (Figure 1): This is the space that will house your workflow. Tools found in Box 1 can be dragged and dropped onto this workspace.
Box 3 (Figure 1): Once you have dragged a tool to the workspace, the configuration window (shown in Box 3) is used to customise your tool.
Box 4 (Figure 1): When you are happy with the tool in your workspace and would like to see how it has changed your data, click the run button at the top of the interface (Figure 3). The resulting data will be displayed in Box 4. Additionally, error and warning information is displayed here.

Figure 3. Run button
Box 5 (Figure 1): The overview box is useful for viewing your workflow as a whole and navigating to different sections of your workflow. This is especially helpful if your workflow is large. If you do not see the overview window, add this to your interface by clicking “View” on the top toolbar and selecting “Overview”.
Pro tip!
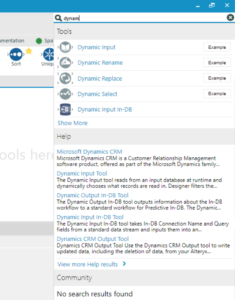
The search bar can be found on the top right corner of the interface (Figure 4). This function is handy when you are struggling to find a tool you want in the tools list or any time you are unsure of what tool you need. As an example, if I cannot remember which tab the tool “Dynamic Rename” is in, I can use the search function to find the tool. As I type the tool name, I get lots of great information on the tool, including links to the Alteryx online manual. The “Dynamic Rename” tool is the second tool in the list. I can now drag the tool directly onto my workspace and then configure the tool as normal.

Figure 4. The search bar is a super useful feature!
From this guide, you should be more familiar with the layout of Alteryx Designer and should now be able to give processing your data a go. Hint: to start working with your data, your first tool will be “Input Data”.
Happy data prepping!
Louise
Check out my blog feedmedata and follow me on Twitter @FeedMeData_
