


Yesterday, I walked you through the process I used to do a bulk download of zip files from the U.S. Bureau of Transportation Statistics (see here). Although that process only used two tools in Alteryx, input and download, the process to create the input file in Alteryx is a teeny bit longer.
Of course, you could do the same thing with Excel, but ultimately I found it easier to work with Alteryx because the process is broken down step by step with the tools you use in your workflow.
If you recall from yesterday’s post, the first thing you want to do in your input file is create a column for the URL of each zip file you want to download, as well as a column specifying where to save the files to and what to name each file. Because the files I am downloading are named based on the month and year of each datasource, I need to figure out a way to automatically fill down the column with the same first part of the file name URL and folder location pathway, and a second part that changes based on the month and year.
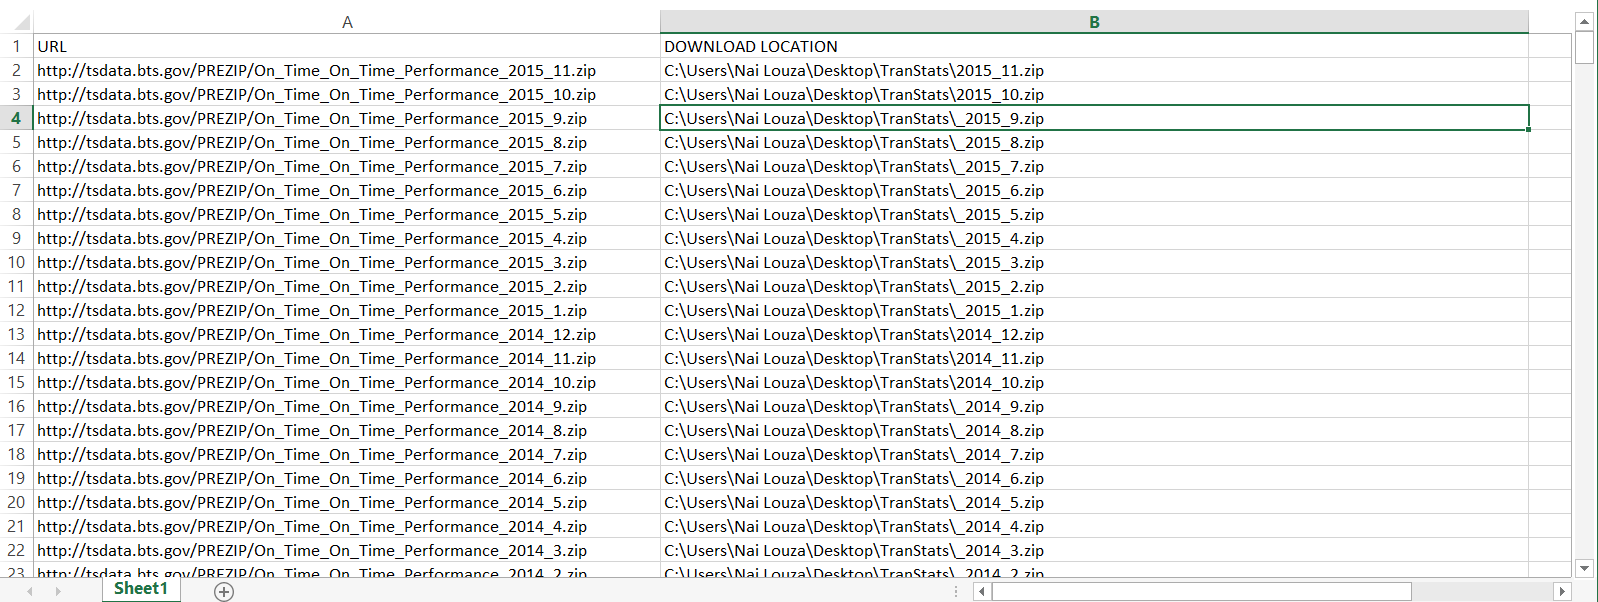
Input Excel file I used with Alteryx’s download tool to bulk download several zip files.
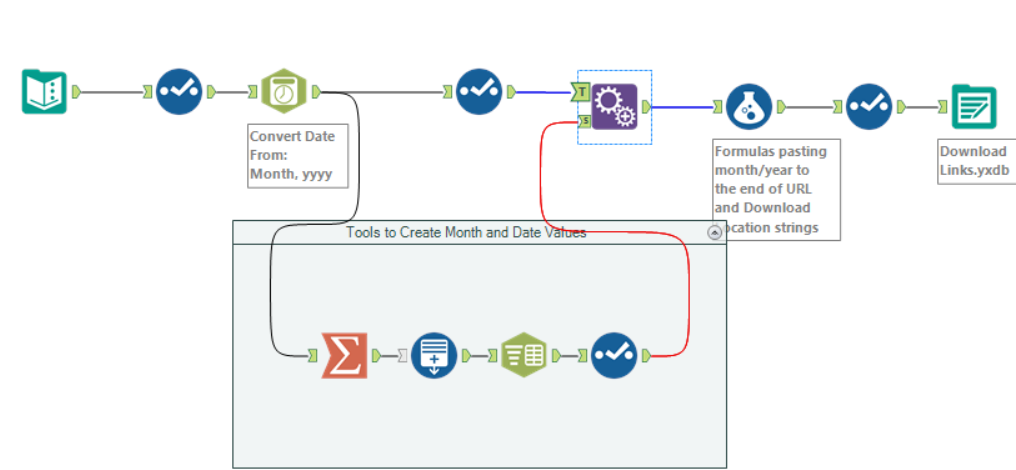
To do this, first drag in a text input tool and create a column for the URL, another for the Date, and another for the file path specifying where you will be saving your downloads to. In the first row, put in the first part of your file URL in the URL column (remember we got this from our Downloads window in Chrome when we tested out a single zip file download from the website) and in the Download Location column, put in the path to the folder you are saving your downloads to. In the date column, put in the earliest date of the datasources you want to download (in this case, November, 2015). Put the same URL and file location in the second row but this time, input the oldest date under the date column (January, 1987 in this case):

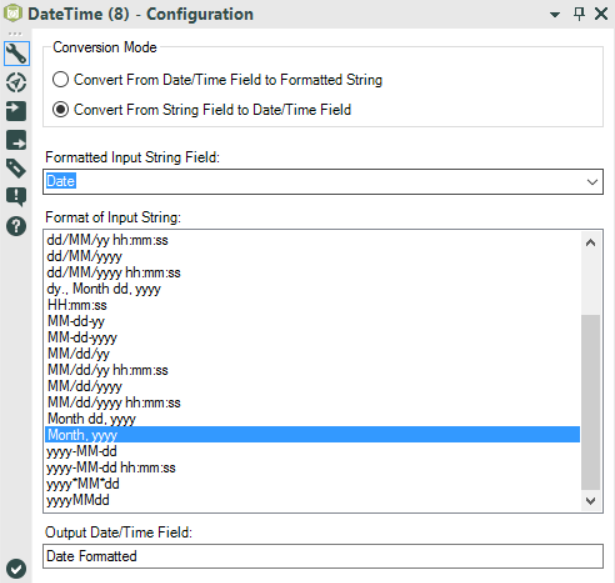
Once you’ve done that, use a select tool to convert the types of both columns into strings, and then use the DateTime tool to convert the strings into a Month, yyyy date format that Alteryx recognizes as a date:
Next, use the summarize tool to get the min and max values for the dates you have formatted. After you have done this, use the Generate Rows tool, create a new field that is a V_WString type, and input the following:
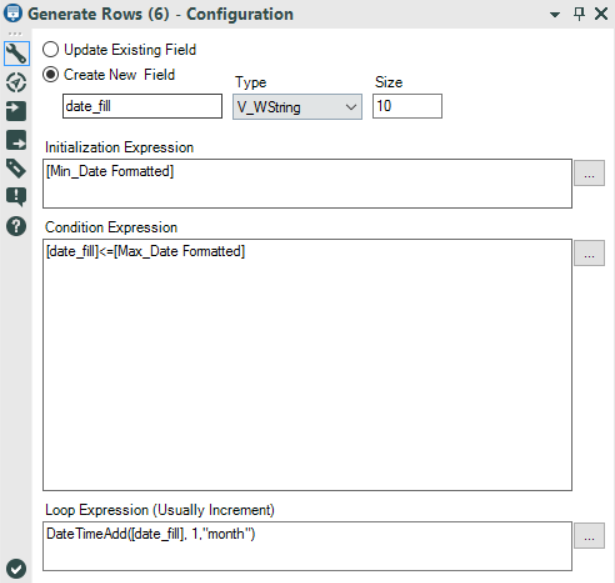
This is basically telling Alteryx to fill down rows with automatically generated month and year values between the min and max dates we previously specified.
Now, using Text to Columns, you will split this new field into 3 columns to parse the month, year, and day values from each other, and use the Select tool to just choose the month and year columns. Using the Append Fields tool, you can now append the month and year columns to the URL and Download Location folders you originally had before you summarized your values to min and max dates (see workflow above).
Lastly, use the Formula tool to paste together the month/year values with the URL and folder location pathway columns. You’ve now created a file with the full download link URLs and pathway names in each row based on the month and year of the data:
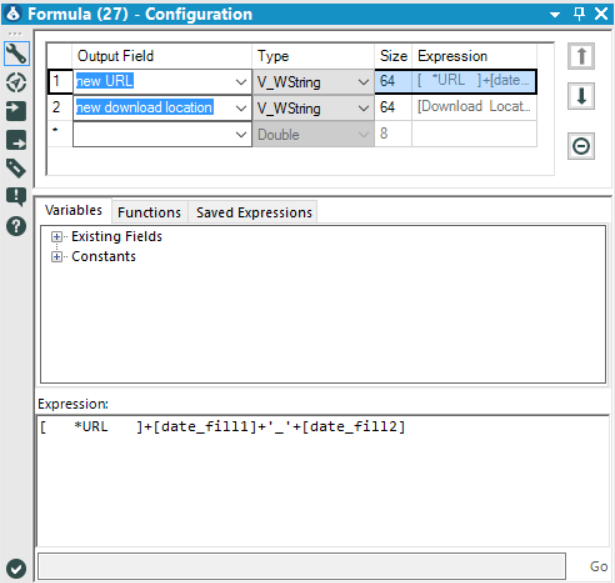
Make sure to set the type to V_WString when you create the new columns in your formula tool! This is because you are working with special characters (like underscores) and Alteryx will create null values if you do not explicitly tell it that you are working with these special characters as a string. Now you’re ready to output your workflow in whatever format you like (excel file, csv, or yxdb) and use this as an input with the Download tool in a new workflow (see yesterday’s blog here).