In this blog I will demonstrate how to introduce RLS in to your Power BI reports. This is when you restrict access to certain rows of your data for different users. This is useful when you would like different users to have different views of your report, so everyone can only see the data they are permitted to, making sure you are in line with data governance principles. This means that you can create just one report which is filtered by the email/username of whoever is logged in rather than creating multiple reports with all the different views.
Step 1: Creating a security table
Create a security table with the email addresses/usernames of your users and the field that will control the level of access. You can see below that I have given myself access to all of the regions. It is recommended that if you are building the view that you give yourself full access so you don't lock yourself out of anything whilst building. Just for your reference later on in this blog, I have saved my security table as "User Regions".

Step 2: Relating the security table to the main data set
We now need to create a relationship between our main data set and our security table. My main data set is the Sample Superstore data set from Tableau, which I have called "Orders":
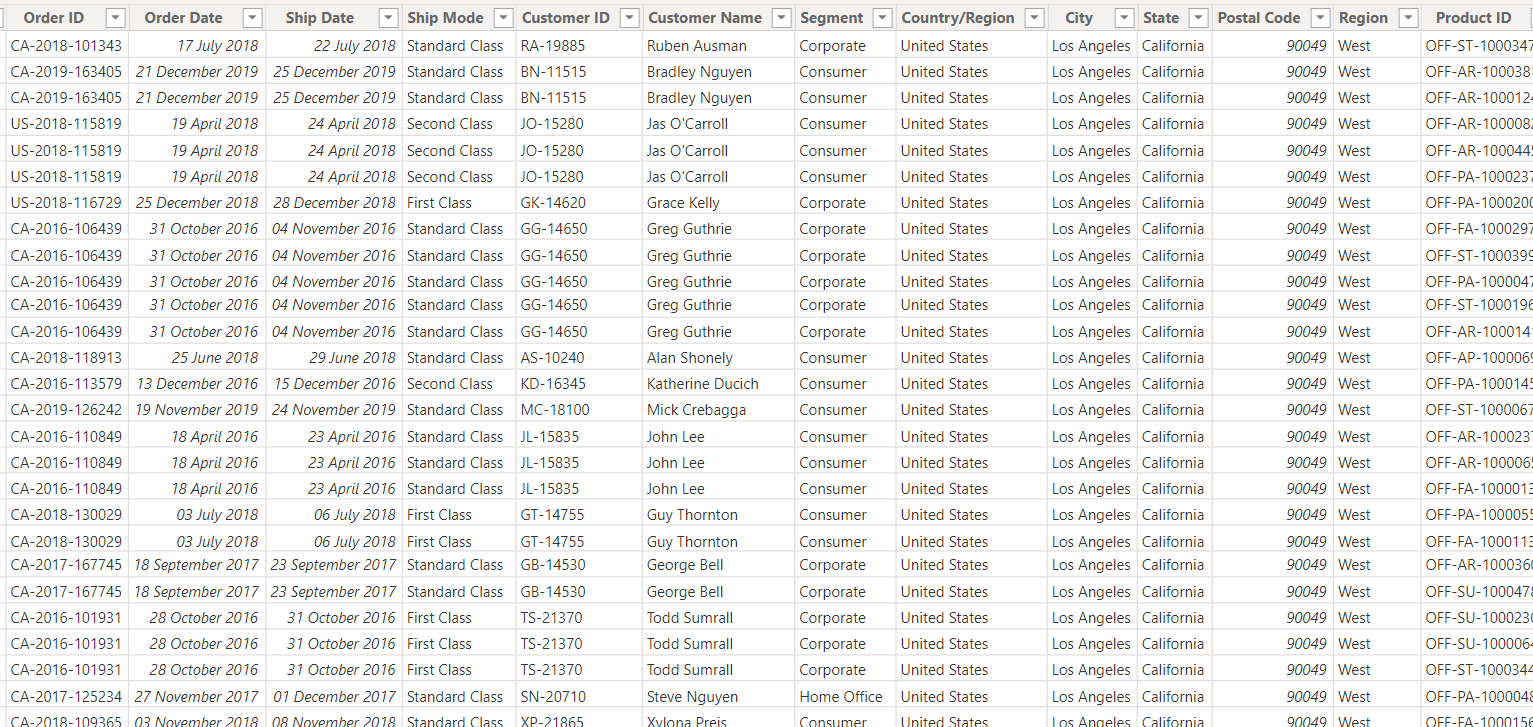
The common column between the Superstore data set and my security table is "Region" so that is the field we will base our relationship on. The cardinality we will need for this relationship is a many-to-many as each region appears multiple times across both tables. The important part when creating this relationship is to make sure the cross filter direction is set to single from the security table to the Superstore data set.
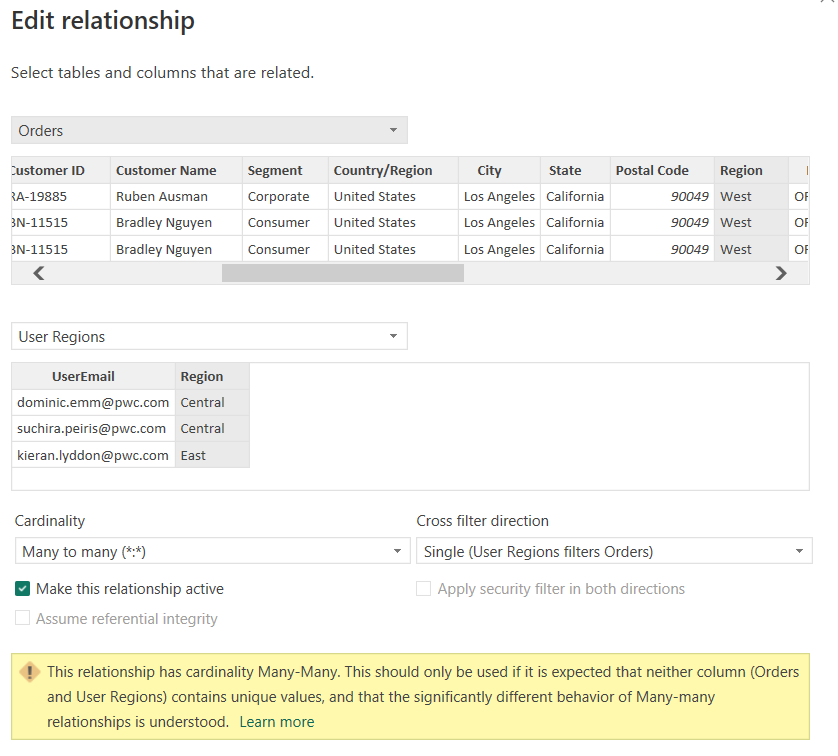

This is because I want the "UserEmail" field in my security table to filter the data in the Superstore data set. So, if Dom was viewing my report, I only want him to be able to see the regions that he as access to.
Step 3: Setting up the security and testing
If you now navigate back to your report, it might be useful to drag on the "UserEmail" field, whichever field contains your users' emails, on to the view as a card, so you can see who you are viewing the report as. (This will be useful later on after I introduce the concept of roles.) When you drag on the "UserEmail" field, the first email in your security table will be shown and this is because we haven't set up any security yet.
We are now going to set up the RLS, in order to do this we will need to create a role that will allow me to filter my view for each user. For this user filter to work, Power BI needs to be told that the email address of whoever is logged in must be equivalent to the corresponding email in the security table.
USERPRINCIPALNAME() is the DAX that outputs the email of whoever is logged in. So I need this DAX to be equal to the appropriate email in the security table which in turn will filter the regions in the Superstore data set and thus filtering the report.
To create a role we can navigate to the "Modeling" tab > Manage Roles > Create
Give your role a name > Click on the 3 dots next to your security table > choose the column containing your emails, "UserEmail" and then replace where it says "Value" with the DAX from above.
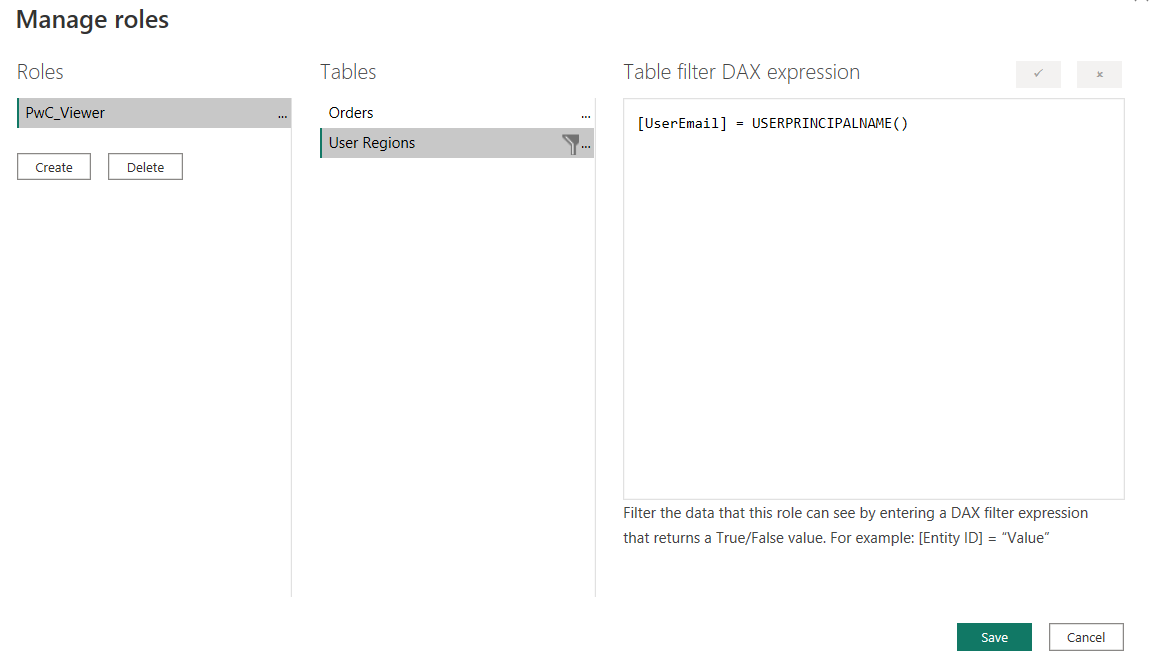
After writing your expression, click the "tick" icon on the top right above the expression editor box to check the syntax. Then click "Save".
It still looks like nothing has changed in our report but if you now go to the "View as" option in the "Modeling" tab and select to view your report through the role you have just created, your email should now appear on your view, if you dragged on the "UserEmail" field as a card as mentioned earlier, and you should only be able to see the data that you gave yourself access to.
Testing
If you now go back to the "View as" option and select "Other User", then type in the email of another user from your security table, click "Ok", then the report should now be filtered to only what that user is permitted to see and their email should appear in our card on the view. It useful to use the "View as" feature just to test and make sure the security that has been set up correctly and is working as expected so any alterations can be made before the report is shared with the respective users. Just for you to note as well, this user filter will be applied to all of the pages in your report.
I hope this blog has been helpful as a tutorial on how to set up RLS in Power BI.